by Rain Chu 5 月 15, 2024 | AI
打算用一句會形容每一個Google IO所發表的AI新功能
VIDEO
2024-05-15- Google IO 10min 彙整 Gemini in workspace
用 google ai 整合並且搜尋你所有在google上的私人資訊,包含用文字搜尋照片(找出女兒游泳的照片),email的彙整,google meet的會議紀錄彙整,Ask Photos with Gemini,Ask with Video
Gemini 1.5 Pro token 1M
相較於其他產品,Gemini 1.5 Pro 的 token 數量可以來到 2M ,大約是1500頁論文,1小時的影片
Gemini 1.5 Flash
輕量型 Gemini ,用於端,有效率
Project Astra
跟昨天的 OpenAI 一樣,可以利用手機的攝像頭即時理解生活的大小事情,包含複雜的程式碼或是只是幫你找到眼鏡
Project Veo
跟 OpenAI SORA 一樣,是影片的生成引擎,可以生成 1080p 的影片 46 秒
VIDEO
TPU Trillium
比起上一代,要快4.7倍
Google AI Search (Gemini Era)
Gemini 客製了一個模型是給搜尋引擎使用,可以產初即時的資訊,有評分過後並且可以信任的資訊,也支援影片搜尋
Gemini Gems
跟 OpenAI 的 GPTs 一樣,可以用自然語言指揮你的AI,但不同的是有支援到 1M Tokens
Youtube AI
可以跟影片對話,提問
PailGemma
Gemma 2 才會支援,27B 參數,針對視覺處理
LearnLM
專作教育市場的 AI 大語言模型,會出題會改作業的時代要來了
Imagen 3
Google 最新的文生圖模型
Music AI Sandbox
提供給專業製作人們使用的 AI 生成音樂工具
VIDEO
AI Teammate (Chip)
協助你協同作業的萬能助理,他能在你開會的時候,幫你調查各種資料,以及解答問題
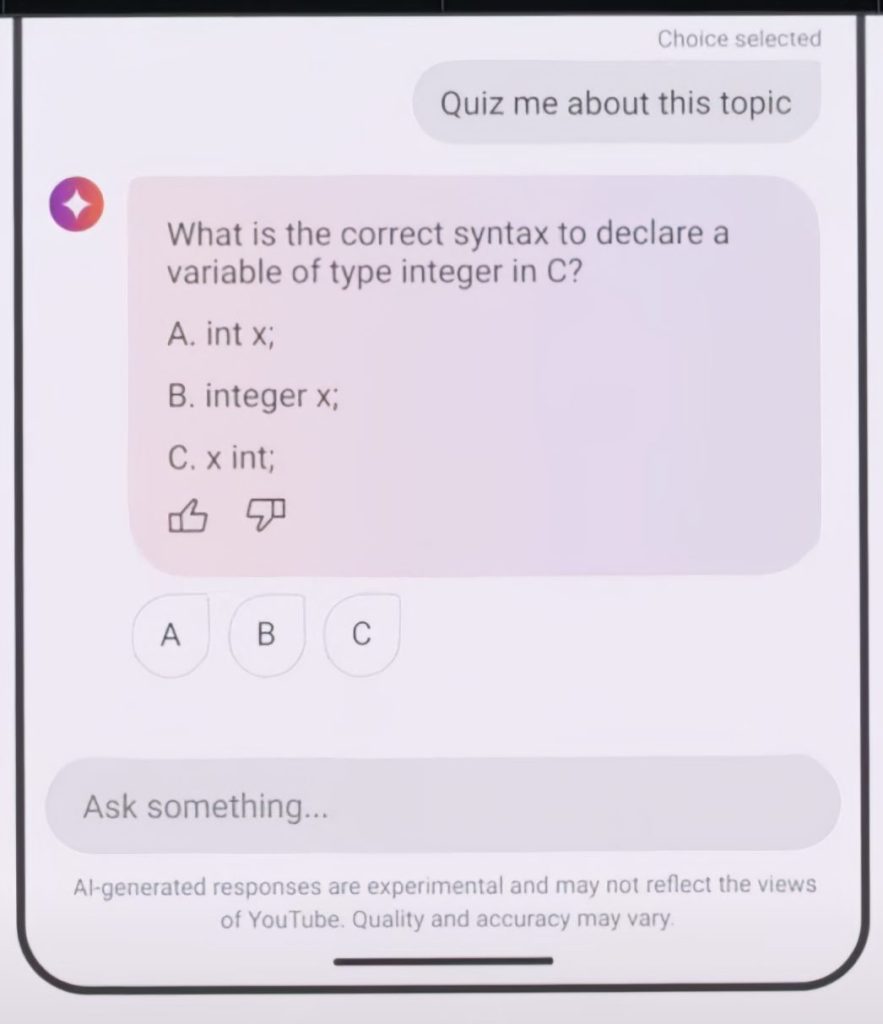
Circle to search
有了教學平台,當然也會有解題平台,學生可以用 Circle 取圈選題目,查詢答案,並且會提供解題步驟
AI旅行社
幫你規劃旅程
AI 防詐騙
幫你聽電話裡面的人是否有想要詐騙你
結論
整場會議上 AI 被提及 121 次,可見有多重要
by Rain Chu 5 月 14, 2024 | Linux , Ubuntu , Windows
預設在你的windows下的 Linux 系統會取得一個 IP,通常是172.19開頭的,這是因為用的是 Hyper-V 架構導致的,變成你再 WSL 內開發的服務都很難對外,但其實只要利用 windows 內建的 Netsh interface portproxy 即可
設定 NAT Proxy
透過 netsh interface portproxy 來作設定
netsh interface portproxy add v4tov4 listenport=<yourPortToForward> listenaddress=0.0.0.0 connectport=<yourPortToConnectToInWSL> connectaddress=(wsl hostname) -I) 其中
listenport 和 connectport 通常設定一樣,也就是你的服務的 port
listenaddress=0.0.0.0 (固定)
connectaddress 要記得是填入你 ubuntu 的IP喔,可以透過 wsl hostname -I 找出 IP
假設你有一個服務是運行在 port 3001,ubuntu 的 ip 172.19.227.52,修改後的你指令應該要長成
netsh interface portproxy add v4tov4 listenport=3001 listenaddress=0.0.0.0 connectport=3001 connectaddress=172.19.227.5 最後記得要打開對應的防火牆的設定喔
加碼演出
關於 netsh 的控制指令說明
顯示目前所有的設定
netsh interface portproxy show all 重新設定 netsh
netsh interface portproxy reset 參考資料
https://learn.microsoft.com/zh-tw/windows/wsl/networking
by Rain Chu 5 月 14, 2024 | AI , Chat
這一次OpenAI的2024年春季更新,帶來了虛擬人的真正可行性,因為可以真正即時的交互對談,過程中也真的像極了真人,有語氣,不會笨笨的把句子唸到完畢,完全能理解使用者的指令,並且做出對應的動作,重點還 free
更新說明
Hello GPT-4o | OpenAI
影片如下
Introducing GPT-4o (youtube.com)
重點摘要
realtime
反應速度快、真的超快,再也沒有延遲,可以看看DEMO
VIDEO
有了真的的人類情緒
懂說話者的語氣,你可以緊張、可以不舒服,他都可以感受到
chatgpt 可以用各種語氣回應,甚至連叫他用歌劇的方法也可以
Live research
可以用錄影的方法,了解上下文解題,數學題代公式的也難不倒
也可以用攝像頭看得出來使用者的情緒
Free to everyone
Desktop and Mobile Phones app
https://openai.com/chatgpt/download
Web UI Update
by Rain Chu 5 月 13, 2024 | AI , Chat , Linux , NodeJS , React , Ubuntu , ViteJS , 程式
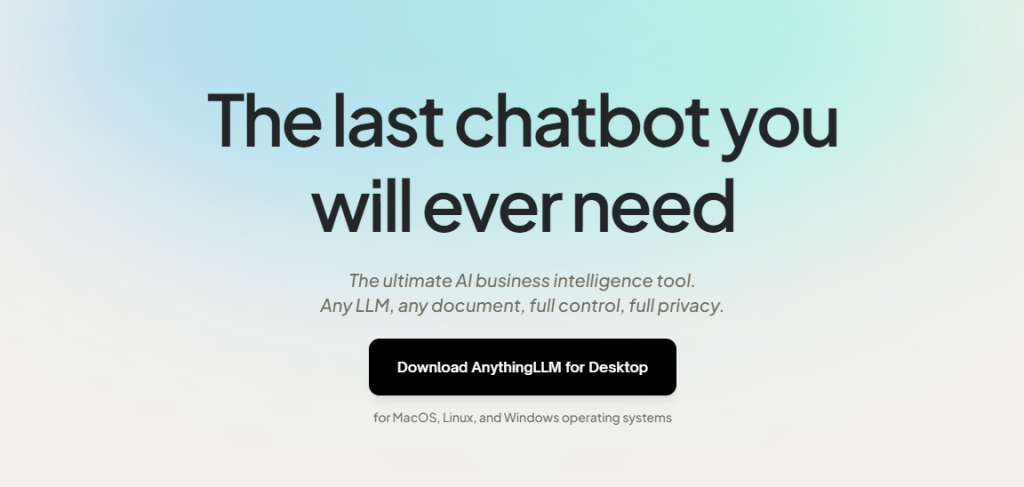
AnythingLLM是一款全功能的應用程序,支持使用商業或開源的大語言模型(LLM)和向量數據庫建構私有ChatGPT。用戶可以在本地或遠端運行該系統,並利用已有文檔進行智能對話。此應用將文檔分類至稱為工作區的容器中,確保不同工作區間的資料隔離,保持清晰的上下文管理。
特點:多用戶支持、權限管理、內置智能代理(可執行網頁瀏覽、代碼運行等功能)、可嵌入到網站的聊天窗口、多種文檔格式支持、向量數據庫的簡易管理界面、聊天和查詢兩種對話模式、引用文檔內容的展示,以及完善的API支持客戶端定制整合。此外,該系統支持100%雲端部署,Docker部署,且在處理超大文檔時效率高,成本低。
VIDEO
注意,以下要用 linux 平台安裝,windows 用戶可以用 WSL,推薦用 Ubuntu OS
在自己的 home 目錄下,到 GitHub 中下載原始碼
git clone https://github.com/Mintplex-Labs/anything-llm.git 利用 yarn 作設定資源
cd anything-llm
yarn setup
把環境變數建立起來,後端主機是 NodeJS express
cp server/.env.example server/.env
nano server/.env
密文需要最少12位的字元,檔案的存放路徑也記得改成自己的
JWT_SECRET="my-random-string-for-seeding"
STORAGE_DIR="/your/absolute/path/to/server/storage"
前端的環境變數,先把/api打開即可
# VITE_API_BASE='http://localhost:3001/api' # Use this URL when developing locally
# VITE_API_BASE="https://$CODESPACE_NAME-3001.$GITHUB_CODESPACES_PORT_FORWARDING_DOMAIN/api" # for Github Codespaces
VITE_API_BASE='/api' # Use this URL deploying on non-localhost address OR in docker.
如果你在設定的時候,遇到更新請求,可以跟我著我下面的方法作
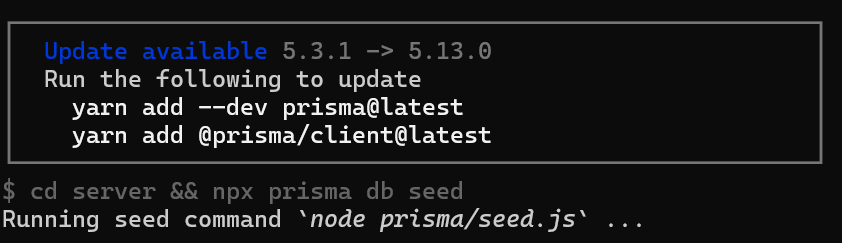
把 prisma 更新好
yarn add --dev prisma@latest
yarn add @prisma/client@latest
前端的程式碼
先編譯前端程式碼,前端是由 viteJS + React
cd frontend && yarn build 將編譯好的資料放到 server 的目錄下
cp -R frontend/dist/* server/public/ 選項,如果需要用到本地端的 LLM 模型,就把 llama-cpp 下載下來
cd server && npx --no node-llama-cpp download 把資料庫建立好
cd server && npx prisma generate --schema=./prisma/schema.prisma
cd server && npx prisma migrate deploy --schema=./prisma/schema.prisma
Server端是用來處理 api 以及進行向量資料庫的管理以及跟 LLM 交互
Collector 是一個 NodeJS express server,用來作UI處理和解析文檔
cd server && NODE_ENV=production node index.js &
cd collector && NODE_ENV=production node index.js &
更新的指令碼
現在 anything llm 更新速度超快,把這一段指令碼複製起來,方便未來作更新的動作
#!/bin/bash

cd $HOME/anything-llm &&\
git checkout . &&\
git pull origin master &&\
echo "HEAD pulled to commit $(git log -1 --pretty=format:"%h" | tail -n 1)"

echo "Freezing current ENVs"
curl -I "http://localhost:3001/api/env-dump" | head -n 1|cut -d$' ' -f2

echo "Rebuilding Frontend"
cd $HOME/anything-llm/frontend && yarn && yarn build && cd $HOME/anything-llm

echo "Copying to Sever Public"
rm -rf server/public
cp -r frontend/dist server/public

echo "Killing node processes"
pkill node

echo "Installing collector dependencies"
cd $HOME/anything-llm/collector && yarn

echo "Installing server dependencies & running migrations"
cd $HOME/anything-llm/server && yarn
cd $HOME/anything-llm/server && npx prisma migrate deploy --schema=./prisma/schema.prisma
cd $HOME/anything-llm/server && npx prisma generate

echo "Booting up services."
truncate -s 0 /logs/server.log # Or any other log file location.
truncate -s 0 /logs/collector.log

cd $HOME/anything-llm/server
(NODE_ENV=production node index.js) &> /logs/server.log &

cd $HOME/anything-llm/collector
(NODE_ENV=production node index.js) &> /logs/collector.log &
by Rain Chu 5 月 12, 2024 | 教育 , 線上學習
1. MyET
MyET (My English Tutor)是一款專注於英語學習的AI軟體,擁有全球最多用戶的口說學習應用之一。這款軟體利用先進的語音識別技術來評估和提升用戶的英語口語能力。透過模擬真實情境的交談練習,MyET能夠提供即時反饋,指出用戶的發音、語調、語速等方面的不足。此外,MyET在東亞尤其受到歡迎,已有超過400萬人使用這款軟體,見證了其有效性。
MyET還包含豐富的教學課程和互動式練習,適合各個語言水平的學習者使用。學習者可以根據自己的學習進度調整課程難度,進行個性化學習。軟體還能大幅減少教師在改作業方面的工作量,使教師能更專注於教學質量的提升。此外,MyET與知名的夏恩英語 學校合作,提供更專業和系統化的學習資源,進一步提升學習成效。這種全面且實用的學習工具,無疑是英語學習者提升口語能力的強大助手。
由台灣之光發明的口說練習,也是許多非中文語系的國家學習中文的首選 My-CT 是許多東南亞國家的必要學習中文的軟體之一
Toko是一款多語言學習平台,以AI驅動的對話練習功能聞名。這款應用支持英語學習以及西班牙語、法語等多種語言,非常適合全球用戶。Toko的特色在於其強大的互動性和高度可定制的學習經驗。用戶可以與AI進行一對一的對話練習,AI會根據對話中的語言使用情況提供反饋和建議,幫助學習者提升語言技能。
去年,Toko獲得了知名創業加速器Y Combinator和GSV Ventures的210萬美元投資,這不僅是對其技術和市場潛力的認可,也提供了進一步發展和擴展的資金支持。Toko設計了超過150種不同的話題情境,如職場、時事、閒聊、運動等,這讓用戶能夠在日常會話中用英文思考和表達,強化語言實用性和流暢性。
此外,Toko鼓勵用戶以英語的邏輯進行對話,目標是提升用戶的回話速度和自然使用目標語言的能力。平台還特別強調文化語境和俗語的學習,這對於深入了解目標語言的文化背景非常有幫助。透過這些獨特的設計,Toko不僅是一款語言學習工具,更是橋梁,連接語言學習者與廣闊的文化世界。
3. Speak app
Speak app 是由OpenAI支持的一款創新語言學習工具,特別注重於提升用戶的口語和聽力技能。這款應用程序利用先進的自然語言處理技術,可以理解和生成自然的對話,使學習者能夠在真實的對話情境中練習。
我覺得Speak app的最厲害的地方在於其能夠根據用戶的反應和回答適應性地調整對話難度和話題,從而提供高度個性化的學習體驗,尤其跟真人一樣的講話語速,腔調,讓我可以很快的學習真正在地的語言,而不是台灣式的英文。
此外,這款軟體還能夠捕捉並分析用戶的進步,並提供實用的學習建議。
這三款口說AI練習語言的軟體各有其獨特的優勢和功能,無論是初學者還是進階學習者都能從中找到合適的學習工具,有效提升自己的語言交流能力。隨著AI技術的不斷進步,未來這些工具的功能和效果將更加出色,為語言學習者提供更多的便利和機會。


近期留言