by Rain Chu | 9 月 6, 2023 | IIS, PHP
最近遇到 PHP 太吃記憶體的問題,我除了在php.ini 中設定 limit memory 以外,也打算在 IIS 中把總量的記憶體限制住,避免讓主機的記憶體爆滿,而當機,可以在記憶題超過限制後,把自己行程回收。
設定方法
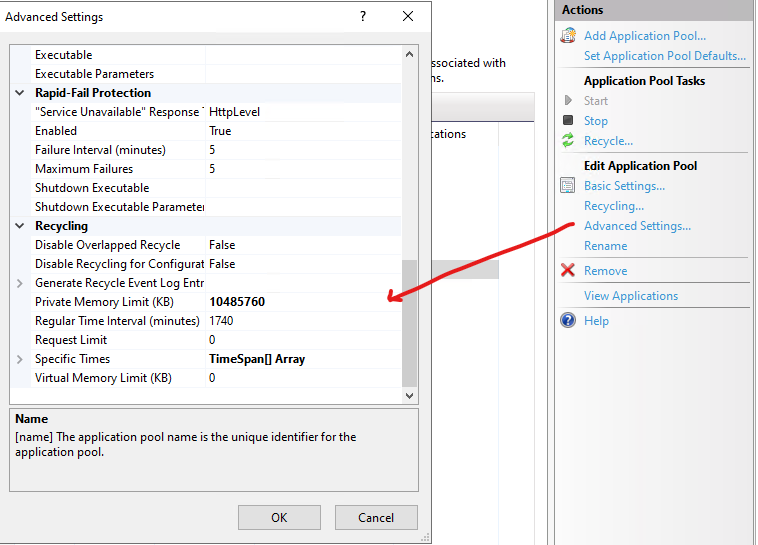
在管理介面中,找到 「Advanced Settings」 ,進去後往下滑找到 「Private Memory Limit (KB)」 ,這邊這個數值是 KB 為主,如果希望將 Private Memory Limit (KB) 設定為 10GB,您需要將其設定為 10485760 KB 設定公式如下
10 GB = 10 * 1024 * 1024 KB = 10485760 KB
我設定的邏輯是觀察主機上所有的 Application Pool 會用到多少的記憶體,然後去分配她
by Rain Chu | 4 月 28, 2023 | IIS, Windows
現在的網站一定都要有https的協定才會是安全的,SEO的分數也才會高,在IIS內可以直接透過 URL rewrite 來將 http 連線都轉換成 https 連線,過程比 nginx 要麻煩一點,但有圖形化的介面設定,也是蠻容易上手的
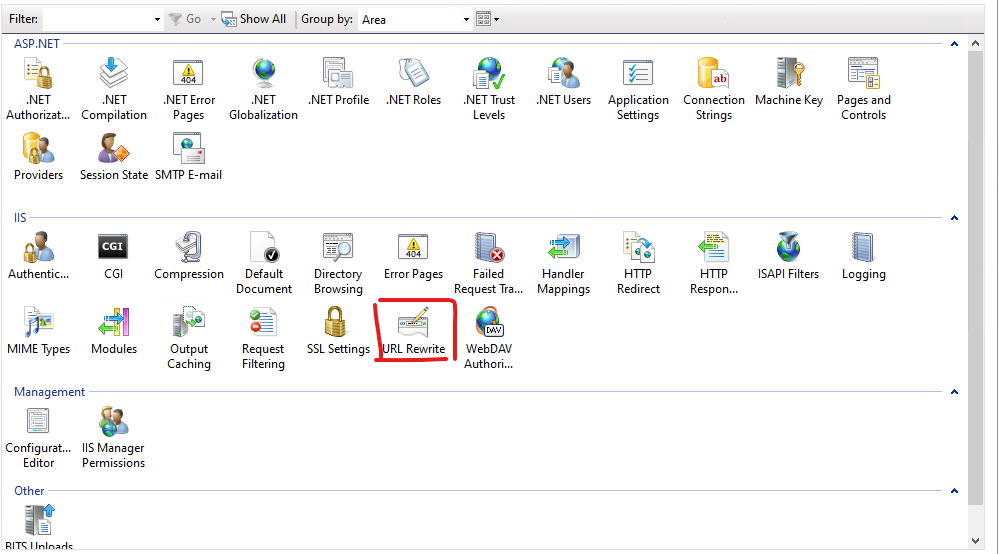
打開 IIS Manager 找到 URL Rewrite
先假設你已經完成了 URL Rewrite 的安裝,則可以在介面中看到 URL Rewrite的設定
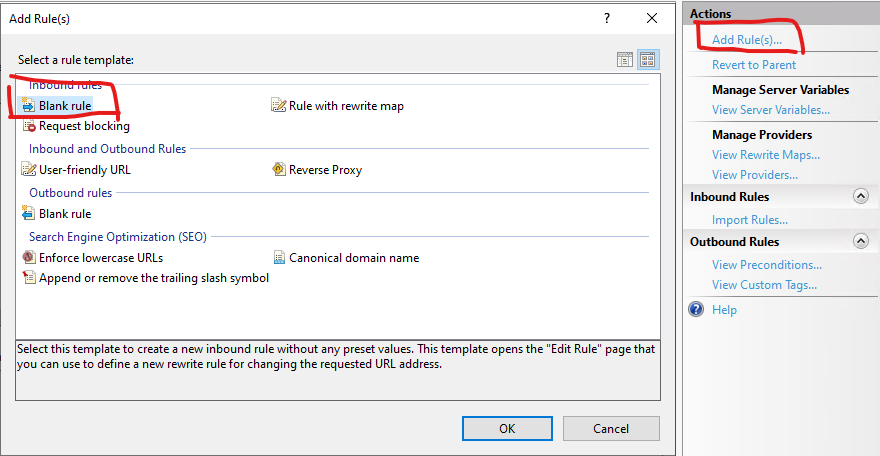
建立新的規則 (Add Rule)
在右邊的 Actions 選擇 Add Rule(s),並且選擇 Blank rule
建立 Inbound Rule
如下圖,下拉方塊中選擇 Match URL,並且在 Pattern 中填入 (.*) ,然後移到下方 Conditions 選擇 Add
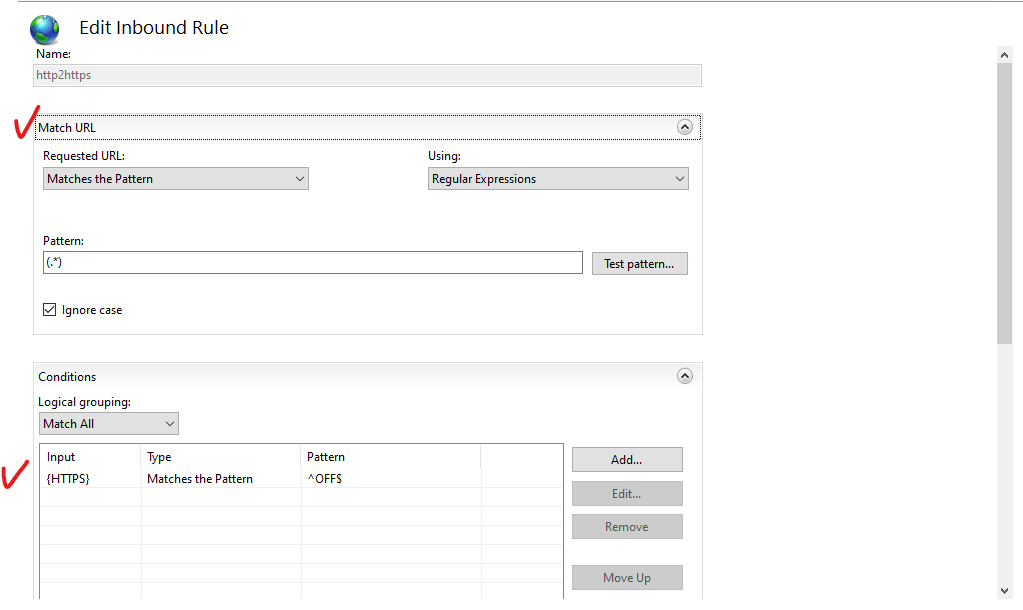
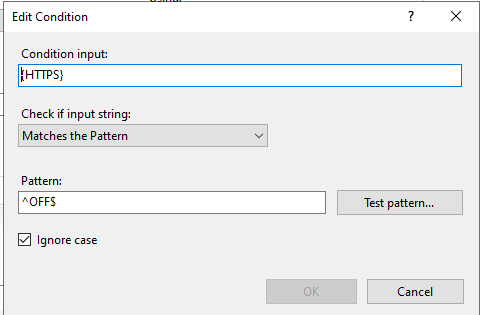
並且在 Condition input 填入 {HTTPS} ,在 Pattern 中填入 ^OFF$ ,下拉選單中則是選擇 Matches the Pattern
設定 Action
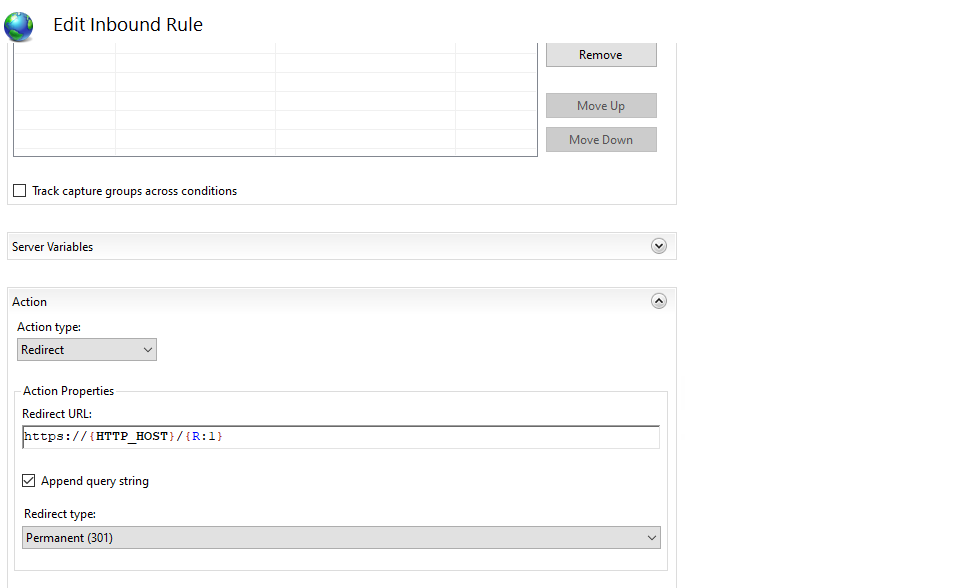
輸入網址的條件設定完之後,要來設定符合的網址要如何處理,如何做動作,參考下圖,Action type 的下拉選單,選擇 Redirect
並且在 Redirect URL 中,填入 https://{HTTP_HOST}/{R:1} ,並且到 Redirect type 下拉選單中選擇 Permanent(301) 後即可以存檔 (Apply)
Web.Config 中的 rewrite
用 iis manager 設定完畢後,你就可以在 web.config 中看到剛剛所做的設定
        <rewrite>
            <rules>
                <clear />
                <rule name="http2https" stopProcessing="true">
                    <match url="(.*)" />
                    <conditions logicalGrouping="MatchAll" trackAllCaptures="false">
                        <add input="{HTTPS}" pattern="^OFF$" />
                    </conditions>
                    <action type="Redirect" url="https://{HTTP_HOST}/{R:1}" />
                </rule>
            </rules>
        </rewrite>
參考資料
https://aboutssl.org/iis-redirection-http-to-https/
by Rain Chu | 1 月 19, 2023 | IIS, PHP, web, Windows, wordpress
在 windows server 的 iis 下,預設情況下安裝 php 架構的 wordpress 總是會遇到很多的困難,像是如果遭遇到想要訪問 wordpress 目錄下的目錄資料,例如:https://rain.tips/uploads/,會跟你說找不到資料,原因是wordpress所有的入口要先透由 index.php 去做路由,解決方案則是用 web.config 去指定路由要透過 index.php 即可
請在web.config檔案中添加 rewrite rules
<rewrite>
<rules>
<rule name="WordPress: https://yoururl.com" patternSyntax="Wildcard">
<match url="*"/>
<conditions>
<add input="{REQUEST_FILENAME}" matchType="IsFile" negate="true"/>
<add input="{REQUEST_FILENAME}" matchType="IsDirectory" negate="true"/>
</conditions>
<action type="Rewrite" url="index.php"/>
</rule></rules>
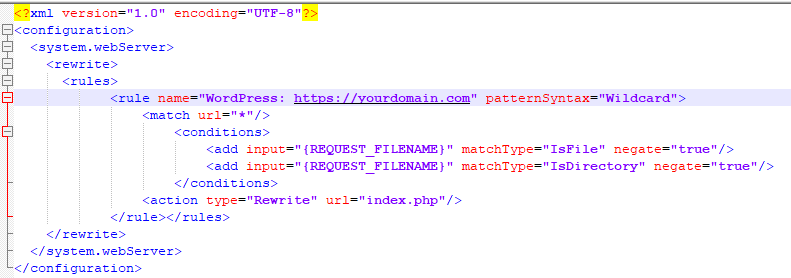
</rewrite>最後會長成這樣子
<?xml version="1.0" encoding="UTF-8"?>
<configuration>
  <system.webServer>
    <rewrite>
      <rules>
			<rule name="WordPress: https://yoururl.com" patternSyntax="Wildcard">
				<match url="*"/>
					<conditions>
						<add input="{REQUEST_FILENAME}" matchType="IsFile" negate="true"/>
						<add input="{REQUEST_FILENAME}" matchType="IsDirectory" negate="true"/>
					</conditions>
				<action type="Rewrite" url="index.php"/>
			</rule></rules>
    </rewrite>
  </system.webServer>
</configuration>
同場加映
by Rain Chu | 3 月 7, 2022 | IIS, PHP, wordpress
很少人使用 IIS 架設 wordpress ,因為文件不好找,例外狀況又多,這次又發現 WordPress 的 Route 規則怪怪的,會在所有路徑中出現 index.php? ,這才意識到之前用 nginx 時候這些規則都早就解決,只要研究如何處理這樣的困境,研究之後得到有三個要點。
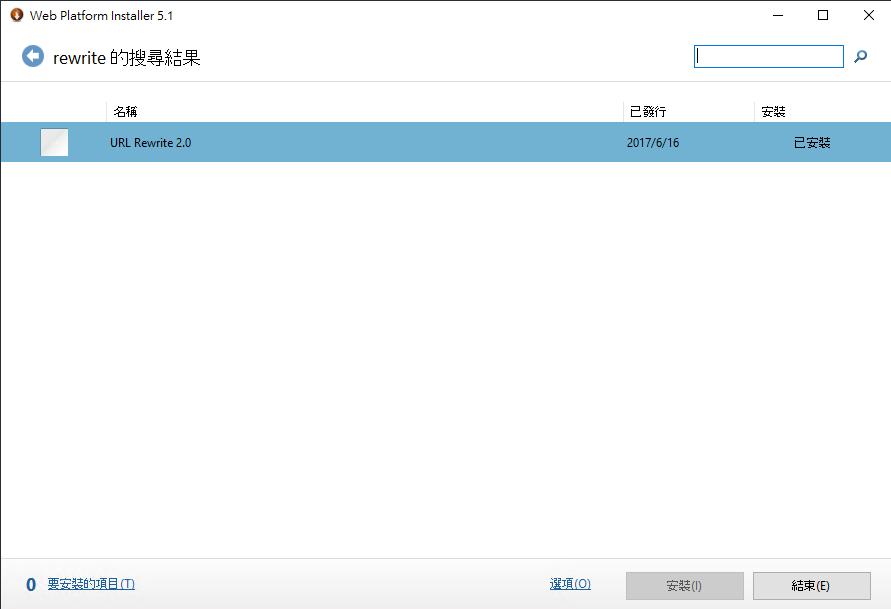
- IIS 需要有 URL rewrite 擴充
- WordPress 後台要去「設定->永久連結」設定自訂結構
- WordPress 中的 web.config 需要加入 rewrite rule
先安裝 IIS 的 URL Rewrite
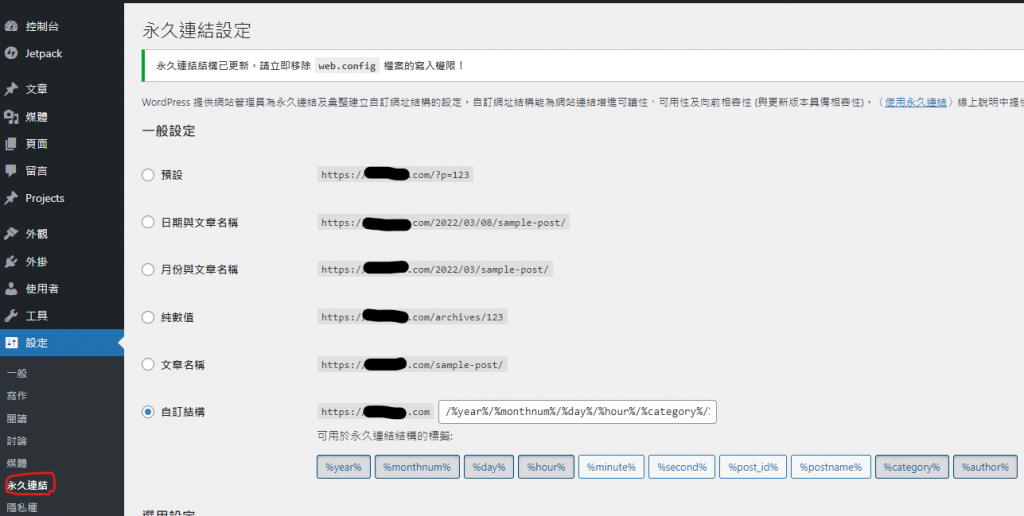 回到 WordPress 的後台設定永久連結
 更改 web.config 設定 rewrite rule
	<rewrite>
		<rules>
			<rule name="WordPress: https://yourdomain.com" patternSyntax="Wildcard">
				<match url="*"/>
					<conditions>
						<add input="{REQUEST_FILENAME}" matchType="IsFile" negate="true"/>
						<add input="{REQUEST_FILENAME}" matchType="IsDirectory" negate="true"/>
					</conditions>
				<action type="Rewrite" url="index.php"/>
			</rule></rules>
    </rewrite>
Apache and Nginx 的設定作法
https://www.php.cn/cms/wordpress/459657.html
by Rain Chu | 2 月 18, 2022 | IIS, PHP, Windows, wordpress
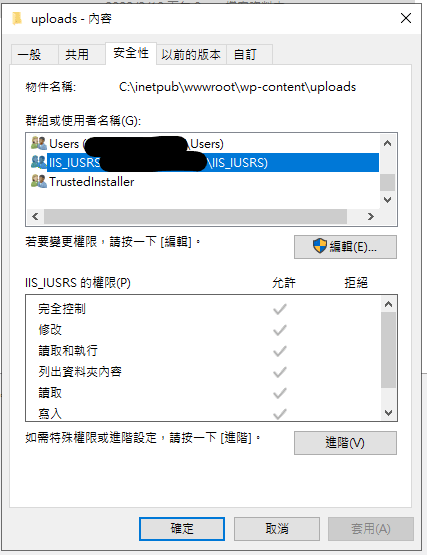
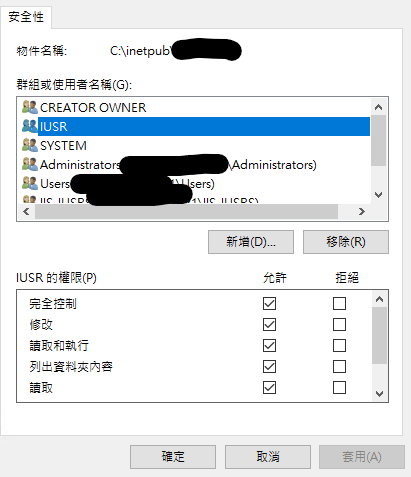
通常用 WordPress 的人,多數會選擇在 Linux + nginx or apache + php 的解決方案,在這個架構下,權限控管通常是 www-data 所去主管的,在 IIS 中的權限控管相對複雜許多,但直接對應 Linux 系統的是 IIS_IUSRS,這次新安裝在 IIS 的 WordPress ,發現了上傳圖片,明明有在目錄中出現,但卻無法在網站中顯示,網站直接存取圖片時候,會發生代碼 500 的錯誤,查證後,確定是圖片的權限無法讓 IIS_IUSRS 讀取,直接將目錄的權限開放後即可在網站上看到上傳的檔案。
但詭異的是,再次作圖檔上傳測試的時候,發現相同可以上傳但無法顯示圖片的問題一直出現,但只要改了檔案權限後就可以讀取,最後往前去追溯 php 上傳並且產生圖檔的過程後,發現她會先將檔案上傳到 Windows\Temp 然後再複製到 inetpub\wwwroot\wp-content\uploads ,造成檔案的權限是繼承 Windows\Temp 的權限過來的
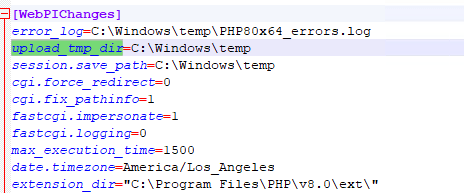 路徑在C:\Program Files\PHP\v8.0
問題的源頭要將 C:\Windows\temp 的目錄改成讓 IIS_IUSRS 可以修改即可
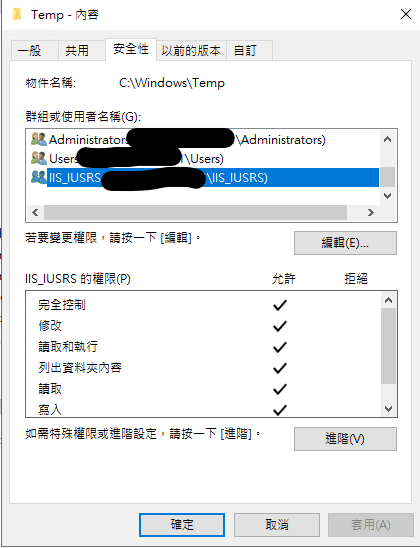
當你修改 Windows\temp 下的權限會有很多緊告出現,你還可以透過修改 php.ini ,將暫存目錄移動更好的位置中,設定良好的權限後,一直可以解決此一個問題
想知道我如何替PHP除錯?
by Rain Chu | 2 月 15, 2022 | IIS, Windows, wordpress
這次解決了一個比較少人碰過的問題,當有人在 Windows Server 上並且使用 IIS Server 裝載 WordPress ,但剛剛裝好的時候,關於外掛或是外觀佈景主題,沒法安裝,會跳出要求你透過FTP安裝外掛。
原因是 web.config 設定的問題,以及權限設定的問題,解決方法如下:
增加 Web.config 設定
/* 直接用檔案下載的方法更新 */
define('FS_METHOD', 'direct');
修改權限讓 PHP 可以建立目錄和檔案
去到 wordpress\wp-content\plugins 和 wordpress\wp-content\theme 把目錄的權限加入 IUSR ,並且打開修改權限,這樣就可以直接在 wordpress 後台直接用檔案更新了
近期留言