Select Page
Windows 跑 AI Agent 為什麼要用 WSL?完整環境整理

Windows 跑 AI Agent 為什麼要用 WSL?完整環境整理

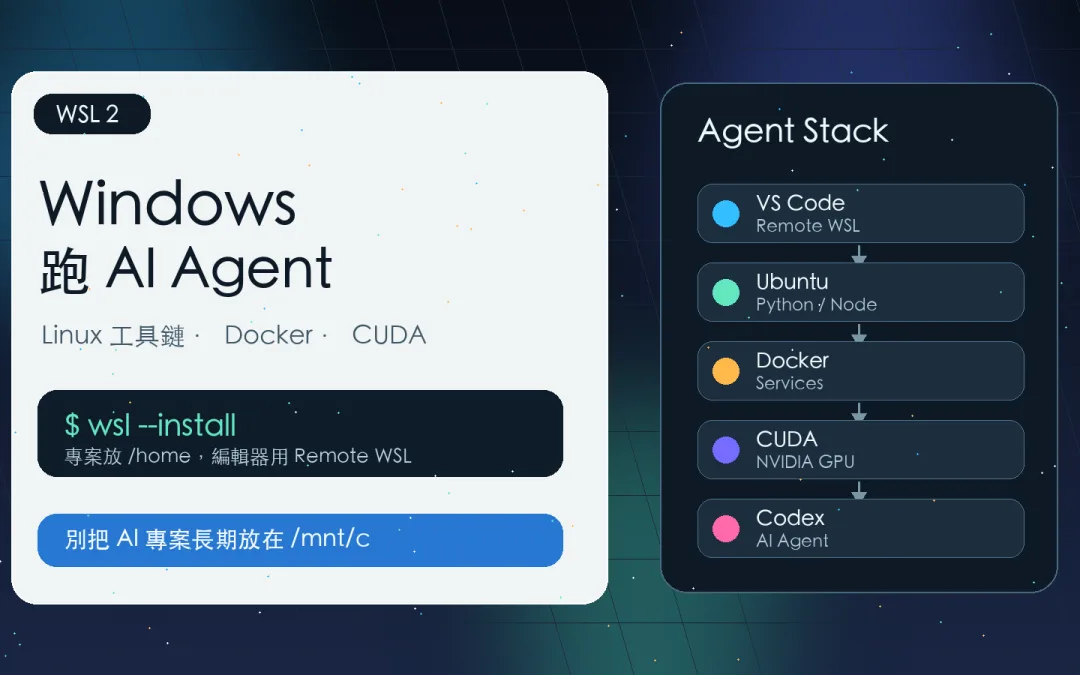
Windows 跑 AI Agent,真正的關鍵不是把所有工具硬裝進 PowerShell,而是把 Windows 當成桌面和硬體入口,把 Linux 工具鏈交給 WSL 2,這樣做的好處很直接:Python、Node、Docker、Git、CUDA、各種開源 Agent 工具,都會更接近它們原本被設計和測試的環境。

我的判斷是,如果你在 Windows 上做 Codex、Claude Code、Cursor、OpenCode、本地模型或自動化 Agent,WSL 2 幾乎是標準底座,不是因為 Windows 不行,而是 AI Agent 這一波工具鏈大多先從 Linux 生態長出來。

先講結論

  • Windows 11 或新版 Windows 10 可以用 `wsl –install` 安裝 WSL,預設會走 WSL 2。
  • AI Agent 專案建議放在 WSL 的 `/home` 目錄,不要長期放在 `/mnt/c`。
  • VS Code 建議用 Remote WSL,讓編輯器在 Windows,工具鏈在 Linux。
  • Docker Desktop 可以啟用 WSL 2 backend,適合需要容器化 Agent 服務的人。
  • NVIDIA GPU 可以在 WSL 2 裡用 CUDA,但重點是安裝 Windows 端驅動,不要在 WSL 裡裝 Linux 顯示驅動。

為什麼 Windows 跑 AI Agent 需要 WSL

Microsoft 對 WSL 的定位很清楚:讓開發者可以在 Windows 上直接使用 Linux distribution、Linux 應用、工具和 Bash 命令列,而且不需要傳統虛擬機或雙系統。對 AI Agent 來說,這剛好補上 Windows 和開源工具鏈之間的落差。

很多 Agent 專案會同時碰到 Python、Node、Playwright、ffmpeg、SQLite、Docker、Git hooks、shell scripts。這些東西在 Linux 裡比較自然,在 Windows 原生環境則容易遇到路徑、權限、編碼、套件編譯和命令差異。

如果你正在使用 Codex 與 ChatGPT Work,或想把 OpenWork 和 OpenCode 桌面工作台 跑穩,WSL 可以讓 Windows 變成比較舒服的 Agent 開發機,而不是一直在修環境。

第一步:安裝與確認 WSL 2

Microsoft 官方文件建議,在符合版本的 Windows 上,可以用系統管理員 PowerShell 執行:

wsl --install

安裝後可以用下面指令查看 distribution 和 WSL 版本:

wsl.exe --list --verbose

如果你有多個 Linux distribution,可以用 `wsl.exe –set-default` 設定預設環境。對大多數 AI Agent 使用者,我會建議先用 Ubuntu,原因不是它最酷,而是教學、套件、問題排查和相容性資料最多。

第二步:專案不要放在 /mnt/c

這是最常見的坑。Microsoft 文件明確建議,如果你主要在 Linux 命令列裡工作,專案檔案應該放在 WSL 檔案系統內,例如 `/home/你的帳號/projects`。不要把主要專案放在 `/mnt/c/Users/…` 下面長期開發。

原因是跨 Windows 和 Linux 檔案系統會影響效能,也可能讓檔案權限、大小寫、watcher、node_modules、Python venv 出現奇怪問題。AI Agent 工作流常常有大量小檔案、快取、套件安裝和檔案監看,這種差異會被放大。

簡單說:Linux 工具鏈處理的專案,就放 Linux 檔案系統,需要從 Windows 檔案總管打開時,可以在 WSL 目錄下執行:

explorer.exe .

第三步:VS Code 用 Remote WSL

不要把 VS Code 直接開在 Windows 路徑裡,再讓終端機切來切去。比較乾淨的方式是安裝 VS Code 的 WSL 支援,從 WSL 裡開專案:

code .

這樣 UI 還是在 Windows,但 extension host、terminal、語言服務和套件環境會跑在 WSL。對 Python、Node、Rust、Go、Docker compose、Playwright 這類 Agent 常用工具,這種模式會少很多不必要的摩擦。

第四步:Docker 交給 WSL 2 backend

很多 AI Agent 工具會需要資料庫、瀏覽器服務、向量資料庫、Redis、sandbox 或 API mock。這時候 Docker 是很自然的選擇。Docker Desktop 支援 WSL 2 backend,可以讓 Windows 上的容器工作流更接近 Linux。

我會把它看成「可複製環境」的保險。今天你在 Windows WSL 跑得起來,明天移到 Linux server 或雲端 VM,踩坑會少很多。這和我之前整理 Docker 跟 command line 一樣使用 的方向一致,容器不是炫技,而是讓環境可重現。

第五步:GPU 和 CUDA 要小心裝

如果你要跑本地模型、推理框架或 CUDA 工具,WSL 2 可以吃到 NVIDIA GPU,NVIDIA 官方文件的關鍵提醒是:安裝 Windows 端 NVIDIA 驅動後,CUDA 驅動會映射進 WSL,不要在 WSL 裡安裝 Linux 顯示驅動。

這點很重要。很多人一進 Ubuntu 就照 Linux 教學裝完整 NVIDIA driver,反而把環境弄壞,WSL 裡需要的是相容的 CUDA toolkit 和使用者空間工具,不是另一套 Linux 顯示驅動。

如果你在 Windows 上遠端連自己的 AI server,可以參考我之前寫的 Windows PowerShell 連接 Ollama AI Server。如果是要本機推理,則更需要把 WSL、GPU driver、CUDA 和模型框架的版本關係先整理好。

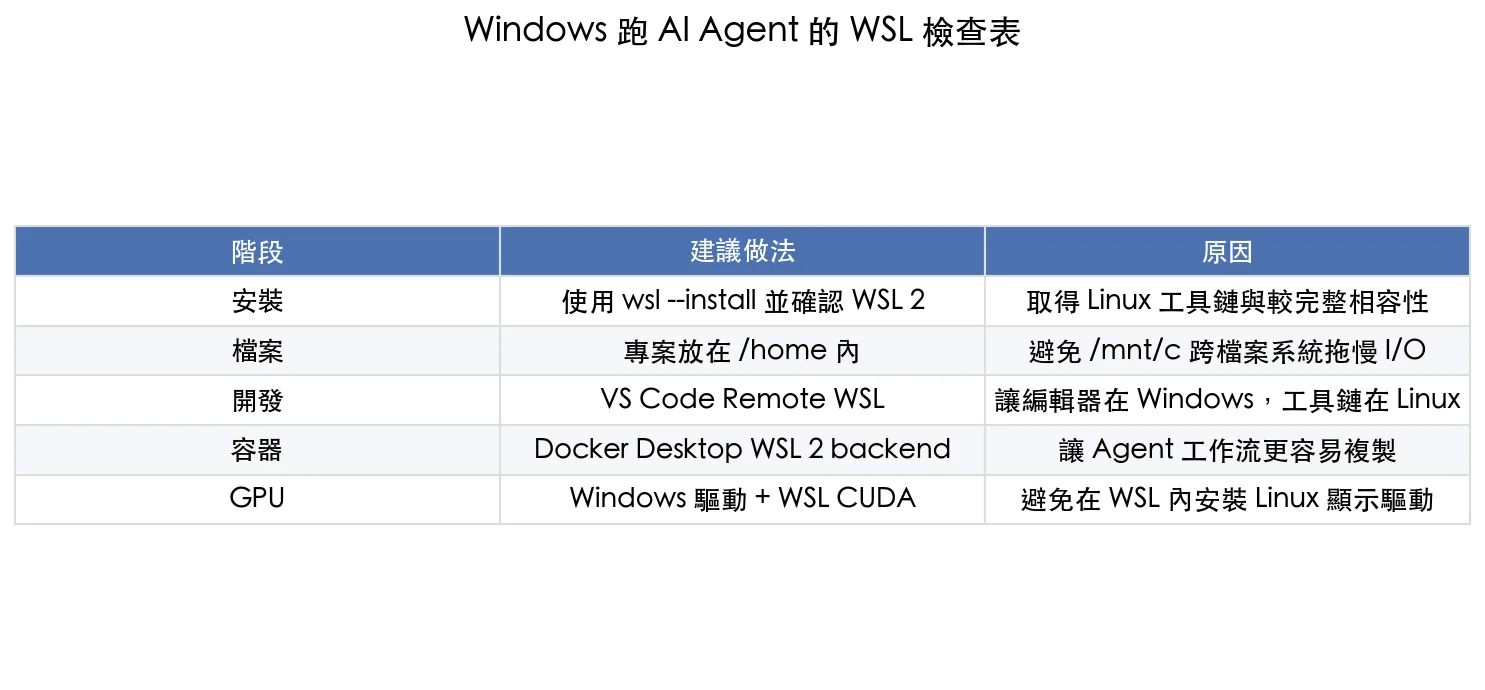
Windows 跑 AI Agent 的 WSL 檢查表

階段建議做法原因
安裝使用 wsl –install 並確認 WSL 2取得 Linux 工具鏈與較完整相容性
檔案專案放在 /home 內避免 /mnt/c 跨檔案系統拖慢 I/O
開發VS Code Remote WSL讓編輯器在 Windows,工具鏈在 Linux
容器Docker Desktop WSL 2 backend讓 Agent 工作流更容易複製
GPUWindows 驅動 + WSL CUDA避免在 WSL 內安裝 Linux 顯示驅動
Windows 跑 AI Agent 的 WSL 檢查表
WSL 跑 AI Agent 的重點不是只把 Ubuntu 裝起來,而是把檔案、編輯器、容器和 GPU 全部放在正確位置。

我會怎麼配置一台 Windows AI Agent 機

如果是我自己整理一台 Windows AI Agent 工作機,我會照這個順序來:

  • Windows Terminal 裝好,PowerShell 和 Ubuntu 分開使用。
  • WSL 2 裝 Ubuntu,專案目錄固定放在 `/home`。
  • VS Code 用 Remote WSL 開專案。
  • Python 用 uv 或 venv 管,Node 用 nvm 或 corepack 管。
  • 需要服務就用 Docker compose,不把資料庫亂裝在 Windows 裡。
  • 需要本地模型時,先確認 NVIDIA Windows driver、WSL kernel、CUDA toolkit 和推理框架版本。

如果你的目標是 本地大模型推理框架,WSL 可以讓 vLLM、SGLang、llama.cpp、Ollama 周邊工具更接近 Linux 使用方式。如果你的目標是 Agent 開發,WSL 則可以讓 shell、瀏覽器自動化、檔案操作和套件安裝更穩。

我的判斷

Windows 不需要變成 Mac,也不需要硬裝成 Linux。最好的方式是讓 Windows 做它擅長的事:桌面、驅動、硬體管理、遊戲和日常軟體。讓 WSL 做它擅長的事:Linux 工具鏈、開源套件、容器、AI Agent 環境。

真正穩的 Windows AI Agent 工作流,不是把所有東西混在同一個地方,而是把邊界分清楚。Windows 管外層,WSL 管開發環境,Docker 管可重現服務,GPU driver 留在 Windows,專案檔案留在 Linux 檔案系統。這樣才比較不會每次換工具就重修一次環境。

延伸資源

FAQ

Windows 跑 AI Agent 一定要用 WSL 嗎?

不一定,但如果工具鏈偏 Linux、需要 Python、Node、Docker、CUDA 或多個開源套件,WSL 2 通常比純 Windows 環境穩定。

WSL 專案檔案應該放哪裡?

如果主要在 Linux 命令列工作,專案最好放在 WSL 的 `/home` 目錄,不要放在 `/mnt/c`,這樣 I/O 效能和權限行為通常比較穩。

VS Code 可以直接編輯 WSL 專案嗎?

可以。建議使用 VS Code Remote WSL,讓編輯器留在 Windows,語言工具鏈、終端機和套件環境跑在 WSL 裡。

WSL 可以用 NVIDIA GPU 嗎?

可以,但要用支援 WSL 的 Windows NVIDIA 驅動。重點是不要在 WSL 裡安裝 Linux 顯示驅動,CUDA 驅動會從 Windows 端映射進 WSL。

Docker Desktop 和 WSL 2 有什麼關係?

Docker Desktop 可以使用 WSL 2 backend,讓 Windows 上的容器工作流更接近 Linux 開發環境,適合需要複製 AI Agent 服務環境的人。

OpenCode 如何使用本地端模型

打開 opencode 設定檔 :

  • macOS / Linux: ~/.config/opencode/opencode.json
  • Windows: %USERPROFILE%\.config\opencode\opencode.json

加入下面的設定(是標準的 json)

json{
  "$schema": "https://opencode.ai/config.json",
  "provider": {
    "ollama": {
      "npm": "@ai-sdk/openai-compatible",
      "name": "Ollama (local)",
      "options": {
        "baseURL": "http://localhost:11434/v1"
      },
      "models": {
        "qwen2.5-coder-16k": {
          "name": "Qwen Coder Local (16k)",
          "tools": true
        }
      }
    }
  }
}

Opencode config 說明

https://opencode.ai/docs/config

Ubuntu Linux zip 排除檔案指令

最近有需要作下指令壓縮,並且把 wordpress 容器化的需求,所以要排除原有舊網站上的 wordpress 的主要程式,以及 wordpress 的使用者上傳的檔案,可以用下面的指令來作排除, 只要在後面加入 +x ,以及要排除的目錄名稱,記得最後面要加入 * 即可

zip -r wordpress.zip /var/www/wordpress/wp-content -x "/var/www/wordpress/wp-content/uploads/*"
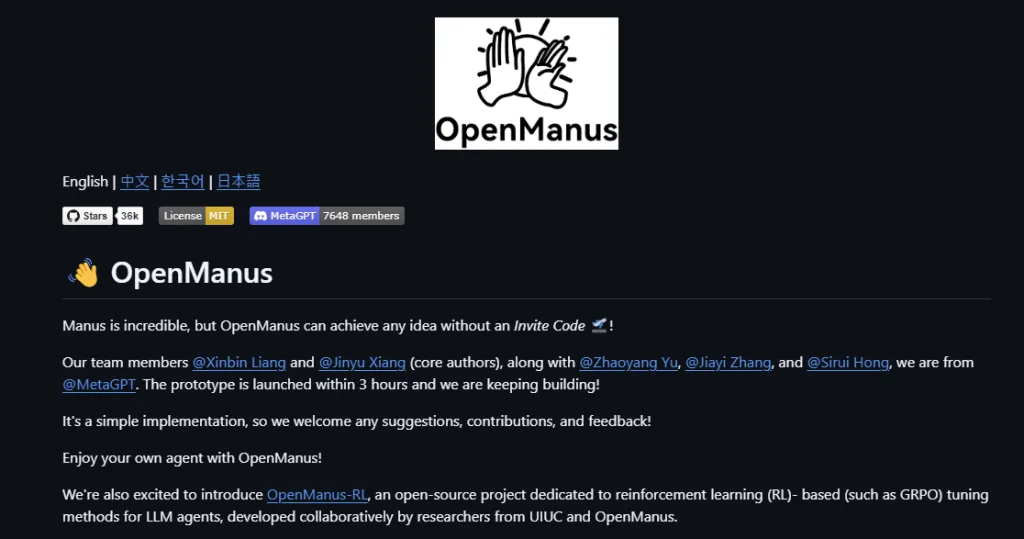
Manus 沒邀請碼怎麼辦?用 OpenManus 本地免費部署 Ollama 模型,三分鐘搞定

Manus 沒邀請碼怎麼辦?用 OpenManus 本地免費部署 Ollama 模型,三分鐘搞定

🚀 1. 本地端完美對接 Ollama AI 模型

OpenManus 最大的亮點在於能與目前最流行的 Ollama 本地端 AI 大模型平台進行完美整合。

  • Ollama 是一個輕量、高效的 AI 模型管理工具,讓你可以輕鬆在自己的電腦上運行各種強大的大模型(如 Llama3、Qwen、DeepSeek 系列模型等)。
  • OpenManus 透過 Ollama API 與這些模型無縫互動,你能輕易在本地體驗到媲美線上服務的智慧功能,並保護個人隱私。

💻 2. 跨平台支援 Windows、Mac、Linux

無論你使用哪個平台,OpenManus 都有完整的跨平台支援,讓你輕鬆安裝與運行:

  • Windows 用戶可透過 Conda 或 Docker 快速部署。
  • macOS 用戶可以使用 Homebrew 或直接透過終端機運行。
  • Linux 用戶則能自由選擇 Docker 或直接透過原生方式安裝。

🎯 3. 無需邀請碼,即裝即用!

不同於原始封閉的 Manus 需要透過邀請碼才能使用,OpenManus 堅持完全開源與自由的精神。
無須註冊、無須邀請碼,直接部署到自己的電腦,立即開始使用,毫無限制,這就是開源社群給予大家最棒的禮物。


如何快速部署 OpenManus?(以 Windows 為例)

只需幾個簡單步驟,即可享受本地端 AI 大模型:

建立 Conda 環境:

conda create -n openmanus python=3.12
conda activate openmanus

Git OpenManus 專案:

git clone https://github.com/mannaandpoem/OpenManus.git
cd OpenManus

安裝所需依賴:

pip install -r requirements.txt

修改設定檔(config.toml):

cp config/config.example.toml config/config.toml

config.toml的內容如下,可以參考後修改

# Global LLM configuration
#[llm]
# model = "claude-3-7-sonnet-20250219"        # The LLM model to use
# base_url = "https://api.anthropic.com/v1/"  # API endpoint URL
# api_key = "YOUR_API_KEY"                    # Your API key
# max_tokens = 8192                           # Maximum number of tokens in the response
# temperature = 0.0                           # Controls randomness

# [llm] #AZURE OPENAI:
# api_type= 'azure'
# model = "YOUR_MODEL_NAME" #"gpt-4o-mini"
# base_url = "{YOUR_AZURE_ENDPOINT.rstrip('/')}/openai/deployments/{AZURE_DEPOLYMENT_ID}"
# api_key = "AZURE API KEY"
# max_tokens = 8096
# temperature = 0.0
# api_version="AZURE API VERSION" #"2024-08-01-preview"

[llm] #OLLAMA:
api_type = 'ollama'
model = "llama3.2"
base_url = "http://localhost:11434/v1"
api_key = "ollama"
max_tokens = 4096
temperature = 0.0

# Optional configuration for specific LLM models
#[llm.vision]
#model = "claude-3-7-sonnet-20250219"        # The vision model to use
#base_url = "https://api.anthropic.com/v1/"  # API endpoint URL for vision model
#api_key = "YOUR_API_KEY"                    # Your API key for vision model
#max_tokens = 8192                           # Maximum number of tokens in the response
#temperature = 0.0                           # Controls randomness for vision model

[llm.vision] #OLLAMA VISION:
api_type = 'ollama'
model = "llama3.2-vision"
base_url = "http://localhost:11434/v1"
api_key = "ollama"
max_tokens = 4096
temperature = 0.0

# Optional configuration for specific browser configuration
# [browser]
# Whether to run browser in headless mode (default: false)
#headless = false
# Disable browser security features (default: true)
#disable_security = true
# Extra arguments to pass to the browser
#extra_chromium_args = []
# Path to a Chrome instance to use to connect to your normal browser
# e.g. '/Applications/Google Chrome.app/Contents/MacOS/Google Chrome'
#chrome_instance_path = ""
# Connect to a browser instance via WebSocket
#wss_url = ""
# Connect to a browser instance via CDP
#cdp_url = ""

# Optional configuration, Proxy settings for the browser
# [browser.proxy]
# server = "http://proxy-server:port"
# username = "proxy-username"
# password = "proxy-password"

# Optional configuration, Search settings.
# [search]
# Search engine for agent to use. Default is "Google", can be set to "Baidu" or "DuckDuckGo".
# engine = "Google"

啟動 OpenManus 服務:

python main.py

之後打開瀏覽器就可以了

測試 OpenManus :

可以輸入請他使用瀏覽器看某一個網站,並且執行SEO策略

打開 https://rain.tips/ 並且給予SEO的建議,並且把建議存放在桌面上.txt的文件

補充資料

Github

PyAutoGUI-自動控制你的電腦

可以在 windows, mac, Linux 上使用,自動地透過滑鼠鍵盤來控制你的電腦畫面,還支援螢幕截圖

簡易使用方法

安裝 pyautogui

pip install pyautogui

使用 pyautogui

import pyautogui

螢幕截圖

pyautogui.screenshot('screenshot.png')

滑鼠控制

pyautogui.moveTo(100, 100, duration = 1.5) #用1.5秒移動到x=100,y=100的位置
pyautogui.dragTo(100, 100, duration=2, button='right') #用2秒按住滑鼠右鍵到x=100,y=100的位置
pyautogui.click(clicks=2, interval=0.5, button='right') #雙擊左鍵並且中途間隔0.5秒

鍵盤控制

pyautogui.keyDown('ctrl')
pyautogui.press('a')
pyautogui.keyUp('ctrl') #全選的功能鍵效果
pyautogui.hotkey('ctrl', 'shift', 'esc') #開啟工作管理員的快捷鍵

資源

PyAutoGUI 說明文件

PyAutoGUI 原始碼

中文說明檔

相關資源