by Rain Chu 7 月 7, 2026 | Agent , AI , RAG , 簡報製作 , 語音合成
如果你常把 PDF、論文、產業報告或內部文件丟進 AI 工具整理,Google NotebookLM 確實很方便;但只要資料牽涉商業機密、未公開研究、客戶內容或公司內部知識庫,雲端上傳與模型選擇限制就會變成真正的門檻,Open Notebook 的定位,正是把 NotebookLM 類型的文件理解、問答、摘要與 Podcast 生成,搬到更可控、更可自訂的開源工作流裡。
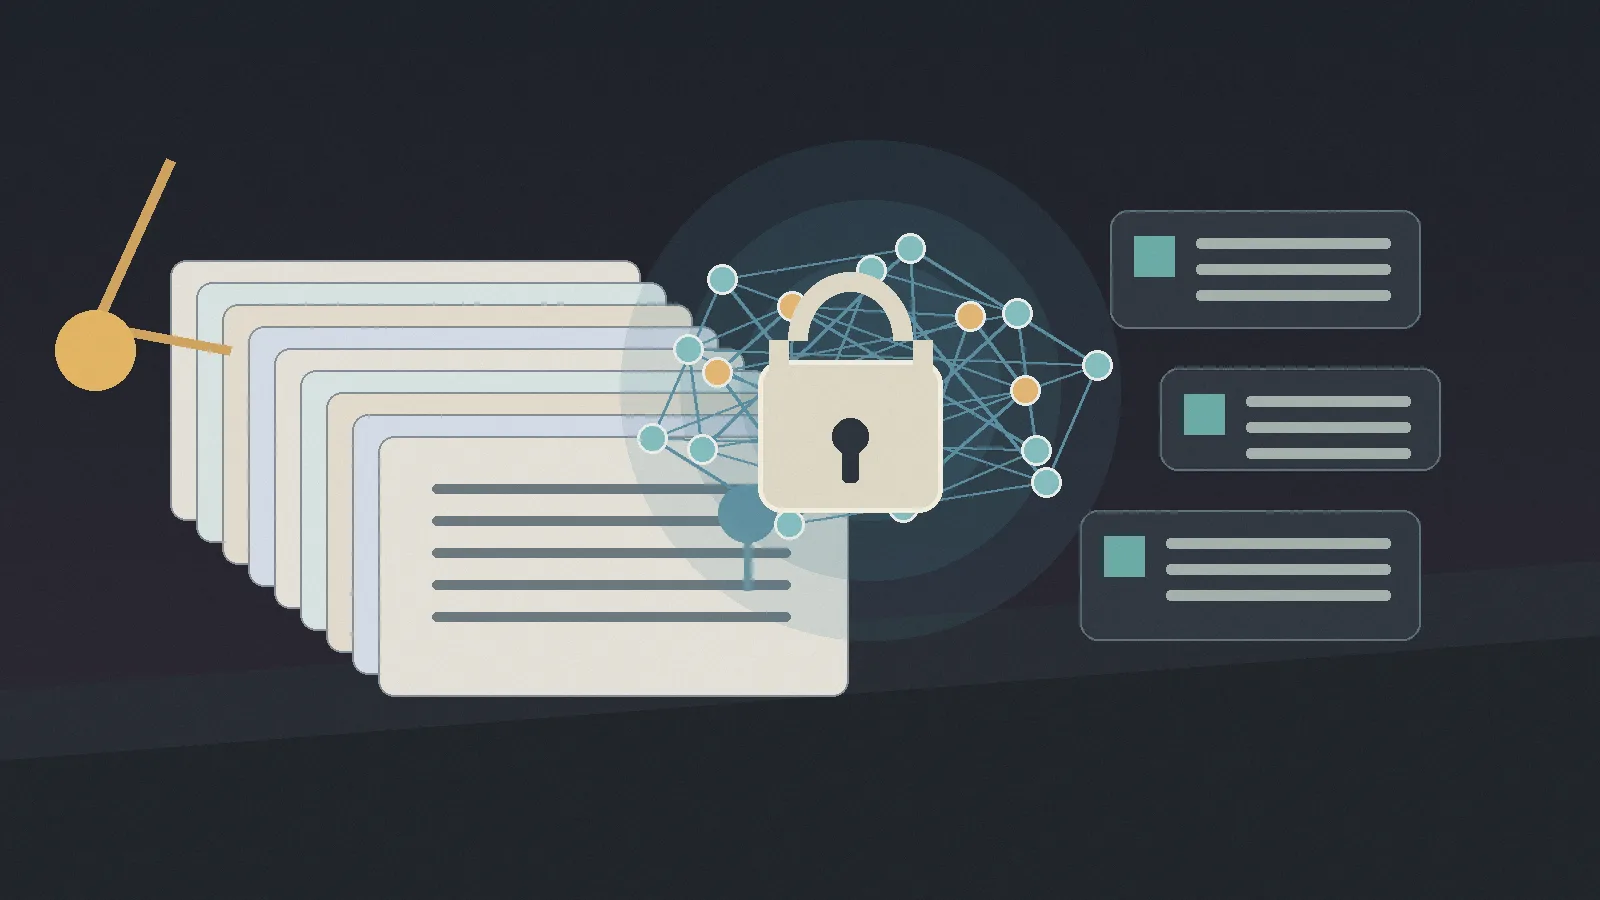
圖:Open Notebook 私有 AI 研究工作流示意 Open Notebook 解決的是什麼問題?
傳統文件型 AI 助手最容易卡在兩件事:資料放在哪裡,以及模型能不能換。對個人研究來說,把公開文章交給雲端 AI 問答通常沒什麼壓力;但對企業團隊、顧問、研究員或寫作者來說,資料可能包含未公開策略、訪談紀錄、合約、財務數據或客戶文件。這時候,能否自架、能否控制資料歸屬、能否選用自己的模型,就不只是偏好,而是能不能導入的前提。
Open Notebook 的優勢在於,它不是只做一個聊天視窗,而是把「文件匯入、知識庫整理、跨文件問答、來源引用、Podcast 生成、模型配置」串成一套私有 AI 研究工作流。官方 GitHub 專案 lfnovo/open-notebook 目前採 MIT 授權,官方說明也把它定位為一個 privacy-focused alternative to Google NotebookLM,截至 2026-07-07,GitHub API 顯示約 35K stars,最新 release 為 v1.10.0。
核心亮點一:資料主權回到自己手上
Open Notebook 最吸引人的地方,是它把資料控制權從平台端拉回使用者端。你可以把文件、音訊、多媒體檔案、網頁等素材放進自己掌控的環境,再用 AI 做摘要、檢索與問答。對需要處理敏感研究、公司內部文件或客戶資料的人來說,這比「功能多一點」更重要。
這也讓 Open Notebook 很適合搭配文件前處理工具。例如需要先把 PDF、Word、PPT 轉成 AI 更容易讀的文字格式時,可以參考我之前寫過的 MarkItDown 教學 ,先把原始文件整理成更乾淨的資料,再交給知識庫系統分析。
核心亮點二:模型不再被單一供應商綁住
NotebookLM 的好處是省事,但限制也很明顯:使用者基本上跟著 Google 的模型與產品設計走。Open Notebook 則主打 18+ AI provider,官方 README 提到支援 OpenAI、Anthropic、Ollama、LM Studio 等供應商。這代表同一套知識庫可以依任務切換模型:便宜模型做初步整理,強模型做深入推理,本地模型處理敏感資料。
如果你的工作流已經開始用 Ollama 或本地模型,Open Notebook 的價值會更明顯。它可以成為文件層的操作介面,而模型層則交給你自己的 AI server,想走本地端路線的人,也可以延伸看 GraphRAG 使用本地端的 Ollama 或 Ollama 遠端連線教學 ,把模型部署與文件分析分開思考。
核心亮點三:Podcast 生成更像內容製作工具
Podcast 生成是 NotebookLM 很受歡迎的功能,但固定雙人對談也限制了內容形式。Open Notebook 的方向更偏向內容製作工具:可以做 1 到 4 位 speaker,並調整角色設定與對話形式。這讓它不只適合做「兩人解說」,也能做單人旁白、三人圓桌、多人辯論或不同角色的知識導覽。
對自媒體、研究型內容創作者或企業內訓來說,這點很實用。你可以先把一批文件整理成知識庫,再把其中的核心結論轉成 Podcast 腳本,甚至為不同聽眾設計不同敘事角色。它不是單純把文字念出來,而是把文件理解、腳本結構與音訊內容生產接在一起。
核心亮點四:Ask 模式更適合跨文件研究
Open Notebook 的 Ask 模式適合處理「不是問單一文件,而是要整合一批資料」的任務。例如你有 20 份產業報告,真正想問的不是某一頁寫了什麼,而是不同報告之間是否有共同趨勢、矛盾、缺口與可引用依據。這時候,單純的檢索式問答會不夠,需要能跨文件整理、比對與引用來源的研究流程。
這也是 RAG 類工具接下來會越來越重要的原因:文件不是只被「搜尋」,而是要被組織成可以反覆推理的知識庫。Open Notebook 提供的是比較完整的操作層;而像 GraphRAG、向量資料庫、本地模型與文件轉換工具,則是可以接在底下的技術層。把這些組起來,才會形成真正可重複的 AI 工作流 。
Open Notebook 和 NotebookLM 怎麼選?
比較面向 Open Notebook NotebookLM 資料控制 可自架,資料在自己掌控的環境 以 Google 雲端服務為主 模型選擇 可接多家 provider,也可接 Ollama / LM Studio 主要使用 Google 模型 Podcast 形式 可做 1-4 位 speaker 與自訂角色 以固定形式為主 部署方式 Docker、雲端或本地部署 直接使用雲端產品 適合對象 重視隱私、模型自由、工作流整合的人 重視上手速度、不想部署的人
簡單說,如果你要的是「馬上可以用」,NotebookLM 仍然很省事;如果你要的是「資料可控、模型可換、流程可自訂」,Open Notebook 會更有想像空間。它不是每個人都需要的工具,但對研究、顧問、內容團隊與企業知識庫來說,很值得放進評估清單。
導入前要先確認的限制
Open Notebook 的自由度比較高,但也代表它不是完全零門檻。最基本的前提是你要能接受 Docker 或自架環境;如果公司電腦不能裝 Docker,或 IT 政策不允許本機服務,導入就會比較麻煩
Docker 新手可以先看 如何使用 Docker 跟用 command line 一樣 ,先把容器概念補起來。
算力也要看你的模型選擇。如果只是用雲端 provider,主要成本會落在 API;如果想完全本地跑模型,就要準備足夠的 GPU、記憶體與模型部署能力。換句話說,Open Notebook 降低的是資料與模型綁定,不是把所有基礎設施成本變成零。
誰最適合用 Open Notebook?
研究員:需要整理大量論文、報告、訪談與來源引用。
內容創作者:需要把資料轉成腳本、長文、Podcast 或系列內容。
學生與知識工作者:需要把課堂筆記、PDF、網頁資料統一管理。
企業團隊:需要建立內部知識庫,又不希望敏感文件全部交給外部雲端。
Open Notebook 適合把 AI 研究流程變成私有工作台
Open Notebook 的價值,不只是「開源版 NotebookLM」這麼簡單。它真正有意思的地方,是把資料主權、模型自由、Podcast 生成、跨文件研究與自架部署放在同一個工作台裡。對只想偶爾整理公開資料的人來說,它可能稍微重了一點;但對需要長期累積知識庫、處理敏感文件、或把 AI 研究流程變成團隊基礎設施的人來說,它是一個值得測試的選項。
Open Notebook Github
FAQ
Open Notebook 是 NotebookLM 的替代品嗎?
它可以被視為 NotebookLM 的開源替代方案,但重點不只是功能相似,而是提供自架、模型選擇、資料控制與更多自訂能力。
Open Notebook 一定要很強的電腦才能用嗎?
不一定。如果使用雲端模型,主要需要 Docker 與 API 設定;如果要完全本地跑大型模型,才需要更強的 GPU、記憶體與部署能力。
Open Notebook 適合企業內部知識庫嗎?
適合放進評估清單,尤其是重視資料控制、模型彈性與自架部署的團隊。不過正式導入前,仍要評估權限管理、備份、資安政策與維運成本。
by Rain Chu 3 月 12, 2026 | Docker , google , wordpress
在管理多個 WordPress 專案時,傳統 VM 加架構往往面臨擴展性與維護成本的挑戰。透過 Google Cloud Run (Serverless) 、Cloud SQL (代管資料庫) 與 Cloud Storage (雲端儲存) 的組合,我們可以建立一個自動縮放、安全且高效率的網站環境。
一、 架構預覽
計算節點 :Google Cloud Run (Docker 容器化運行)。資料庫 :Google Cloud SQL (MySQL 8.0)。靜態檔案 :Google Cloud Storage (GCS)。流量分配 :Google Cloud Load Balancing (HTTPS 負載平衡器)。
二、 準備 Docker 鏡像與環境排除
在打包之前,請務必設定 .dockerignore 以優化鏡像體積並保護敏感資訊
my-wp-site/
├── Dockerfile           # 自動化打包腳本
├── wp-config.php        # 修改為讀取環境變數的版本
├── .dockerignore        # 排除不需要打包的檔案 (如 .git, local backups)
└── wp-content/
    ├── plugins/         # 放置您自定義的外掛
    └── themes/          # 放置您自定義的主題
建立 標準化 Dockerfile 範本
# 使用官方 PHP-Apache 映像檔,穩定且相容性高
FROM wordpress:php8.2-apache

# 1. 設定環境變數 (Cloud Run 預設監聽 8080,但官方 WP 鏡像預設是 80)
# 這裡我們讓 Apache 監聽 Cloud Run 指定的 PORT
RUN sed -i 's/Listen 80/Listen ${PORT}/g' /etc/apache2/ports.conf
RUN sed -i 's/:80/:${PORT}/g' /etc/apache2/sites-available/000-default.conf

# 2. 安裝必要的系統套件 (如有需要自訂 PHP 擴展可在這加)
RUN apt-get update && apt-get install -y \
    libpng-dev \
    libjpeg-dev \
    && docker-php-ext-configure gd --with-jpeg \
    && docker-php-ext-install gd

# 3. 複製現有的自定義檔案進入容器
# 建議只複製 plugins 和 themes,核心檔案由官方鏡像提供
COPY ./wp-content/plugins/ /var/www/html/wp-content/plugins/
COPY ./wp-content/themes/ /var/www/html/wp-content/themes/
COPY ./wp-config.php /var/www/html/wp-config.php

# 4. 設定正確的檔案權限 (對 WordPress 運行至關重要)
RUN chown -R www-data:www-data /var/www/html

# 5. 設定預設環境變數 (可在部署時被 gcloud 指令覆蓋)
ENV PORT=8080
ENV DB_HOST=127.0.0.1
ENV DB_USER=root
ENV DB_PASSWORD=password

# 暴露埠號
EXPOSE 8080
1. 建立 .dockerignore
Plaintext
.git
.gitignore
.dockerignore
Dockerfile
*.sql
*.zip
.vscode/
wp-config-sample.php
2. 打包與推送鏡像
PowerShell
# 編譯鏡像
docker build -t asia-east1-docker.pkg.dev/[PROJECT_ID]/wp-repo/[docker_name]:latest .

# 推送到 Artifact Registry
docker push asia-east1-docker.pkg.dev/[PROJECT_ID]/wp-repo/[docker_name]:latest
三、 資料庫遷移與設定
1. 匯入 SQL 腳本
將 .sql 檔案上傳至 Google Cloud Storage (GCS) 後執行匯入
注意 :請確保 SQL 檔案中不含 CREATE DATABASE 或 USE 語句,以免匯入失敗或指向錯誤的資料庫。
PowerShell
gcloud sql import sql [INSTANCE_NAME] gs://[BUCKET_NAME]/[docker_name].sql --database=[docker_name]_db
2. 設定 wp-config.php 智慧判斷
為了同時支援本地開發與雲端環境,建議在 wp-config.php 加入連線判斷邏輯
PHP
// 偵測是否在 Cloud Run 環境 (透過 Unix Socket 連線)
if (getenv('INSTANCE_CONNECTION_NAME')) {
    define( 'DB_HOST', ':/cloudsql/' . getenv('INSTANCE_CONNECTION_NAME') );
} else {
    define( 'DB_HOST', getenv('DB_HOST') ?: '127.0.0.1' );
}

// 負載平衡器 HTTPS 辨識
if (isset($_SERVER['HTTP_X_FORWARDED_PROTO']) && $_SERVER['HTTP_X_FORWARDED_PROTO'] === 'https') {
    $_SERVER['HTTPS'] = 'on';
}
四、 部署至 Cloud Run
部署時需指定 Cloud SQL 連線名稱 ,這會自動建立加密隧道
PowerShell
gcloud run deploy [docker_name] `
  --image asia-east1-docker.pkg.dev/[PROJECT_ID]/wp-repo/[docker_name]:latest `
  --region asia-east1 `
  --allow-unauthenticated `
  --add-cloudsql-instances [PROJECT_ID]:asia-east1:[INSTANCE_NAME] `
  --set-env-vars="INSTANCE_CONNECTION_NAME=[PROJECT_ID]:asia-east1:[INSTANCE_NAME],DB_NAME=[docker_name]_db,DB_USER=root,DB_PASSWORD=[PASSWORD]"
五、 設定負載平衡器 (GCLB) 與自訂網域
為了使用自有的網域(如 blog.rain.tips),建議使用 HTTPS 負載平衡器 。
建立 Serverless NEG :讓負載平衡器找到 Cloud Run 。設定前端 IP :保留一個靜態全域 IP。Google 管理憑證 :在前端設定中新增網域,Google 會自動處理 SSL 簽發與續期 。DNS 設定 :將您的網域 A 紀錄 指向負載平衡器的靜態 IP 。
六、 故障排除 (Troubleshooting)
Error establishing a database connection :
檢查 Cloud Run 服務帳戶是否擁有 「Cloud SQL Client」 角色 。
確認 DB_HOST 在雲端環境是否正確指向 :/cloudsql/... 。
503 Service Unavailable :
確認 Cloud Run 服務已設定為 「允許未經驗證的叫用」 。
檢查負載平衡器的憑證是否已變為綠色的 Active 狀態 。
IPv6 連線問題 :
若使用 Nginx 反向代理遇到 Network is unreachable,請強制 Nginx 優先使用 IPv4 或修改系統 /etc/hosts 。
參考資料
by Rain Chu 11 月 6, 2024 | Agent , AI , Chat
最近 OpenAI 推出了 Canvas ,開始流行在 ChatGPT 上頭寫程式、寫郵件等等,馬上就有人推出本地端一樣的服務 Open Canvas ,解放了你只能在 OpenAI 上使用的困境,除了 Git 以外,也馬上有了 docker 版本,可以快速體驗
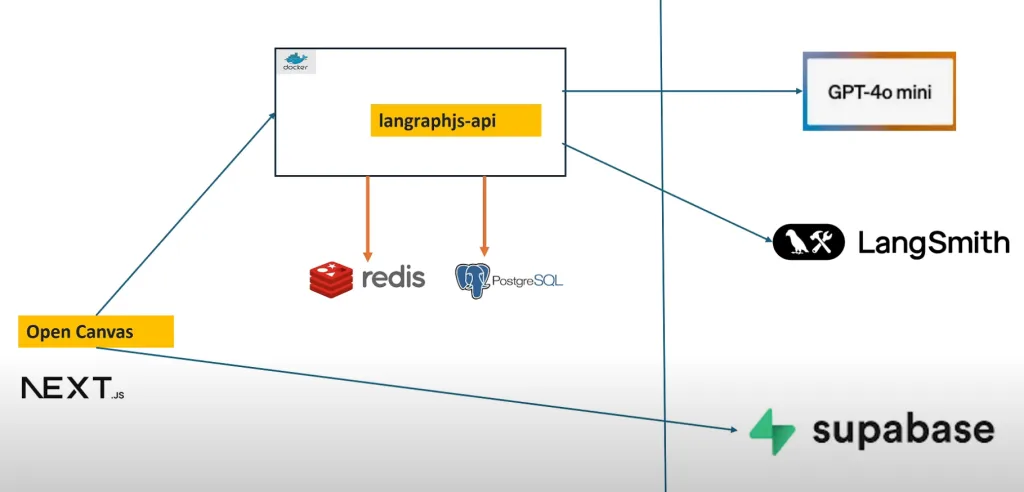
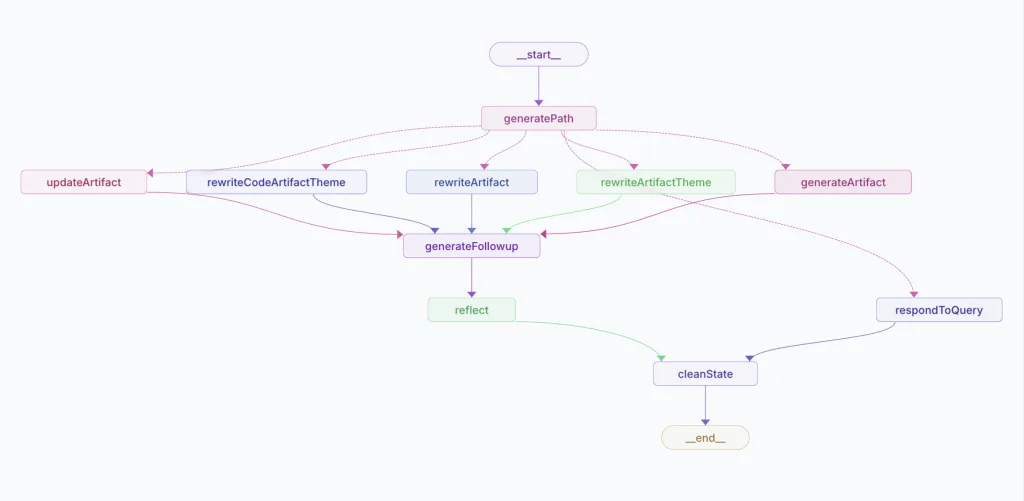
Open Canvas 架構圖 Open Canvas Workflow
相關資源
Open Canvas 原始檔
Open Canvas Docker
LangGraph Studio
LangSmith
VIDEO
by Rain Chu 11 月 5, 2024 | MIS
使用 docker 時候,常常遇到被占用的 port 要處理,這邊記錄下正確的處理方法
找到占用port的程式
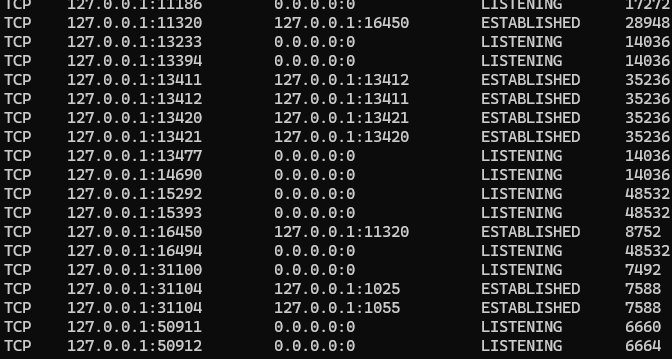
netstat -ano | findstr 8080 會得到下面的輸出,最後面一個是 PID
查詢程式資訊
刪除占用的程式行程
舉例來說,我要刪除佔用了 port 50912 的程式,由上圖知道他的 PID 是 6664,那就輸入以下指令即可
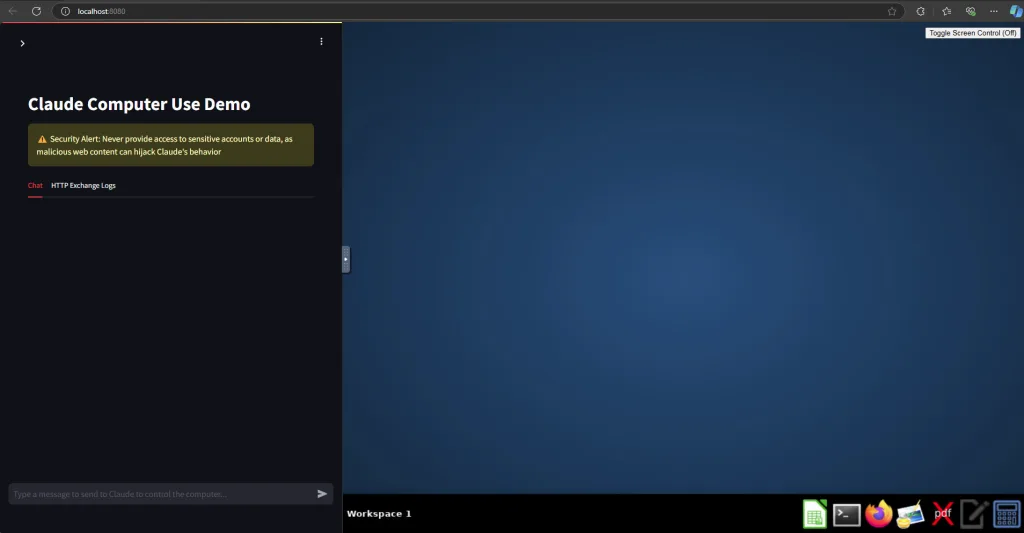
by Rain Chu 11 月 5, 2024 | AI
終於來到電影中的AI操作電腦的情節了,動動嘴巴就可以控制電腦,AI 透過 LLM 模型,知道你的意圖,在看你的電腦畫面,去決定要點選甚麼樣的位置,或是輸入甚麼樣的資訊,原來可以這麼簡單就實現用嘴巴操作電腦
準備 API Key
請先到這邊,https://www.anthropic.com/api ,取得 API Key,等等 docker 建立的時候會用到
Docker 安裝 Ahthropic computer use
Linux / Mac
export ANTHROPIC_API_KEY=%your_api_key%
docker run \
    -e ANTHROPIC_API_KEY=$ANTHROPIC_API_KEY \
    -v $HOME/.anthropic:/home/computeruse/.anthropic \
    -p 5900:5900 \
    -p 8501:8501 \
    -p 6080:6080 \
    -p 8080:8080 \
    -it ghcr.io/anthropics/anthropic-quickstarts:computer-use-demo-latest
Windows
export ANTHROPIC_API_KEY=%your_api_key%

docker run `
    -e ANTHROPIC_API_KEY=$ANTHROPIC_API_KEY `
    -v $HOME/.anthropic:/home/computeruse/.anthropic `
    -p 5900:5900 `
    -p 8501:8501 `
    -p 6080:6080 `
    -p 8080:8080 `
    -it ghcr.io/anthropics/anthropic-quickstarts:computer-use-demo-latest

近期留言