by Rain Chu 9 月 17, 2026 | AI , 模型
Ornith 1.5 把本地 AI 的一個老問題攤得很清楚:每秒吐出多少 token,和最後有沒有把工作做完,是兩回事 ,35B-A3B 版本靠 MoE 架構降低每個 token 的運算量,在公開實測中展現速度優勢,也出現思考太久、額度用完卻沒交出程式碼的案例。
如果你想找一顆接在本地程式代理後面的模型,Ornith 1.5 35B 值得列入測試,評估時要一起看量化格式、記憶體餘裕、工具相容性與任務完成率,下面先拆開「自我改進」的意思,再看官方評分、兩組不同硬體的實測,以及實際上手順序。
Ornith 1.5 更新了什麼?先分清楚三種模型
Ornith 1.5 家族包含 9B Dense、35B MoE 與 397B MoE。手機部署的主角是 9B-Mobile 量化版本,與旗艦商用模型比較的宣傳則主要圍繞 397B。本文聚焦中間的 35B-A3B,不能把另外兩款的部署條件或成績直接套過來。版本資訊可從 官方模型集合 查看。
如果你看過 Ornith 1.0 的自我拆解任務方式 ,這次最主要的延伸是把「生成訓練任務」也納入改善流程。
自我改進發生在訓練期間,下載後不會自動改寫權重
依照 Ornith 官方技術說明 ,模型在訓練中依序扮演三個角色:先根據程式庫與過去解題紀錄出題,再安排工具、指令與拆解方法,最後嘗試解題。結果回饋到強化學習流程,讓題目、執行安排與解法一起改善。
出題也有條件:題目要能驗證、難度合適,而且不能一直重複,官方把目標成功率設在約 20%,讓模型練習有挑戰但仍可能解出的題目。這個百分比是訓練課程的設計目標,不是產品的答題正確率。
可以把它想成練習寫程式時,不只修答案,也回頭調整練習題與測試方式。
下載回來的則是訓練後的模型權重,日常對話、保存記憶或反覆提示,不代表權重正在持續更新。
AlphaLab 對自我改進邊界的分析 也提醒,環境與評分規則仍由人設計,分數上升還要確認是否真的學會解題。
35B-A3B 的 A3B,不是記憶體只要放下 3B
MoE 每次只選部分專家參與計算,但其他專家的權重仍要有地方存放。活躍參數主要影響每一步的運算量,總權重與快取才是估算記憶體的起點。 官方 35B 模型頁列出約 3B 活躍參數,BF16 權重約 70GB,原生上下文為 262,144 token,模型規格與啟動範例 可作為設定依據。
以目前 官方 GGUF 檔案清單 為例,Q4_K_M 單一模型檔約 21.71GB,換算約 20.22GiB,這還沒加上推論引擎、上下文快取或視覺投影檔,因此「有 24GB 顯示記憶體」只能作為測試起點,不能直接承諾長上下文與多個並行任務都放得下。
12GB 或 16GB 顯示卡若想跑這個 Q4 檔,通常還得規劃部分權重放在系統記憶體,或改用其他量化版本,能載入模型、能順利對話、能在長任務中維持速度,應分開驗收。Mac 使用統一記憶體,也要預留系統空間,可搭配 本地 AI 的記憶體與頻寬選擇 理解這個差別。
官方評分顯示程式能力進步,但要連測試框架一起看
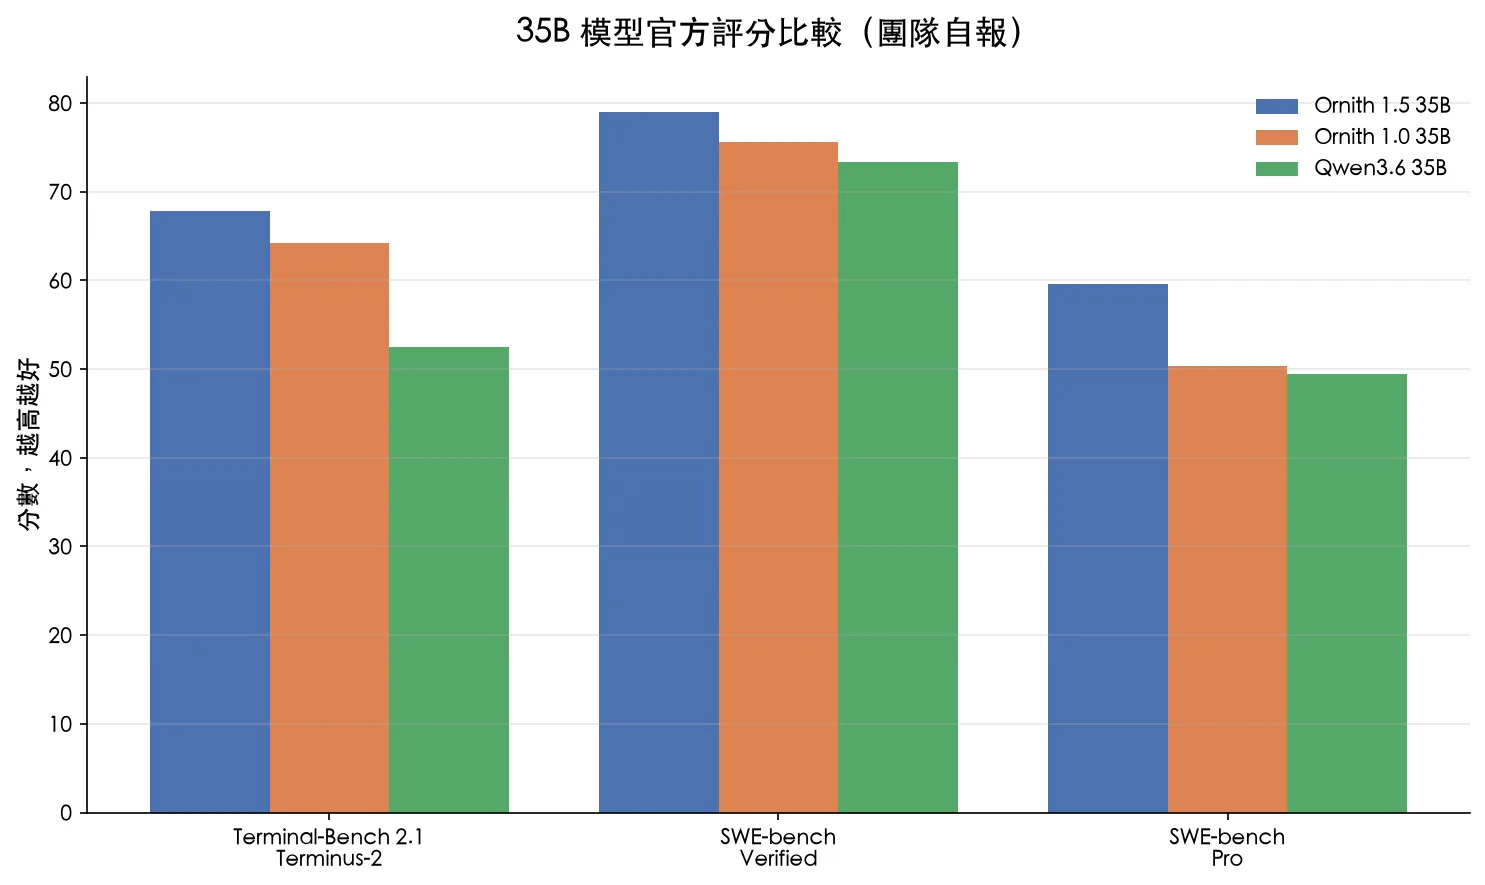
以下是官方模型卡中同尺寸模型的部分成績。
Ornith 1.5 的結果為團隊自報的五次執行平均,並非本文重跑,也不等於所有電腦都會得到相同結果。
測試 Ornith 1.5 35B Ornith 1.0 35B Qwen3.6 35B Terminal-Bench 2.1/Terminus-2 67.8 64.2 52.5 SWE-bench Verified 79.0 75.6 73.4 SWE-bench Pro 59.6 50.4 49.5
資料來源:Ornith 35B 官方模型卡。各項測試使用各自的評測設定,不能相加成通用能力分數。 Terminal-Bench 的上述結果使用 Terminus-2,SWE-bench 使用 OpenHands。工具、提示、可用時間與上下文都會影響代理表現。「追平 Claude Opus」應限於官方列出的特定 397B 比較,無法據此宣稱 35B 全面取代商用模型。
對上 Qwen3.8 27B:生成得快,整個任務卻可能更慢
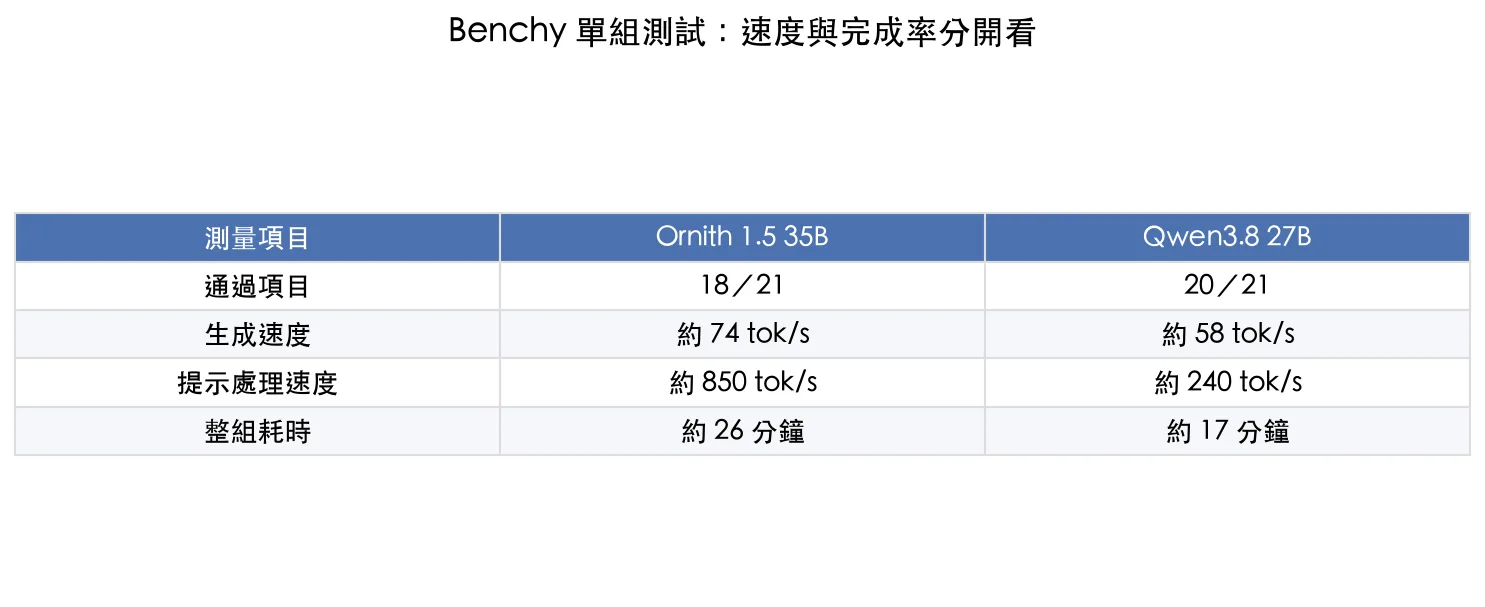
DIY Smart Code 的 Benchy 本地測試 使用 RX 7900 XTX 24GB、Ryzen 9、64GB 系統記憶體與 Ollama,比較兩款 Q4 模型。Ornith 測試標示 32K 上下文。這是作者自建測試集的一組案例,量化檔案與測試工具的細節限制了外部重現,不能當成通用排名。
同一組 Benchy 案例 Ornith 1.5 35B Qwen3.8 27B 通過項目 18/21 20/21 生成速度 約 74 tok/s 約 58 tok/s 提示處理速度 約 850 tok/s 約 240 tok/s 整組耗時 約 26 分鐘 約 17 分鐘
資料來源:DIY Smart Code,2026 年 8 月 22 日公開案例。數值依逐字稿約數整理,並非本文實測。 最有參考價值的是 DAG 非同步任務排程題:Ornith 花了約 18,000 個思考 token,耗盡輸出額度後沒有交出最終 Python 程式,Qwen 則完成程式並通過該題檢查。所以每秒輸出較快,仍可能因為思考與重試較多,拖長整個工作的時間。
這也不能反推成所有 MoE 都不擅長推理,或 Qwen 永遠比較穩,模型、量化、引擎與題型都不同,架構本身不能單獨解釋全部差異,要比較自己的程式任務,可參考 Qwen3.8 27B 本地部署教學 ,固定測試條件再重跑。
雙 GB10 的 NVFP4 實測:減少搬運,也能讓解碼加速
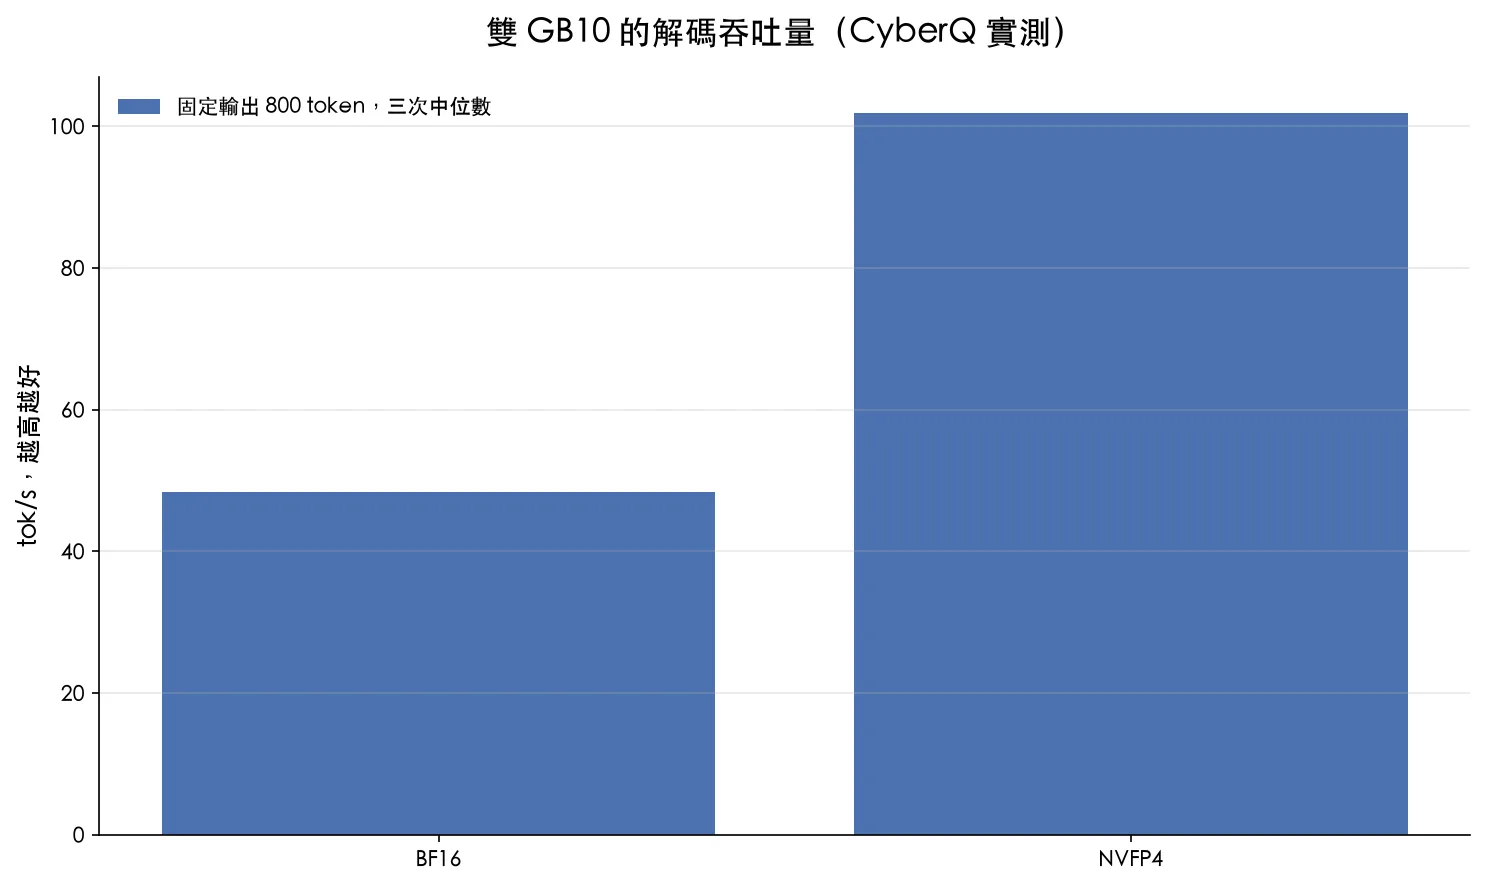
CyberQ 的雙 GB10 實測 是在另一套硬體與 vLLM 環境中比較 BF16 與 NVFP4。它固定解碼 800 token,暖機後取三次量測中位數,因此較適合觀察格式差異,不適合直接和前面的 Ollama 成績排高低。
雙 GB10/TP=2 BF16 NVFP4 解碼吞吐量 48.41 tok/s 101.86 tok/s 12,001 token 提示處理 2,767 tok/s 4,141 tok/s
解碼約為 2.10 倍。這是特定硬體與引擎的量測結果。 該測試的 NVFP4 路徑先以低位元格式搬運權重,再反量化計算。當瓶頸是記憶體頻寬,減少搬運量就可能抵銷反量化成本。這是推論效率改善,不能解讀成硬體原生算力增加。
品質抽查中,兩種格式在 AIME 2026 都完成並答對 23/30 題,各有 7 題被輸出上限截斷。兩邊共同完成的 22 題答案一致,但答案一致不代表逐 token 的思考過程相同,也不能延伸成量化完全不損失品質。
本地部署怎麼開始?先讓短任務與工具呼叫跑通
先選權重格式與執行工具。桌面試用可從 GGUF 與 Ollama、llama.cpp 相容工具開始,伺服器則參考官方 vLLM 或 SGLang 範例。還不確定差別,可先看 本地大模型推論框架比較 。
下載時認明 原始模型庫 、官方 GGUF 與 官方 NVFP4 。另有 AtomicChat 的 GGUF 轉換版本 可比較,請記錄實際檔名與量化等級,同樣寫 Q4 不表示所有檔案與執行結果完全相同。
測試時先縮短上下文、一次處理一個請求,確認記憶體與基本輸出正常,再逐步拉長。官方雖提供延伸到約 1M token 的設定,卻也提醒長上下文縮放可能影響一般長度的品質,不必第一次啟動就把視窗開到最大。
接代理前,再測試工具名稱、參數、工具結果回傳,以及模型能否繼續下一步。模型能輸出 tool_calls,只代表這段格式可用,MCP 伺服器還需要由代理程式接上。純聊天成功,不能代替完整工具流程驗收。
最後設定整個任務的時間、輸出與重試上限,並檢查所用引擎是否支援獨立思考額度。只縮小總輸出上限,可能更早截斷最終答案。日常試用可先用幾個有明確驗收條件的小任務,比較完成時間、人工修正量與失敗原因,再決定是否放入長時間自動化工作。
授權與手機部署,哪些說法還要保留?
T客邦的發布報導 有助於了解系列定位,但授權敘述與官方 metadata 不一致。
本文以官方模型頁標示的 MIT 為準。
同樣地,9B-Mobile 支援行動裝置的宣稱,不能保證每一款手機都有足夠可用記憶體、支援對應模型格式,或能維持長上下文。先確認使用的 App、量化檔與裝置條件,比直接照搬桌面版的速度數字有用。
常見問題
Ornith 1.5 35B-A3B 是只有 3B 參數嗎?
不是。它是 35B 級 MoE 模型,每個 token 約啟用 3B 參數。儲存與載入仍需考慮完整權重,以及快取和引擎額外用量。
Ornith 1.5 放在本地使用會自己越來越聰明嗎?
官方的自我改進是訓練流程。下載後一般執行推論,不會因為聊天次數增加就自動更新模型權重。
24GB 顯示卡一定能跑 35B 的完整上下文嗎?
不能保證。官方 Q4_K_M 檔約 20.22GiB,還需預留引擎與快取空間。應從短上下文實測,再逐步調整。
Ornith 1.5 和 Qwen3.8 27B 該選哪個?
先用自己的任務比較。公開 Benchy 案例中 Ornith 生成較快,Qwen 通過較多項目。這組結果只適用於該測試條件。
這是美國團隊所推出的模型
Ornith 支援工具呼叫,就能直接連 MCP 嗎?
還需要代理程式與 MCP 連接層。應測試參數格式、工具執行與結果回傳的整個流程。
先看能否完成你的工作,再看分數有多高
Ornith 1.5 值得研究的地方,是它把練習題、工具安排與解法放進同一條訓練流程。而對本地使用者來說,35B-A3B 的實際價值仍要靠任務驗收:能不能在現有記憶體內跑穩、工具是否接得上,以及等待之後有沒有拿到可用成果。
先挑幾個你每週真的會做的工作,讓 Ornith 與現有模型各跑一次。保留設定、耗時與失敗紀錄,往往比看一張總排名更容易做出選擇。若想了解前述測試工具的設計,可再看 Benchy 測試工具建置說明 。
by Rain Chu 9 月 9, 2026 | AI , Chat
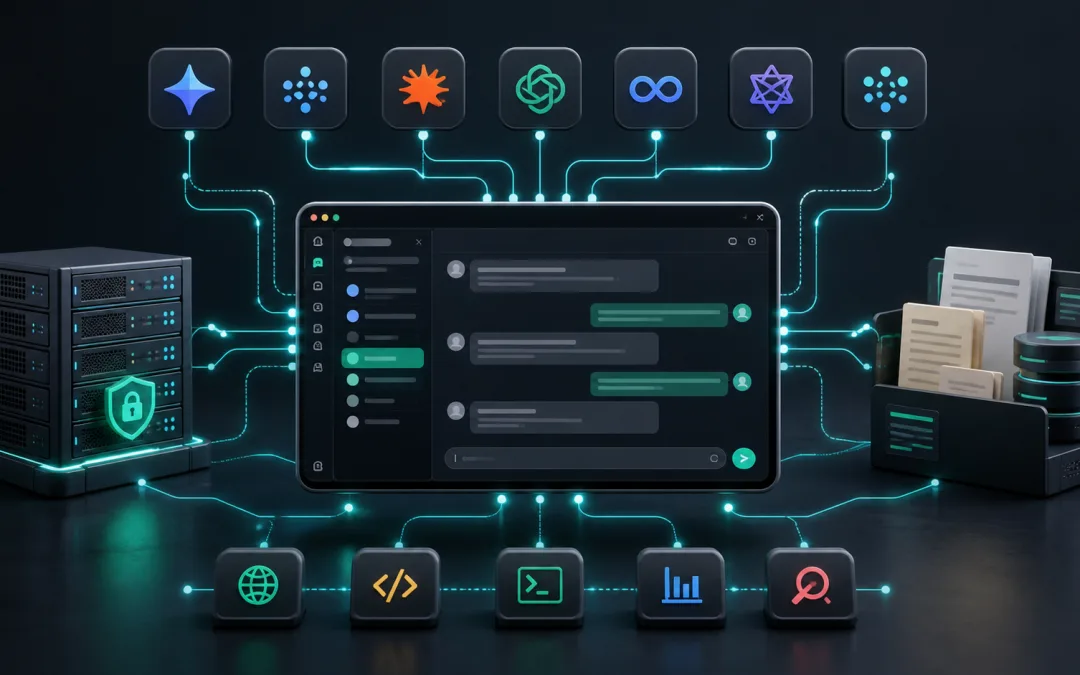
LibreChat 是把 OpenAI、Anthropic、Google、OpenAI 相容端點與本地模型,整理成一個可以自己部署、自己管理的 AI 工作台。早期把它叫做「套殼」還勉強能描述外觀,但到了現在,這個說法已經低估了它的定位。
它比較像模型與工具之間的控制層。使用者面對同一個聊天介面,管理者則能在後面決定模型來源、權限、Agents、MCP、搜尋、文件檢索與資料保存方式。對想把雲端 API 和內網 Ollama 放在一起的人,LibreChat 是很實用的開源入口。
LibreChat 是什麼
LibreChat 是可自行部署的開源 AI 平台,原始碼放在 LibreChat GitHub 。它不包含自己的大型語言模型,而是把不同模型供應商、本地推理服務與工具能力接到同一個操作介面。
在同一段對話裡切換不同模型
保存 Prompt、Presets、對話分支與搜尋紀錄
上傳文件並使用 RAG、OCR 與檔案檢索
建立 Agents,串接 MCP、Skills、工具與子代理
使用 Code Interpreter、Artifacts、圖片生成與網頁搜尋
提供多使用者登入、角色、群組與存取控制
目前官方文件以 v0.8.x 為主,GitHub README 也會展示較新的候選版本功能。正式環境不要只看介面截圖判斷版本,部署前應先確認自己使用的映像標籤與官方升級說明。
它不是免費的 ChatGPT Plus 集合包
這是最容易誤會的地方。LibreChat 本身免費開源,不代表接進去的模型都免費
ChatGPT Plus、Claude Pro 與 Gemini 的消費者訂閱,通常也不能直接當成 API 額度使用。要呼叫官方模型,仍需準備對應的 API Key,費用由各供應商另外計算。
如果不想累積雲端 API 費用,可以改接 Ollama、llama.cpp、LM Studio、vLLM 或其他 OpenAI 相容服務,不同推理後端怎麼選,可以先看 本地大模型推理框架比較 。LibreChat 負責操作與編排,模型成本、速度和能力仍由後端決定。
用 Docker 安裝 LibreChat
官方目前仍把 Docker Compose 列為最直接的本機安裝方式。先確認電腦已安裝 Git 與 Docker Desktop,再執行以下命令。
git clone https://github.com/danny-avila/LibreChat.git
cd LibreChat
cp .env.example .env
docker compose up -d
Windows PowerShell 或命令提示字元可把複製指令改成下面這一行。檔名之間要保留空格,不能把整段黏在一起。
copy .env.example .env啟動完成後打開 http://localhost:3080。第一個完成註冊的帳號會成為管理員,系統沒有預設帳號與密碼,確認管理員可登入後,公開服務建議把 ALLOW_REGISTRATION 設為 false,避免陌生人自行註冊。
三層設定檔不要混在一起
檔案 用途 適合放什麼 .env密鑰與伺服器開關 API Key、登入、註冊與服務環境變數 librechat.yamlLibreChat 功能設定 自訂端點、模型清單、Agents、MCP 與介面選項 docker-compose.override.yml容器覆寫 掛載設定檔、改連接埠、替換映像與新增服務 docker-compose.yml官方基礎配置 原則上維持原樣,方便後續更新
API Key 建議放在 .env,再由 librechat.yaml 使用環境變數引用。不要把真正的 Key 直接寫進 YAML,也不要提交到 GitHub。修改設定後需要重新啟動容器才會生效。
個人環境可以由伺服器統一提供 Key。多人共用時,也可以在自訂端點把 apiKey 設為 user_provided,讓每位使用者在介面輸入自己的憑證,避免所有請求都共用同一把組織 Key。選哪一種方式,取決於費用要集中管理,還是由使用者各自負責。
docker compose down
docker compose up -d
串接內網 Ollama
LibreChat 可以把 Ollama 當成 OpenAI 相容端點。以下範例直接使用內網位置 192.168.0.240:11434。先在專案根目錄建立 librechat.yaml。
version: 1.3.13
cache: true
endpoints:
  custom:
    - name: Ollama
      apiKey: ollama
      baseURL: http://192.168.0.240:11434/v1/
      models:
        default:
          - qwen3:32b
        fetch: true
      titleConvo: true
      titleModel: current_model
接著在 docker-compose.override.yml 把 YAML 掛進 API 容器。
services:
  api:
    volumes:
      - type: bind
        source: ./librechat.yaml
        target: /app/librechat.yaml
如果 Ollama 和 LibreChat 在同一台電腦,Docker Desktop 環境可以依官方範例改用 http://host.docker.internal:11434/v1/。如果 Ollama 在另一台 AI Server,就使用可從 LibreChat 主機連到的區網 IP。遠端服務的監聽、防火牆與測試方式,可接著參考 Ollama 遠端連線教學 。
不要直接把 11434 對整個網際網路開放。比較穩妥的做法是限制在內網、VPN 或反向代理後方,再用防火牆控制來源。
從聊天介面升級成 Agent 工作台
LibreChat 現在的價值,已經不只在多模型切換。Agents 可以組合系統指令、模型、工具、MCP、Skills、文件與子代理,並在需要時加入人工確認。這讓同一套介面能分別建立研究助理、文件問答、程式開發、客服與內部知識助手。
若主要需求是跨文件研究與來源整理,Open Notebook 私有 AI 研究工作流 會更專門。若重點是跨模型聊天、工具與 Agent 的統一入口,LibreChat 的範圍更廣。兩者也不衝突,前者可以負責知識工作流,後者負責日常模型與代理入口。
常見安裝問題
出現 librechat.yaml 錯誤
先檢查縮排與 YAML 語法,再確認 override 已把檔案掛到 /app/librechat.yaml。容器內讀不到檔案時,主機上有 YAML 也不會生效。
3080 連接埠被占用
可在 override 把外部連接埠改成 3081:3080,之後用 http://localhost:3081 開啟。
Apple Silicon 啟動 MongoDB 失敗
官方文件指出部分 M1 到 M4 環境會遇到 MongoDB 映像的 AVX 相容問題,可在 override 將 MongoDB 映像指定為 mongo:4.4.18。這是相容性處理,不代表所有 Apple Silicon 都一定會遇到。
不知道錯在哪裡
docker compose logs api先看 API 容器最後一段紀錄,通常會直接指出缺少的環境變數、無效 YAML、資料庫連線或供應商 API 問題。
公開部署前的安全清單
第一個管理員建立後關閉公開註冊
使用 HTTPS 與可信任的反向代理
不要把 API Key 寫進公開 YAML 或 Git 儲存庫
限制 Ollama、MongoDB 與 Redis 的網路來源
定期備份資料庫與上傳檔案
依團隊角色設定 Agents、MCP、檔案與對話權限
升級前先查看 v0.8.x 的相容與遷移說明
LibreChat 現在已有預覽中的 Admin Panel,可管理使用者、群組、角色、系統授權與部分設定覆寫。不過預覽功能仍可能調整,正式環境不能只依賴介面上的開關,網路隔離、密鑰管理與備份仍要在基礎設施層處理。
LibreChat 適合誰
如果你只固定使用一個雲端聊天服務,官方介面通常最省事。當你開始同時使用多家模型、需要本地 Ollama、想建立不同 Agents,或要替團隊管理共用入口,LibreChat 的價值才會真正出現。
我的判斷是,LibreChat 已經從「像 ChatGPT 的開源介面」走到「自架 AI 控制台」。它不會替你省掉所有模型費用,也不會自動解決權限和維運問題,但它讓模型、工具、文件與代理不必被綁死在單一供應商。這對想建立私有 AI 工作環境的人,比單純模仿介面重要得多。
FAQ
LibreChat 可以免費使用 GPT 嗎
LibreChat 免費開源,但 GPT API 仍由 OpenAI 計費。ChatGPT Plus 訂閱通常不能直接抵用 API。想避免 API 成本,可以接本地 Ollama 或其他自架模型。
LibreChat 可以接 Ollama 嗎
可以。透過 librechat.yaml 建立 OpenAI 相容自訂端點,並把設定檔掛進容器即可。本機 Docker 可使用 host.docker.internal,內網 AI Server 則使用可連線的區網 IP。
LibreChat 適合公開給團隊使用嗎
可以,但需要 HTTPS、註冊控制、角色權限、密鑰管理、資料備份與內部服務隔離。第一個註冊帳號會成為管理員,建立後應立即檢查公開註冊設定。
by Rain Chu 7 月 28, 2026 | Agent , AI
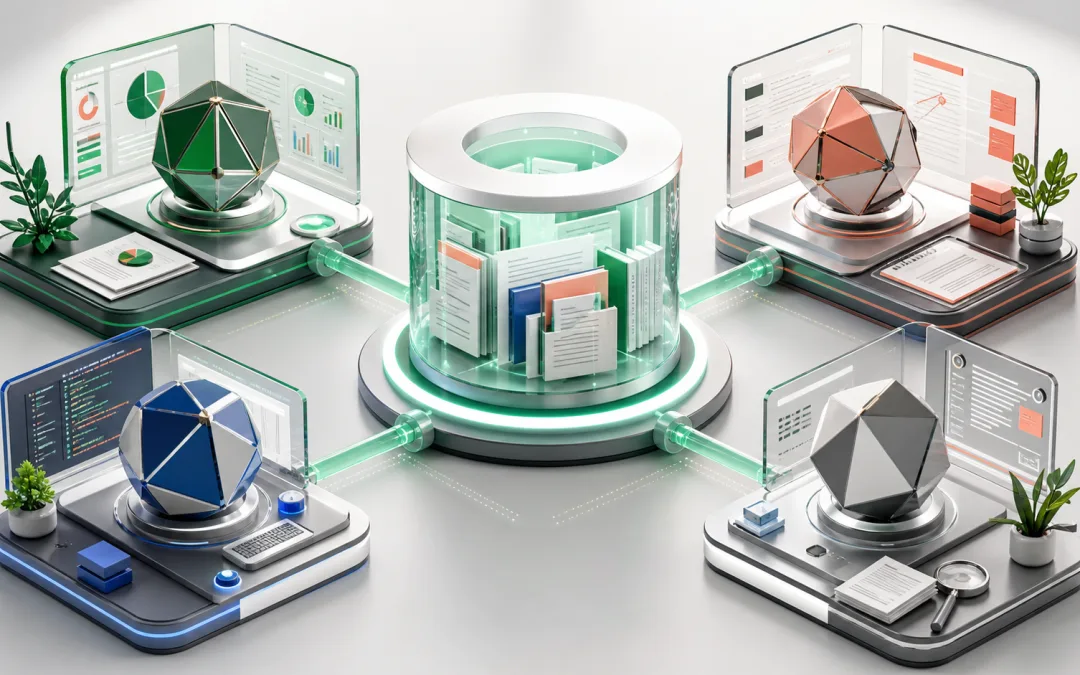
CrewAI 不是一個大語言模型,而是一套用來編排 AI Agent 的 Python 框架,它把一個複雜任務拆成不同角色,再透過 Task、Process 與 Crew 控制合作方式。模型負責思考,工具負責行動,知識庫負責補充事實,而 CrewAI 負責讓這些元件按照可理解的流程運作。
提示詞優化是一個很適合理解 CrewAI 的案例,只要把工作拆成分析、改寫、測試與最終審核,就能看見多 Agent 的價值,也能看見它的代價,Agent 數量增加後,模型呼叫、檢索次數、延遲與費用都會一起增加。真正重要的不是組一支看起來很熱鬧的 AI 團隊,而是讓每個角色都有不可取代的責任。
CrewAI 是什麼
CrewAI 是獨立開發的多 Agent 自動化框架,不依賴 LangChain,官方把主要能力分成 Crews 與 Flows,Crews 適合需要角色分工、探索與協作的任務,Flows 適合需要明確順序、狀態、條件分支與可稽核結果的工作流。
可以把它想成一間小型公司,Crew 是團隊,Agent 是成員,Task 是工作單,Process 是工作順序,Tool 是成員可以使用的工具。Knowledge 則是團隊共同或個別可查閱的資料庫。
元件 負責內容 提示詞優化案例 Agent 角色、目標、模型、工具與行為 分析師、改寫者、測試者 Task 工作描述、輸入、預期輸出與驗收條件 找出缺漏、產生新版、比較品質 Crew 組合 Agent 與 Task 並啟動執行 完整的提示詞優化團隊 Process 決定工作如何安排 依序分析、改寫、測試與定稿 Flow 控制狀態、事件與條件路徑 品質不合格時退回重寫 Knowledge 提供文件、網站或結構化資料 提示詞規範與優秀案例 Tool 讓 Agent 存取外部能力 向量檢索、網頁搜尋與評分器
提示詞優化 Crew 的完整架構
使用者輸入原始需求
        ↓
RAG 檢索提示詞規範與案例
        ↓
Prompt Analyzer 找出目標、限制與缺漏
        ↓
Prompt Optimizer 建立第一版完整提示詞
        ↓
Prompt Tester 以驗收標準比較品質
        ↓
Ultimate Optimizer 整合修正並輸出定稿
這種設計的關鍵是讓每個 Agent 產生下一個 Task 能直接使用的結果,分析師不應只給模糊評論,而要輸出結構化問題清單,改寫者要根據問題清單產生完整版本,測試者要使用固定量表,而不是憑感覺說新版比較好,最後的審核者只整合已確認的修正,不再任意改變需求。
若要進一步降低漂移,可以用 Pydantic 或 JSON 結構固定每一階段的輸出。這比單純增加角色背景故事更有效,因為下一個步驟能明確知道要讀取哪些欄位。
四個 Agent 不一定比兩個好
分析、優化、測試與最終優化看起來很完整,但每個角色都使用大型模型,還在每一階段重複查詢向量資料庫時,成本很容易放大。對簡單提示詞而言,分析與改寫可以由同一個 Agent 完成,再保留一個獨立測試 Agent,就已經有清楚的製作與驗收分工。
保留不同 Agent,當兩個角色需要不同工具、不同權限或不同模型時。
合併 Agent,當工作只是同一段文字的連續改寫時。
改用一般函式,當步驟不需要推理,只是格式轉換或資料驗證時。
改用 Flow,當流程需要條件分支、重試、人工確認與狀態保存時。
RAG 在 CrewAI 裡負責什麼
RAG 的用途不是替 Agent 增加想像力,而是讓它在執行任務前找到可靠的參考資料,提示詞優化系統可以把提示詞指南、優秀範例、品牌規範與輸出格式放進知識庫。使用者送出需求後,系統只取回最相關的片段,再讓 Agent 根據這些內容工作。
2024 年的實作組合是 Phidata、pgvector 與 OpenAI Embedding,Phidata 現在已改名為 Agno ,如果要維護舊專案,應先確認套件名稱與匯入路徑,不宜直接照搬舊版命令。
目前 CrewAI 已有內建 Knowledge ,可讀取文字、PDF、CSV、Excel、JSON 與網站內容,官方的 provider-neutral RAG client 預設使用 ChromaDB,也支援 Qdrant,若既有系統已使用 PostgreSQL,仍可把 pgvector 封裝成自訂 Tool,若只是做第一個原型,先用內建 Knowledge 通常更省事。
想理解本地檢索的完整取捨,可以搭配 GraphRAG 使用本地 Ollama ,若知識來源主要是專案文件與程式碼,OpenWiki 建立 Agent 共用知識庫 也很適合一起比較。
先用 RAG,不要急著訓練模型
手上有大量人工撰寫的中英文檢索式或高品質提示詞時,第一步不一定是微調。先把資料清理成「需求、上下文、限制、輸入範例、理想輸出」的成對資料,再用 RAG 找相似案例,通常能更快驗證需求。
先建立測試集,保留一批資料完全不進知識庫。
用 RAG 加單一 Agent 建立基準結果。
加入獨立評分 Agent,比較正確性、完整性與格式。
只有在格式高度穩定、資料量充足且 RAG 已到瓶頸時,再評估微調。
這樣做的好處是資料更新不必重新訓練,錯誤案例也能快速撤換。若資料彼此關聯複雜,還可以參考 Graphify 知識圖譜 ,評估是否需要從純向量檢索進一步加入實體與關係。
CrewAI 2026 最新安裝方式
截至 2026 年 7 月,官方文件要求 Python 3.10 以上且低於 3.14,並建議使用 uv 管理套件。CrewAI 現在預設建立 JSON-first 專案,Agent 放在 agents/*.jsonc,Task 與 Crew 設定放在 crew.jsonc。若需要早期常見的 Python 與 YAML 結構,才使用 --classic。
uv tool install crewai
uv tool update-shell

crewai create crew prompt_optimizer
cd prompt_optimizer
crewai install
crewai run
建立後會看到 crew.jsonc、agents/、knowledge/、skills/ 與 tools/。這個結構已經把多數需求放進設定檔,適合先從角色與任務定義開始,再加入自訂 Python Tool。
需要舊版 Python 與 YAML 專案時
crewai create crew prompt_optimizer --classic 舊版教學常出現 crew.py、agents.yaml 與 tasks.yaml,這些概念仍然有效,但預設腳手架已經不同。遇到匯入錯誤時,先確認 CrewAI 版本,再對照該版本官方文件。
CrewAI 如何連接 Ollama
CrewAI 不限定 OpenAI 或 Anthropic。官方文件提供 Ollama 設定,只要在 Agent 指定 LLM 與 base_url 即可。這能把多數推理留在本地端,避免每個 Agent 都產生雲端 API 費用。
from crewai import Agent, LLM

local_llm = LLM(
    model="ollama/qwen3:8b",
    base_url="http://localhost:11434"
)

analyzer = Agent(
    role="提示詞分析師",
    goal="找出需求缺漏並建立清楚的改寫規格",
    backstory="你擅長把模糊需求拆成可驗收的條件",
    llm=local_llm
)
如果 Ollama 在另一台主機,把網址換成實際內網位置即可。部署前要確認 Ollama 有對區域網路監聽、防火牆已開放,而且 CrewAI 使用的模型名稱與 ollama list 完全一致。選擇模型時可以參考 本地大模型推理框架比較 。
Docker 與硬體需求怎麼看
Docker Desktop 不是 CrewAI 的必要條件。早期範例需要 Docker,是因為它用容器啟動 PostgreSQL 與 pgvector。Linux 伺服器可以直接使用 Docker Engine,也可以把 PostgreSQL 安裝成系統服務。若改用 CrewAI 內建 Knowledge 與本地 ChromaDB,第一版甚至不一定需要 Docker。
一般筆電可以執行 CrewAI,因為框架本身不重。真正決定硬體需求的是模型、Embedding、向量資料庫與同時執行的 Agent 數量。雲端模型加本地向量庫的門檻最低。本地模型則要依參數量、量化格式與上下文長度準備足夠的記憶體或顯示記憶體。
成本最高的地方不是框架
CrewAI 開源框架本身不是主要成本。費用通常來自每個 Agent 的模型呼叫、反覆 RAG 檢索、長上下文、Embedding 建庫與失敗重試。四個 Agent 各自檢索並呼叫一次大型模型,很可能比單一 Agent 加一次驗收多出數倍費用。
讓檢索結果在同一輪工作流中共用,不要每個 Agent 重複搜尋。
分類、格式檢查與簡單摘要改用小模型。
昂貴模型只負責最終改寫或高風險判斷。
為 Task 設定清楚的 expected output、guardrail 與最大重試次數。
保存每次輸入、檢索片段、輸出與評分,才能知道錢花在哪裡。
Crews 與 Flows 應該怎麼選
若任務需要研究、創作、分析與不同專業觀點,使用 Crew。若工作需要固定順序、條件分流、錯誤重試、人工核准與狀態恢復,使用 Flow。正式系統通常會把兩者結合,由 Flow 控制整體流程,只在需要推理的節點呼叫 Crew。
需求 建議方式 研究後寫成報告 Crew 分析、改寫與交叉審核 Crew 依分數決定重寫或通過 Flow 呼叫 API 並等待人工批准 Flow 完整內容生產管線 Flow 控制流程,Crew 處理創作
如果需要從桌面工作台管理 Agent 專案,也可以參考 OpenWork 與 OpenCode Agent 工作台 ,比較框架層與操作介面的差異。
我會怎麼重做這套提示詞優化系統
先用單一 Agent 加 Knowledge 建立基準版本。
定義固定評分表,檢查目標、背景、限制、格式與可驗收性。
加入一個獨立測試 Agent,只負責找問題與打分。
分數未達門檻時,由 Flow 送回改寫,並限制重試次數。
先用 Ollama 小模型跑分析與分類,必要時才把最終改寫交給較強模型。
用保留測試集比較原始提示詞與優化結果,不把自我評價當成唯一證據。
這個版本的 Agent 更少,但責任更清楚,也更容易測試。CrewAI 的價值不是替程式多包幾層,而是讓角色、任務、工具、知識與執行順序都能被明確描述。當每個步驟都能觀察、驗證與替換,多 Agent 才真正從展示走向可維護的系統。
官方資源與案例程式碼
FAQ
CrewAI 是模型還是框架
CrewAI 是多 Agent 編排框架。它負責組織 Agent、Task、Process、Tool、Knowledge 與 Flow,實際推理由 OpenAI、Anthropic、Ollama 或其他模型提供。
CrewAI 可以完全使用本地模型嗎
可以。Agent 的 LLM 可指向 Ollama,也能連接其他 OpenAI 相容端點。若 Embedding 與知識庫也改用本地方案,就能大幅降低雲端 API 成本。
Crew 和 Flow 有什麼差別
Crew 強調角色分工與自主協作。Flow 強調精確的執行路徑、狀態、條件分支與可恢復性。正式系統常用 Flow 管理整體流程,再把需要創作或分析的工作交給 Crew。
建立提示詞優化工具需要微調模型嗎
通常不需要先微調。先用 RAG 提供規範與案例,再建立獨立測試集評估品質。只有資料格式穩定、數量足夠,而且 RAG 已無法改善時,才值得評估微調。
使用 CrewAI 一定要安裝 Docker Desktop 嗎
不一定。Docker Desktop 只是啟動 pgvector 的方便方式。CrewAI 本身不依賴 Docker,Linux 可以使用 Docker Engine,也能改用本機 ChromaDB 或遠端向量資料庫。
by Rain Chu 7 月 11, 2026 | 未分類
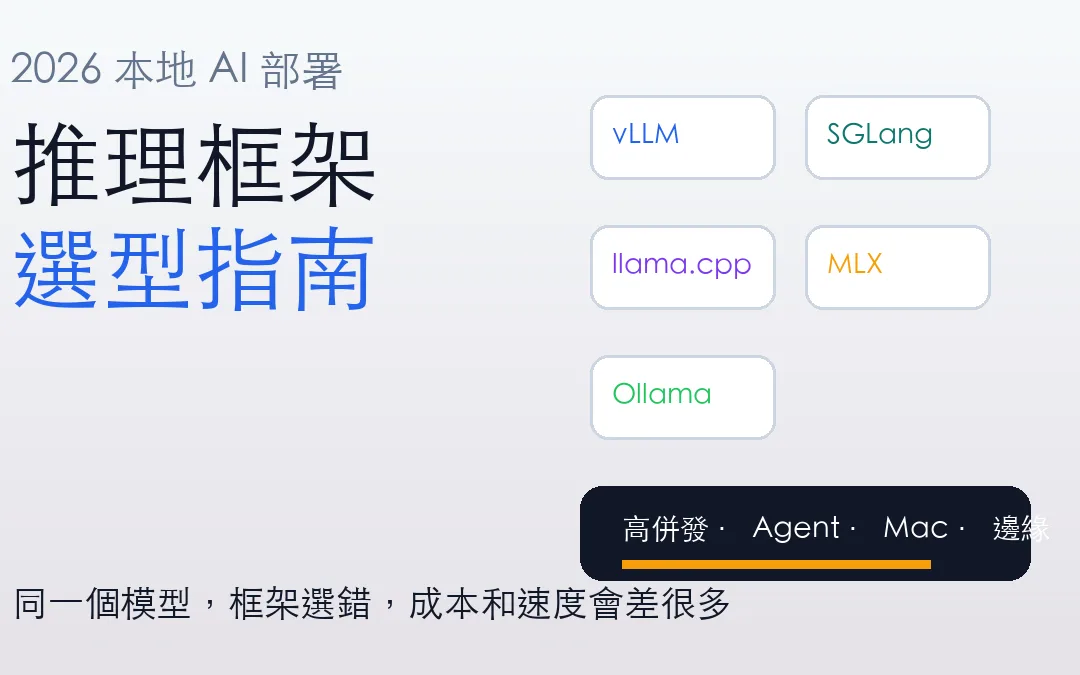
本地部署大模型到了 2026 年,問題已經不只是「模型要選哪一個」。同一張顯卡、同一台 Mac、同一個模型,只要推理框架選錯,吞吐量、延遲、顯存使用率和維運成本都會差很多。
這也是為什麼 vLLM、SGLang、llama.cpp、MLX、Ollama 這五個工具會被放在一起比較。它們不是同一類產品的不同包裝,而是對應不同部署場景的五種答案。選對框架,比盲目追更大參數更實際。
先講結論
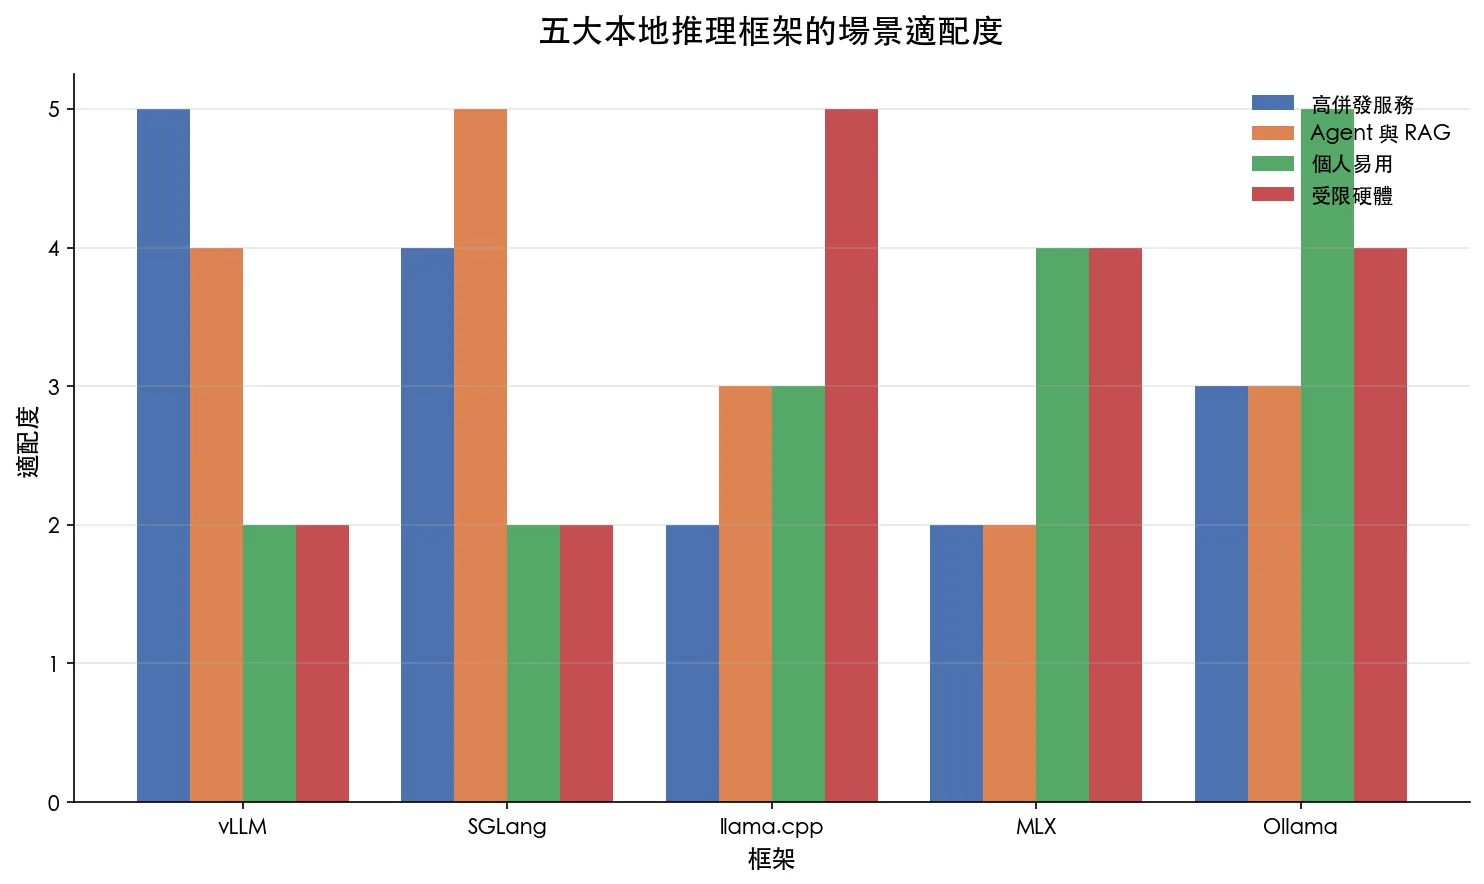
如果你要做高併發 API 服務,先看 vLLM。如果你在做 AI Agent、RAG、多輪工具呼叫,SGLang 很值得研究。如果你要跨平台、邊緣設備、低資源環境,llama.cpp 仍然是最靈活的選擇,如果你主要用 Apple Silicon,MLX 是最貼近硬體的路線。如果你只是想快速讓團隊或個人跑起來,Ollama 依然是最省心的入口。
五個框架的定位差異
框架 核心強項 適合場景 不適合情況 vLLM PagedAttention、Continuous Batching、高吞吐 生產 API、多使用者併發、GPU 服務 個人桌機快速試模型 SGLang RadixAttention、KV Cache 重用、結構化輸出 Agent、RAG、多輪對話、JSON 輸出 只想一鍵跑模型 llama.cpp GGUF、生態成熟、跨平台 CPU、邊緣設備、Mac、Windows、Linux、嵌入式 大規模高併發服務 MLX Apple Silicon 統一記憶體最佳化 M 系列 Mac、本地研究、Mac 開發者 NVIDIA GPU 伺服器 Ollama 安裝簡單、模型管理方便、API 友善 個人使用、團隊內部工具、快速 Demo 需要極致吞吐與深度客製
vLLM:高併發服務優先
vLLM 的代表性技術是 PagedAttention,可以把它理解成用作業系統管理記憶體的思路來管理 KV Cache,讓不同長度的請求不會浪費大量顯存,再加上 Continuous Batching,當某個請求完成後,新請求可以馬上進入批次,不必等整批全部結束。
所以 vLLM 最適合放在需要吞吐量的地方,例如公司內部模型 API、客服系統、多人同時使用的知識庫、需要穩定服務層的產品,你如果正在評估顯卡工作站,也可以對照我之前整理的 RTX PRO 6000 Blackwell 選購分析 ,因為推理框架和硬體規格要一起看才有意義。
SGLang:Agent 和 RAG 的效率選擇
SGLang 的重點不只是跑得快,而是能把複雜互動流程裡重複的上下文計算省下來,它的 RadixAttention 對多輪對話、RAG、知識庫查詢、Agent 工具呼叫很有價值,因為這些場景常常有大量共用前綴和重複上下文。
如果你的應用是「使用者問一句,模型答一句」,SGLang 的優勢不一定完全發揮。但如果你要處理多步驟推理、固定系統提示、文件檢索、JSON 格式化輸出,它會比一般推理框架更貼近 Agent 工程需求。
llama.cpp:跨平台與低資源環境的底座
llama.cpp 最大的價值是能跑在很多地方,從 Mac、Windows、Linux,到 CPU-only、小型邊緣設備、GGUF 量化模型,它提供的是一種很穩的本地推理底座,你不一定拿它做高併發生產 API,但它很適合實驗、嵌入式、離線環境、低成本部署。
如果你關心本地離線模型,之前整理過 gpt-oss 本地離線運行 ,那篇的思路也可以放到 llama.cpp 生態來看。
MLX:Apple Silicon 使用者要特別看
MLX 是 Apple Silicon 上很有意思的選擇。M 系列晶片的統一記憶體架構,讓 CPU、GPU 可以更有效率地共享資料,MLX 的價值就在於它不是把 Mac 當成一般電腦硬跑,而是更貼近 Apple 自家的硬體特性。
如果你手上是 Mac Studio、MacBook Pro 或其他 M 系列設備,MLX 適合拿來做本地研究、模型微調實驗、小型推理服務。它不是 NVIDIA 伺服器的替代品,但在 Mac 生態裡,這條路線會越來越重要。
Ollama:最容易讓人開始用
Ollama 的優勢不是極致效能,而是降低使用門檻。安裝、拉模型、切模型、提供本地 API,整個體驗很適合個人、教學、內部工具和快速 Demo。對很多團隊來說,先用 Ollama 把流程跑通,比一開始就追求 vLLM 的生產級架構更務實。
如果你要把 Ollama 放到內網或 AI Server 上,可以看 Ollama 遠端連線教學 。如果你想把開發環境成本壓低,也可以參考 LM Studio 與 Ollama 的零 API 成本開發環境 。
不要只選一個,混合部署更實際
真正成熟的部署,不一定是一個框架包打天下。比較實際的做法是分層:個人和內部 Demo 用 Ollama,Mac 研究環境用 MLX,跨平台和邊緣設備用 llama.cpp,RAG 和 Agent 後端看 SGLang,高併發正式服務再交給 vLLM。
如果你的硬體是 DGX Spark 或其他 AI Server,也可以把 DGX Spark GB10 Ollama 最佳設定 當作入口,再逐步把高併發服務拆到更專業的推理框架。
我的選型建議
個人開發者:先用 Ollama,真的需要跨平台或量化控制,再補 llama.cpp。
Mac 使用者:Ollama 做入口,MLX 做進階研究和 Apple Silicon 最佳化。
企業內部知識庫:先確認 RAG 架構和上下文重用需求,再評估 SGLang。
正式 API 服務:vLLM 是第一優先,特別是多使用者併發和 GPU 成本敏感時。
邊緣設備或離線場景:llama.cpp 的彈性仍然很難取代。
2026 年的本地 AI 部署,重點會從「能不能跑」走向「跑得是否有效率」。模型能力很重要,但推理框架決定了你花出去的硬體成本能不能真正轉成服務能力。選型時不要只看 benchmark,要看你的流量模式、硬體環境、維運能力和未來要不要接 Agent 工作流。
FAQ
本地大模型推理框架要先學哪一個?
一般使用者先學 Ollama,工程師再補 llama.cpp。需要生產服務時,再研究 vLLM 或 SGLang。
vLLM 和 SGLang 差在哪裡?
vLLM 強在高併發吞吐和生產服務,SGLang 更適合多輪對話、RAG、Agent 和重複上下文很多的流程。
Mac 使用者該選 MLX 還是 Ollama?
想快速跑模型先用 Ollama,想深入 Apple Silicon 最佳化和研究實驗,再看 MLX。
llama.cpp 還值得學嗎?
值得。它在 GGUF、量化、跨平台、CPU 和邊緣設備上仍然非常重要,是本地模型生態的底層工具之一。
by Rain Chu 7 月 8, 2026 | Agent , AI
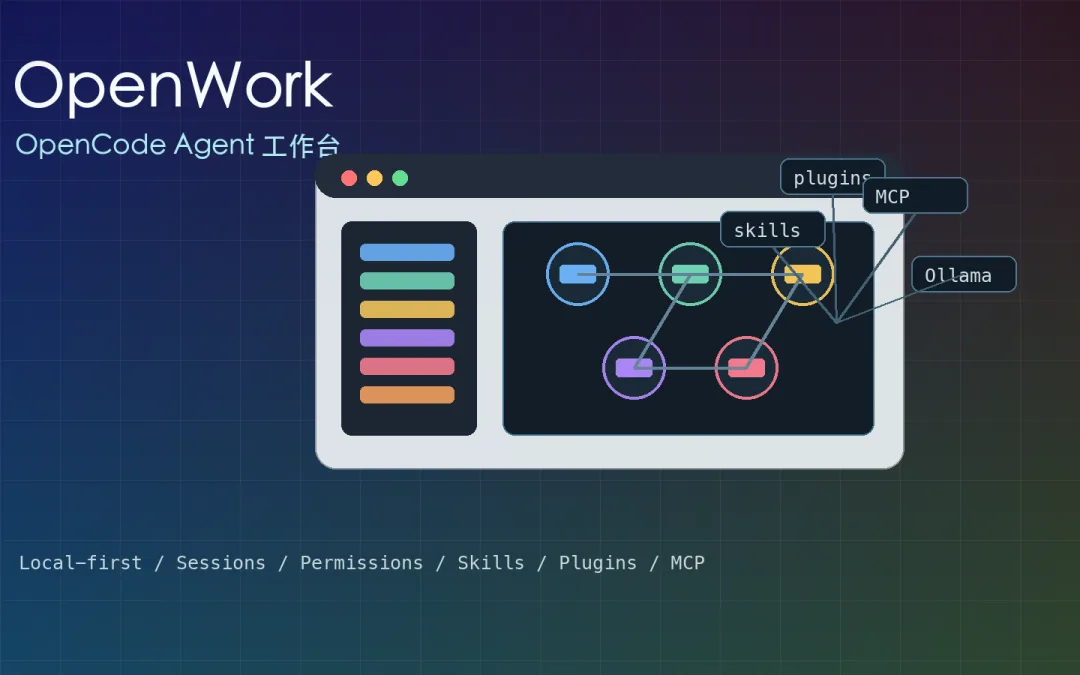
OpenCode 和 OpenWork 這組工具,真正值得看的地方不是「又一個 Claude Code 替代品」而已,而是它把 AI Agent 從純命令列往桌面工作台推了一步, OpenCode 負責 agentic coding 的核心能力,OpenWork 則把工作目錄、Session、Skill、Plugin、MCP、權限確認和遠端 worker 包成比較容易操作的圖形介面。
這條路線剛好踩在很多人的痛點上:Claude Code 好用,但成本、封閉性和模型選擇會卡住;Codex 很適合開發工作,但一般辦公流程、跨工具流程、團隊共享設定,還需要另一層產品化介面, OpenWork 的企圖就是把 opencode 這套底層能力包成「可以給團隊重複使用的 Agent 工作流」。
如果你之前已經在看 OpenCode 如何使用本地端模型 ,這篇可以當成下一步:不只讓模型接進來,而是把 skills、plugins、MCP 和權限流程一起整理成可操作的工作台。
OpenWork 是 opencode 的桌面層,不是另一個單純聊天 App
OpenWork 官方把自己定位成 Claude Cowork 和 Codex 的開源替代方案,它是一個 local-first 的桌面 app,背後 powered by opencode 你可以在本機跑 host mode,也可以用 client mode 連到既有 OpenCode server, 之後透過 UI 管理 session、看 streaming event、處理 permission request、管理 templates、安裝 skills 和 plugins。
這個定位很重要。OpenWork 不是要取代 OpenCode,而是把 OpenCode 原本比較偏開發者的 CLI 體驗,變成更像工作台的產品。OpenCode 擅長讀檔、改檔、跑工具、處理任務;OpenWork 則負責讓這些能力變得可視化、可審核、可分享。
這也是我覺得它和 用 AI 組一家公司 那篇可以放在一起看:真正有價值的不是單一模型多會回答,而是能不能把一套工作流程產品化,讓人、Agent、工具和權限一起運作。
OpenCode 和 OpenWork 的分工
這兩者的分工:
項目 OpenCode OpenWork 核心角色 AI coding agent 與 CLI/Server 核心 桌面工作台與協作介面 使用者體驗 偏工程師、命令列、設定檔 偏圖形介面、session、權限與模板 擴充方式 plugins、agents、SDK、生態資源 skills manager、plugins、MCP、templates 適合場景 開發、專案自動化、終端機工作流 把 Agent 流程包成團隊可重複使用的工作台
OpenWork README 裡有一句很關鍵:它是 ejectable 意思是就算 UI 還沒包到某個能力,只要底層 OpenCode 能做,理論上還是可以回到底層去做。這是開源工具很重要的特性,因為你不會被單一 UI 的產品進度完全卡死。
安裝與模式:先分清楚桌面 App、Host mode、Client mode
OpenWork 有幾種使用方式。最直覺的是下載桌面 app;如果你想自己 build,就要準備 Node.js、pnpm、Bun、Rust/Tauri、OpenCode CLI 官方 source build 流程大致是:
git clone https://github.com/different-ai/openwork
cd openwork
git checkout dev
pnpm install --frozen-lockfile
pnpm dev
如果只想跑 CLI host,也可以用 OpenWork Orchestrator:
npm install -g openwork-orchestrator
openwork start --workspace /path/to/workspace --approval auto
這裡要注意一件事:OpenWork 的 Host mode 會在本機跑 host stack,預設綁在 127.0.0.1 Client mode 則是連到既有的 OpenCode server,如果你看到 ready 是灰色、New task 不能按,第一個方向不是懷疑模型,而是檢查工作目錄、host stack、OpenCode server、provider key 或本地模型連線是否真的準備好。
Skills、Plugins、MCP:OpenWork 真正有用的地方
OpenWork 的 Skills manager 可以列出 `.opencode/skills`,也能把本地 skill folder 匯入到 `.opencode/skills/<skill-name>` 這個方向很像 Claude Code / Codex 的 skills 概念:把常用工作流程寫成可重複使用的操作說明,讓 Agent 每次做事不用從零開始猜。
如果你站上看過 用 skill-creator 建立 Skill ,OpenWork 這裡的邏輯也很接近:與其每次都寫一長串 prompt,不如把工作流程變成可安裝、可分享、可版本化的能力。
Plugin 則是 OpenCode 的原生擴充方式。OpenWork 會讀寫 `opencode.json`,Project scope 在工作目錄的 `opencode.json`,Global scope 通常在 `~/.config/opencode/opencode.json`。
awesome-opencode 這個 repo 則像是生態目錄,整理了 plugins、themes、agents、projects 和 resources 它不是核心工具,但很適合用來觀察 opencode 生態正在長出哪些周邊能力。
Build Mode 和 Plan Mode:不要一開始就讓 Agent 放手改
OpenCode 這類 agentic tool 最容易出問題的地方,是使用者還沒搞清楚任務邊界,就直接讓 Agent 進入執行狀態。比較穩的做法是先用 Plan Mode 讓它讀資料、拆任務、確認工具與風險,再進 Build Mode 讓它動手。
我會把它想成兩層:
Plan Mode :先觀察、讀檔、列步驟、找不確定性、提出執行順序。Build Mode :開始改檔、跑命令、安裝依賴、呼叫工具、產出結果。
這和 Claude Code Workflow 裡的做法一致:先讓 Agent 把路線講清楚,再授權它動手。
AI Agent 的效率不是靠更衝,而是靠每一步都能回頭檢查。
本地模型與 Ollama:重點在 provider 設定,不是只裝好模型
很多人以為「Ollama 已經能跑模型」就等於 OpenWork 會自動看到它,但中間還差 provider 設定、base URL、模型名稱,以及 OpenCode / OpenWork 讀取設定檔的位置。
原則上,你要確認三件事:
Ollama server 已經在跑,常見位置是 `http://localhost:11434`,遠端機器則要確定防火牆與 bind address。
OpenCode 的 provider 設定有指到 Ollama 或 OpenAI-compatible endpoint。
OpenWork 使用的 workspace / dev-mode / global config,和你實際編輯的設定檔是同一份。
這部分可以搭配 Ollama 遠端連線教學 和 LM Studio 與 Ollama 的零 API 成本環境 一起看 OpenWork 不是魔法入口,它還是要靠底層 provider 設定把模型接起來。
Token 成本:免費模型不等於無限使用
免費通常代表某段時間、某個額度、某個服務條款下不用付費,不代表可以無限燒,也不代表 latency、rate limit、上下文長度和品質都沒有代價。
OpenCode / OpenWork 這種工具特別容易消耗 token,因為 Agent 會讀檔、反覆規劃、呼叫工具、看輸出、再修正你讓它處理一個大型 workspace,成本不是只有最後回答那幾百字,而是整個工作循環。
所以比較實際的策略是:
簡單查詢與短任務用便宜或本地模型。
高風險修改、跨檔案重構、複雜判斷再用強模型。
能寫成 skill / template 的流程就固化,減少每次重新解釋。
先 Plan 後 Build,避免 Agent 一路試錯燒成本。
Windows 使用者要先注意的幾個坑
Windows 問題不少,這也很符合這類 Tauri / Node / CLI 混合工具的現況。
OpenWork README 也有提到,Windows access 有一部分是透過 paid support plan;source build 則會牽涉 Node、pnpm、Bun、Rust、Tauri 和 OpenCode CLI。這不是一般雙擊安裝就結束的輕工具。
Ready 灰色 :先檢查 host stack 是否啟動、workspace 是否選對、provider 是否可用。New task 灰色 :通常表示前置狀態未完成,例如沒有有效 session、工作目錄或 worker 尚未 ready。nul 檔案問題 :Windows 下 `nul` 是特殊裝置名,如果工具誤產生同名檔,刪除會很麻煩。這種問題要優先回報 issue,並避免在重要目錄直接測不穩定版本。`.config` 目錄看起來不對 :要確認你看的到底是 OpenCode global config、workspace config,還是 dev-mode 隔離狀態。
這裡我會建議用比較保守的方式測:先開一個乾淨測試資料夾,不要直接指到重要專案;先確認 session、provider、permission、簡單讀寫任務都正常,再把 OpenWork 放進真正的工作流程。
OpenWork 適合誰?
OpenWork 現階段比較適合三種人。
第一種是想把 OpenCode 圖形化的人。 你已經接受 agentic coding,但希望有 session、permission、skills、plugins 的視覺工作台。第二種是想把 Agent 工作流交給團隊的人。 Templates、skills、remote sharing 這些能力,重點都是讓流程可以重複與分享。第三種是正在比較 Claude Code、Codex、OpenCode 生態的人。 OpenWork 讓 opencode 不只停留在 CLI,而是開始往產品化入口走。
但如果你現在只想要一個穩定、少設定、打開就能工作的辦公 AI,OpenWork 可能還會讓你覺得太工程化。它的價值在於可控與可擴充,不在於完全隱藏複雜度。
資源整理
截至我整理資料時,OpenWork GitHub repo 約 1.6 萬 stars,awesome-opencode 約 8 千多 stars 這代表生態正在被快速關注,但也代表文件、Windows 體驗、plugin 相容性和錯誤處理還會持續變動。用它之前要有「早期開源工具」的心理預期。
OpenWork 把 OpenCode 從工具變成工作台
OpenCode 已經回答了「AI Agent 能不能在 terminal 裡幫我做事」;OpenWork 想回答的是下一題:「這套能力能不能被包成一個可視化、可分享、可審核的工作台?」
現階段最好的用法,是先用 OpenCode 跑穩本地模型、provider、skills 和 plugins,再用 OpenWork 管理 session、權限、template 與團隊共享流程。
OpenWork 的重點不是多一個聊天視窗,而是讓 opencode 的 Agent 能力開始變成「可交付的工作流程」。這會是 2026 年 AI 工具很重要的一條線。
FAQ
OpenWork 是什麼?
OpenWork 是 powered by opencode 的開源桌面工作台,讓使用者在本機或遠端 server 上管理 AI Agent session、skills、plugins、MCP、templates 與權限確認。
OpenWork 和 OpenCode 有什麼差別?
OpenCode 是底層 AI coding agent 與 CLI/Server 核心;OpenWork 是圖形化桌面層,負責把 session、權限、skills、plugins、templates 與工作目錄變得更容易操作。

近期留言