by Rain Chu 4 月 26, 2025 | Python , 程式
UIAutoDev
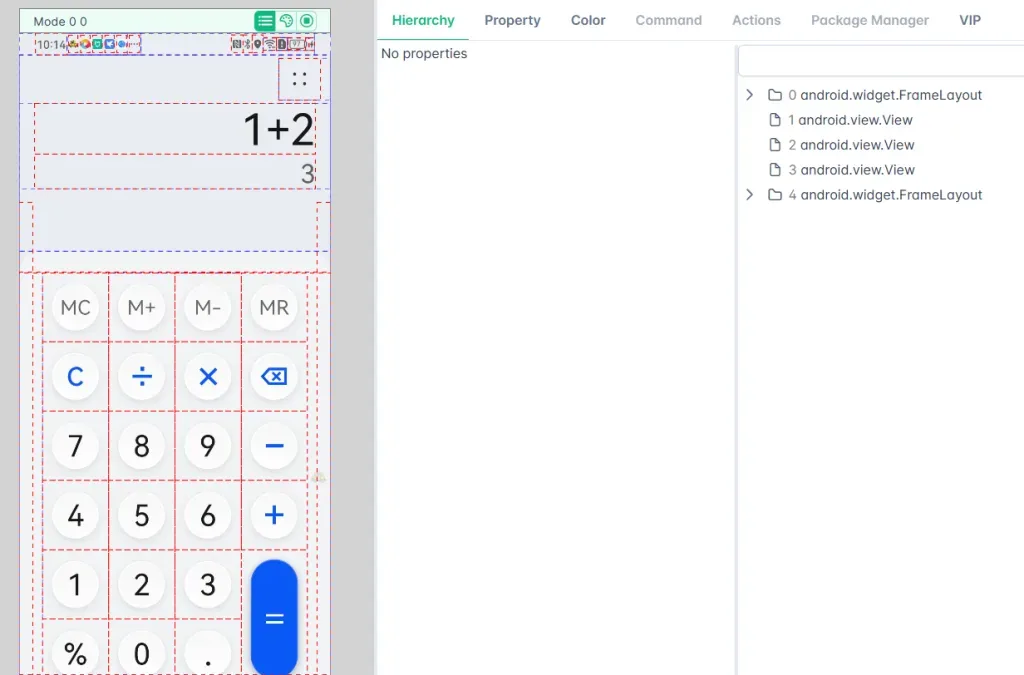
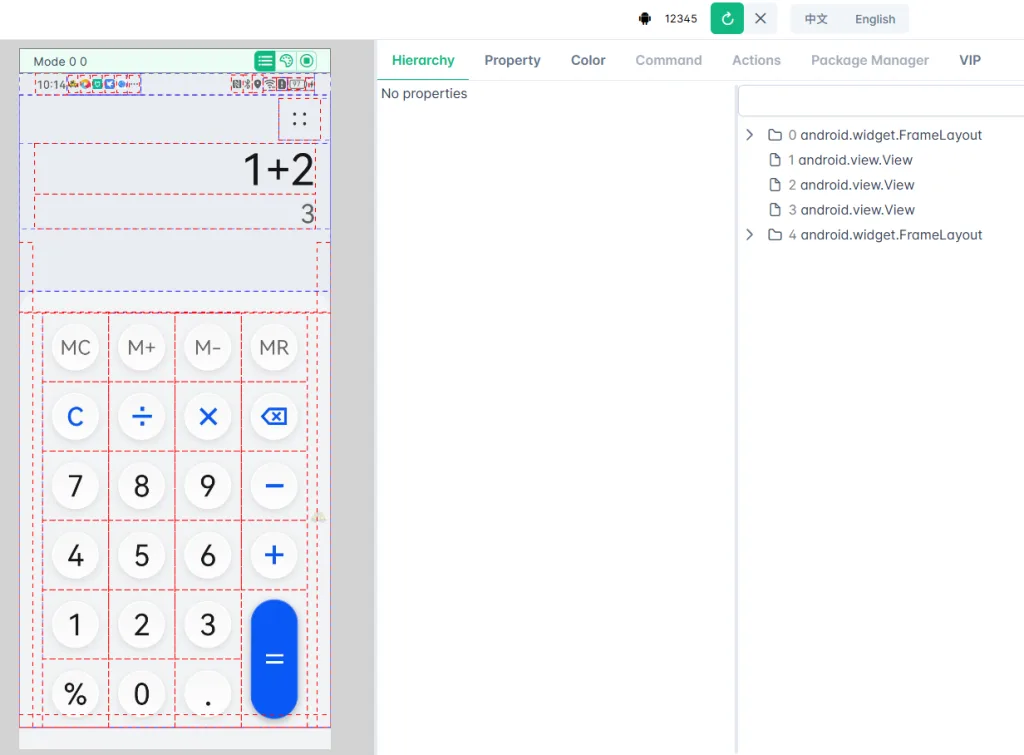
UIAutoDev UI DEMO 🔧 UIAutoDev 的核心特色
1. 支援 Android 和 iOS 平台
UIAutoDev 同時支援 Android 和 iOS 裝置的 UI 元素檢視與操作。對於 iOS,用戶需自行啟動 WebDriverAgent(WDA)服務,以實現與裝置的連接。
2. 直觀的控件選擇與屬性檢視
透過滑鼠點選應用程式中的控件,UIAutoDev 會即時顯示該元素的屬性資訊,如 resource-id、text、class 等,並在控件樹中高亮顯示,方便用戶精確定位。
3. 自動生成 XPath 選擇器
UIAutoDev 能夠根據選取的控件,自動生成多個 XPath 選擇器,並標示每個選擇器匹配的元素數量,協助用戶選擇最合適的定位方式。
4. 色彩分析與坐標微調
工具提供找色功能,允許用戶獲取指定位置的 RGB 和 HSB 色值。同時,透過方向鍵微調坐標,精確定位需要操作的區域,提升自動化腳本的準確性。
🚀 安裝與使用指南
1. 安裝 Python 環境
確保系統已安裝 Python 3.8 或以上版本。
2. 安裝 UIAutoDev
在終端機中執行以下命令:
3. 啟動 UIAutoDev
安裝完成後,執行以下命令啟動工具:
啟動後,瀏覽器將自動打開 UIAutoDev 的網頁介面。
4. 連接裝置
Android :啟用開發者選項並允許 USB 偵錯,使用 USB 或 Wi-Fi 連接裝置。iOS :啟動 WebDriverAgent(WDA)服務,並確保裝置與電腦在同一網路下。
5. 使用工具進行 UI 元素定位
在網頁介面中選擇已連接的裝置。
點擊「刷新」按鈕,同步裝置當前畫面。
使用滑鼠點選畫面中的控件,查看其屬性資訊,並在右側控件樹中進行導航。
利用自動生成的 XPath 選擇器,快速編寫自動化腳本。
🧪 實際應用範例
可以先看DEMO
以下是一段使用 uiautomator2 與 UIAutoDev 結合的 Python 腳本範例:
import uiautomator2 as u2

# 連接到裝置
d = u2.connect()

# 啟動應用程式
d.app_start("com.example.app")

# 點擊指定的控件
d(resourceId="com.example.app:id/button").click()

# 輸入文字
d(resourceId="com.example.app:id/input").set_text("測試輸入")

# 關閉應用程式
d.app_stop("com.example.app")
透過 UIAutoDev 提供的控件屬性資訊,您可以輕鬆取得 resource-id 等屬性,快速編寫上述腳本。
參考資料
https://testerhome.com/topics/40069
by Rain Chu 3 月 27, 2025 | Python , 程式
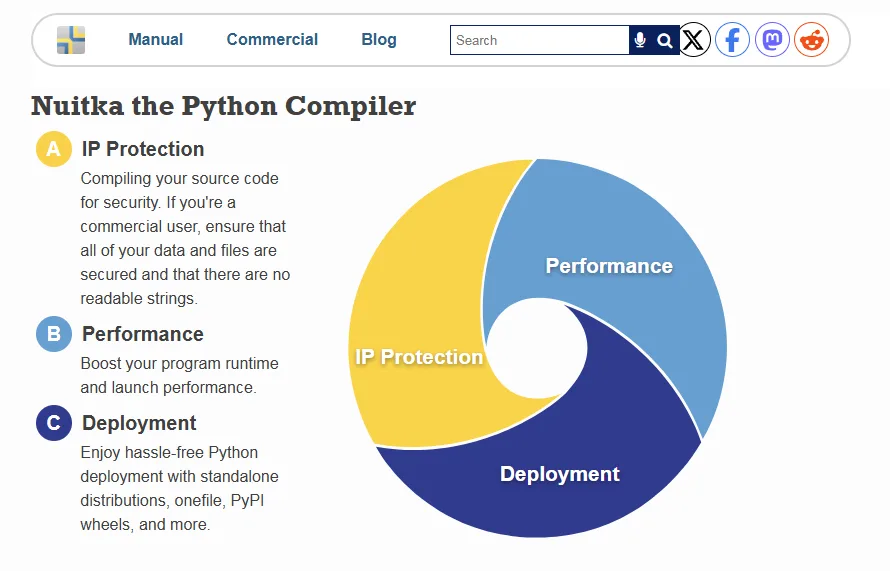
當你在開發 Python 時,將程式轉換為可執行檔案(如 .exe)並提升執行效率是許多開發者關心的議題,Nuitka 是一款大家都推薦的 Python 編譯器,能夠將 Python 原始碼編譯為 C 語言,進而生成高效的可執行檔案,今天來介紹 Nuitka 的安裝、封裝流程、靜態檔案,與相依套件的處理,以及常見問題與性能優化建議,讓即使是初學者也能輕鬆上手。
1. 安裝與執行封裝
安裝 Nuitka
安裝 C++ 編譯器 :Nuitka 需要 C++ 編譯器來編譯生成的 C 程式碼。在 Windows 系統上,推薦安裝 MinGW64。安裝 Nuitka :使用 pip 安裝 Nuitka:
執行封裝
假設您的主程式為 main.py,可以使用以下命令將其封裝為可執行檔案:
nuitka --standalone --mingw64 --enable-plugins=tk-inter --disable-console --remove-output --onefile --output-dir=output main.py 上述命令的參數說明:
--standalone:生成獨立的可執行檔案,包含所有相依套件。--mingw64:使用 MinGW64 作為編譯器。--enable-plugins=tk-inter:啟用 tkinter 插件,根據實際使用的套件啟用相應插件。--disable-console:隱藏執行時的控制台視窗,適用於 GUI 應用程式。--remove-output:在編譯完成後移除中間產物。--output-dir=output:指定輸出目錄為 output。–onefile:如果希望輸出為單一 .exe 檔案
如果是要用 Visual Studio C++ 來封裝的話可以改用
nuitka --standalone --msvc=latest --enable-plugins=tk-inter --disable-console --remove-output --output-dir=output main.py 2.靜態檔案的處理
在某些應用中,可能需要包含額外的靜態檔案(如圖片、配置檔案)。Nuitka 提供了 --include-data-dir 參數來處理這些檔案:
此命令將當前目錄下的 static 資料夾包含到生成的可執行檔案中,並在執行時可正常訪問。
3.相依套件的處理
Nuitka 會自動檢測並包含大多數的相依套件。然而,對於某些特殊的套件,可能需要手動啟用相應的插件。例如,若您的程式使用了 PySide6,則需要在編譯時啟用該插件:
您可以使用 nuitka --plugin-list 命令查看所有可用的插件列表。
4.常見問題的處理
Nuitka 在首次編譯大型專案時可能需要較長時間。為了加快編譯速度,可以安裝 ccache 來進行編譯快取。
由於 Nuitka 會將所有相依套件包含在內,生成的可執行檔案可能較大。可以嘗試使用 --onefile 參數將所有內容打包成單一檔案,或使用壓縮工具對生成的檔案進行壓縮。
5.關於速度的優化
Nuitka 通過將 Python 程式編譯為 C 語言,通常能提升程式的執行效率。然而,實際的性能提升取決於程式的結構和內容。為了獲得最佳性能,建議:
優化原始碼 :確保程式碼中沒有不必要的計算和冗餘。使用內建函數 :盡可能使用 Python 的內建函數,因為它們通常經過高度優化。避免過度使用動態特性 :如 eval、exec 等,這些可能影響編譯器的優化能力。
6.🌟使用 Nuitka GUI 友善介面
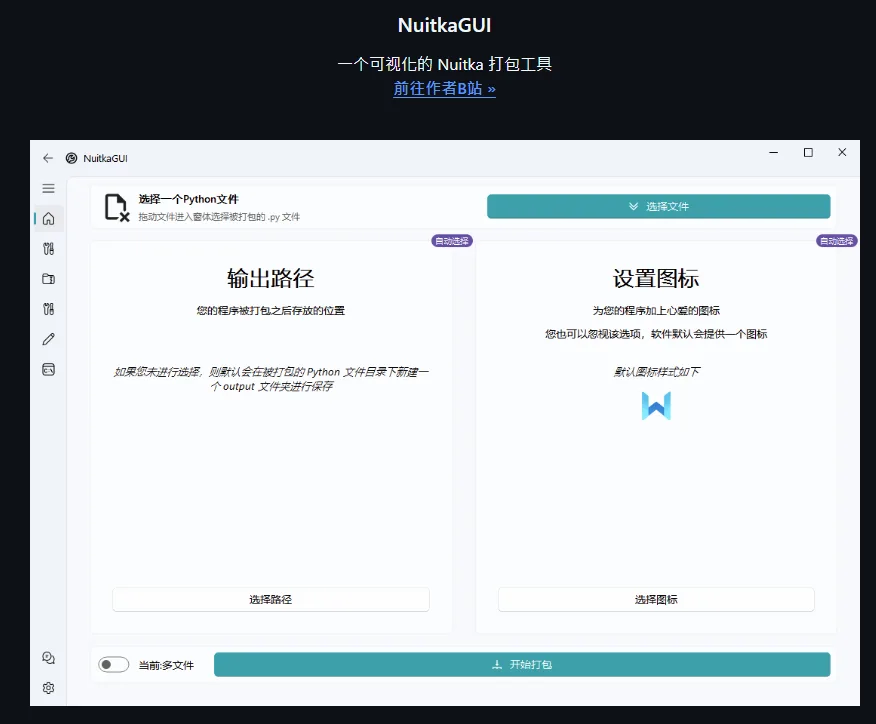
因為既指令很麻煩,推薦使用 Nuitka GUI,這是一款直覺且操作簡單的圖形介面工具。
Nuitka 官方 GUI 安裝:
開啟 Nuitka GUI:
或是用開源的 GUI
https://github.com/271374667/NuitkaGUI
參考資料
https://nuitka.net
by Rain Chu 2 月 20, 2025 | PHP , 程式
什麼是 OpenTBS?
OpenTBS(Open Template-Based Substitution)是一個基於 PHP 的插件,允許開發者使用 OpenTBS 在 Office Open XML(如 .docx、.xlsx、.pptx)以及 OpenDocument 格式(如 .odt、.ods、.odp)的範本中動態插入數據。它基於 TBS(TinyButStrong)引擎,並提供了一種靈活且易於使用的方法來生成動態文件。
為何選擇 OpenTBS?
無需額外安裝 Office 軟體 :OpenTBS 直接操作 Office 文件格式,無需安裝 Microsoft Office 或 LibreOffice。輕量級 :僅需一個 PHP 文件,即可輕鬆集成到現有項目。模板驅動 :允許使用標準的 Office 應用程式來設計範本,無需學習額外的標記語言。支持多種格式 :可處理 .docx、.xlsx、.pptx、.odt 等格式,適用於多種場景,如報表、合同、發票等。
安裝 OpenTBS
OpenTBS 是一個 PHP 插件,可通過下載或使用 Composer 來安裝。
下載 Zip 檔
前往 官方網站 下載 tbs_class.php 和 tbs_plugin_opentbs.php。
將這兩個文件放入你的 PHP 項目中。
GitHub
說明文件
DEMO 網站
基本使用方法
以下是使用 OpenTBS 生成 Word(.docx)文件的基本示例。
1. 建立 Word 範本
在 Word (.docx) 文件中,使用 [] 來標記動態數據,例如:
2. 編寫 PHP 代碼
require_once('tbs_class.php');
require_once('tbs_plugin_opentbs.php');

// 創建 TBS 實例
$TBS = new clsTinyButStrong;
$TBS->Plugin(TBS_INSTALL, OPENTBS_PLUGIN);

// 載入範本文件
template = 'template.docx';
$TBS->LoadTemplate($template, OPENTBS_ALREADY_UTF8);

// 設定變數
$data = array(
    'company_name' => 'ABC 公司',
    'date' => date('Y-m-d'),
    'client_name' => '王小明'
);
$TBS->MergeField('var', $data);

// 輸出生成的文件
$output_file = 'output.docx';
$TBS->Show(OPENTBS_DOWNLOAD, $output_file);
exit;
圖片的進階用法
在 Word 模板中設定圖片
打開 Word (.docx) ,選擇一張要被替換的圖片,
設定 TBS 標籤(放入圖片的「替代文字」區域): 選取圖片 → 右鍵 → 圖片格式 在「替代文字」欄位輸入以下內容 :
[img.user_logo;ope=changepic] pic 是變數名稱,稍後在 PHP 代碼中會用到,這樣 OpenTBS 就知道這張圖片要被替換! 使用 OPENTBS_CHANGE_PICTURE 手動更換圖片
其他參數
要根據原始圖片的框架大小設計的話可以使用
其他 adjust 參數:
參數 說明 adjust=inside圖片自動調整以適應框架(推薦 ) adjust=samewidth圖片的寬度與模板圖片相同 adjust=sameheight圖片的高度與模板圖片相同 adjust=100%圖片維持原始大小
範例
[onshow.pic;ope=changepic;adjust=samewidth;default=current;tagpos=inside] 特殊關鍵字
onshow : 會直接使用php中的同名變數做替換
結論
OpenTBS 是一個強大且輕量的 PHP 插件,能夠讓開發者方便地生成 Word、Excel、PowerPoint 等格式的動態文件,特別適用於報表生成、合約填寫、數據輸出等應用場景,如果你的項目需要動態生成 Office 文檔,可以試試 OpenTBS,它將為你帶來極大的便利!
by Rain Chu 2 月 6, 2025 | Chrome 外掛 , 程式
Google Chrome 擴充功能 可以自訂瀏覽體驗並增加額外功能,但他的下載存放路徑藏的非常的深,以下是 Chrome 擴充功能的存放位置的詳細介紹:
Chrome 擴充功能存放位置
Windows 系統:
在 Windows 系統中,Chrome 擴充功能通常存放在以下路徑中:
C:\Users\[你的用戶名稱]\AppData\Local\Google\Chrome\User Data\Default\Extensions\
在這個文件夾中,每個擴充功能都有一個獨特的資料夾,名稱通常是由一串字母和數字組成的 ID。這個 ID 是擴充功能在 Chrome Web Store 的唯一標識。
macOS 系統:
在 macOS 系統中,Chrome 擴充功能的存放位置位於:
~/Library/Application Support/Google/Chrome/Default/Extensions/ 與 Windows 系統類似,每個擴充功能都有一個以擴充功能 ID 命名的文件夾。
Linux 系統:
在 Linux 系統中,Chrome 擴充功能的存放位置通常在:
~/.config/google-chrome/Default/Extensions/ 每個擴充功能的資料夾名稱也是由擴充功能的 ID 組成。
管理 Chrome 擴充功能
要管理已安裝的擴充功能,可以在 Chrome 瀏覽器中輸入 chrome://extensions/ 並按下 Enter 鍵。這將打開一個頁面,列出所有已安裝的擴充功能,你可以在這裡啟用、禁用或刪除擴充功能,在你打開「開發人員」功能後,可以讀取許多的詳細資訊。
by Rain Chu 1 月 23, 2025 | web , 行銷
Portaly 一款由台灣團隊「真實引擎」開發的社群微型網站工具,可以協助創作者在數分鐘內建立專屬的 Link-in-Bio 頁面,整合 Facebook、Instagram、YouTube 與 Podcast 等多個平台的連結
主要功能特色:
高度客製化的頁面設計:Portaly 提供多種佈景主題、配色和版面配置,使用者可以輕鬆打造符合個人品牌風格的頁面。
多樣化的經營工具:除了基本的連結整合,Portaly 還提供作品展示、商品導購、收集名單等功能,滿足創作者多元的需求。
銷售變現功能:創作者可以透過 Portaly 銷售數位商品,如線上課程、電子書、模板檔案等,並支援金流串接,協助創作者實現流量變現。
數據分析與追蹤:平台提供流量數據監控,讓使用者了解頁面訪問情況,進而優化行銷策略。
支援多語言介面:Portaly 支援繁體中文和英文介面,對中文市場的創作者特別友善。
方案選擇: Portaly 提供免費的基本方案,讓使用者可以建立功能完善的頁面。若需要更多進階功能,如無限區塊與分頁、自訂主題與配色、自訂網域、E-mail 名單收集等,則可選擇付費的頂級方案。
by Rain Chu 1 月 1, 2025 | GitHub , Windows
PowerToys 是一套由在 Windows 95 就開始用到現在的 Microsoft 開發實用工具集合,專為提高 Windows 使用者生產力和使用體驗而設計,PowerToys 提供了許多高效能的工具,幫助使用者完成日常任務,近年來,Microsoft 將其重新打造為開源專案,並為 Windows 10 和 Windows 11 提供支持。
PowerToys 在 Windows 10, 11 新增功能介紹
進階貼上(Advanced Paste)
此工具允許使用者將剪貼簿中的文字以所需格式貼上,並提供 AI 支援的選項來強化貼上功能。
Always On Top
使用此功能,您可以透過快捷鍵 Win + Ctrl + T 將視窗固定在其他視窗之上,確保重要視窗不被遮蓋。
PowerToys Awake
此工具可讓電腦保持清醒狀態,無需調整電源和睡眠設定,適合執行長時間任務時使用。
File Locksmith
此功能可檢查哪些檔案正在使用中,以及由哪些程序使用,方便管理檔案鎖定狀態。
主控件檔案編輯器(Hosts File Editor)
提供方便的方式來編輯包含網域名稱和相符 IP 位址的「Hosts」檔案,便於網路管理。
無框線的滑鼠(Mouse Without Borders)
允許使用相同的鍵盤和滑鼠與多部電腦互動,順暢地在電腦之間共用剪貼簿內容和檔案。
New+
此功能可讓您從檔案總管中的一組個人化範本建立檔案和資料夾,提升工作效率。
預覽(Peek)
允許您預覽檔案內容,而不需要開啟多個應用程式或中斷工作流程,選取檔案並使用快捷方式 Ctrl + 空格鍵 即可。
螢幕尺規(Screen Ruler)
螢幕尺規是一個實用工具,允許使用者快速測量螢幕上的像素,對於設計師和開發者來說特別有用。 只需按下快捷鍵 Win + Shift + M,即可啟動螢幕尺規,選擇測量方式,量度的像素將顯示在螢幕上。
PowerToys 的主要功能介紹:
1. FancyZones FancyZones 是一個窗口管理工具,讓使用者可以輕鬆定義自訂的視窗佈局。這對於需要多任務處理的人來說非常實用,例如在多螢幕或高解析度顯示器上,同時排列多個應用程式視窗。
功能亮點 :
設定自訂區域佈局
快速分配應用程式到區域
支持鍵盤快速操作
2. PowerToys Run 這是一個快速啟動器,類似於 macOS 的 Spotlight,可以幫助使用者快速找到應用程式、檔案,甚至執行系統命令。
功能亮點 :
即時搜尋結果
支持插件擴展
可啟動 URL、執行腳本
3. Keyboard Manager Keyboard Manager 是一個鍵盤重映射工具,讓使用者根據自己的需求修改鍵盤快捷鍵或重新定義按鍵。
功能亮點 :
支持單鍵和組合鍵重映射
適合想提升工作流程的使用者
4. Color Picker Color Picker 是一個顏色選取工具,特別適合設計師和開發者。使用者可以快速提取螢幕上任意位置的顏色,並獲得 HEX、RGB 等格式。
功能亮點 :
5. File Explorer Add-ons 這個工具提供了多種檔案預覽功能,讓使用者可以直接在檔案總管中檢視支援格式的內容,例如 SVG、Markdown 和 PDF 等。
功能亮點 :
6. Text Extractor Text Extractor 是一個 OCR 工具,允許使用者從圖片中提取文字。這在需要快速複製文件或截圖中的內容時特別有用。
功能亮點 :
7. Mouse Utilities 這是一組滑鼠輔助工具,幫助使用者更輕鬆地找到滑鼠指標或執行高精度點擊。
功能亮點 :
8. Image Resizer Image Resizer 是一個影像大小調整工具,可以直接在檔案總管中調整圖片大小,適合需要快速批次處理影像的使用者。
功能亮點 :
為什麼選擇 PowerToys?
免費且開源 :PowerToys 是一個完全免費的工具,並且基於開源社群開發,功能持續更新。高度客製化 :所有工具都可以根據使用者需求進行自訂設置。整合 Windows 生態系統 :與 Windows 的原生功能深度整合,使用者不需要額外安裝繁瑣的軟體。
結論
可以透過 GitHub PowerToys 頁面 下載並探索更多功能。


近期留言