by Rain Chu 2 月 14, 2022 | IOTA , wordpress , 加密貨幣 , 區塊鏈
by Rain Chu 2 月 8, 2022 | PHP , woocommerce , wordpress
WordPress Woocommerce 中,如果是 B2B 的網站或是會員限定的網站,通常會有一個需求,不能對來賓客戶顯示金額,登入後,也應該要對每一個不同的客戶顯示不同的金額,這邊文章先提供如何對沒有登入的客戶隱藏價格,之後再提供不同來賓顯示不同金額
作法很簡單,將以下的程式碼片段,貼到你的佈景主題的 functions.php 即可
// 對訪客隱藏價格
add_filter('woocommerce_get_price_html',function($price){
    if(!is_user_logged_in()){
        return '' ;
    }
    else {
        return $price; // 返回原價
    }});

add_filter('woocommerce_cart_item_price','__return_false');
add_filter('woocommerce_cart_item_subtotal','__return_false');
Woocommerce 如何對不同的使用者權限做價格控制
add_filter( 'woocommerce_get_price_html', function( $price ) {
if ( is_admin() ) return $price;
$user = wp_get_current_user();
$hide_for_roles = array( 'wholesale', 'wholesale-silver', 'wholesale-gold' );
// If one of the user roles is in the list of roles to hide for.
if ( array_intersect( $user->roles, $hide_for_roles ) ) {
return ''; // Return empty string to hide.
}
return $price; // Return original price
} );
add_filter( 'woocommerce_cart_item_price', '__return_false' );
add_filter( 'woocommerce_cart_item_subtotal', '__return_false' );
Woocommerce 如何對不同的類別中的商品做價格控制
add_filter( 'woocommerce_get_price_html', function( $price, $product ) {
if ( is_admin() ) return $price;
// Hide for these category slugs / IDs
$hide_for_categories = array( 'clothes', 'electronics' );
// Don't show price when its in one of the categories
if ( has_term( $hide_for_categories, 'product_cat', $product->get_id() ) ) {
return '';
}
return $price; // Return original price
}, 10, 2 );
add_filter( 'woocommerce_cart_item_price', '__return_false' );
add_filter( 'woocommerce_cart_item_subtotal', '__return_false' );
Woocommerce 如何對特別的商品做價格控制
add_filter( 'woocommerce_get_price_html', function( $price, $product ) {
$hide_for_products = array( 89, 125 );
if ( in_array( $product->get_id(), $hide_for_products ) ) {
return '';
}
return $price; // Return original price
}, 10, 2 );
add_filter( 'woocommerce_cart_item_price', '__return_false' );
add_filter( 'woocommerce_cart_item_subtotal', '__return_false' );
好用外掛推薦
by Rain Chu 11 月 18, 2021 | PHP , woocommerce , wordpress
WooCommerce 預設安裝好會在結帳畫面中,出現「配送道不同的地址」的選項,並且預設是勾選起來的,常常有客戶需要把這個選項關閉,或是隱藏他,做法很多種,我這邊是以複製該 template 到自己的子佈景主題中,然後修改 PHP 的程式碼為主
先複製 wp-content/plugins/woocommerce/templates/checkout/form-shipping.php 到 wp-content/themes/[themes-child]/woocommerce/checkout/form-shipping.php
sudo cp /var/www/html/wp-content/plugins/woocommerce/templates/checkout/form-shipping.php /var/www/html/wp-content/themes/themes-child/woocommerce/checkout/form-shipping.php
2. 修改 form-shipping.php 的內容,將預設選項移除,以及將整個欄位隱藏
原先的程式碼如下
	<h3 id="ship-to-different-address">
			<label class="woocommerce-form__label woocommerce-form__label-for-checkbox checkbox">
				<input id="ship-to-different-address-checkbox" class="woocommerce-form__input woocommerce-form__input-checkbox input-checkbox" <?php checked( apply_filters( 'woocommerce_ship_to_different_address_checked', 'shipping' === get_option( 'woocommerce_ship_to_destination' ) ? 1 : 0 ), 1 ); ?> type="checkbox" name="ship_to_different_address" value="1" /> <span><?php esc_html_e( 'Ship to a different address?', 'woocommerce' ); ?></span>
			</label>
		</h3>
修改後的程式碼如下
	<h3 id="ship-to-different-address" style="display:none" >
			<label class="woocommerce-form__label woocommerce-form__label-for-checkbox checkbox">
				<input id="ship-to-different-address-checkbox" class="woocommerce-form__input woocommerce-form__input-checkbox input-checkbox" <?php checked( apply_filters( 'woocommerce_ship_to_different_address_checked', 'shipping' === get_option( 'woocommerce_ship_to_destination' ) ? 1 : 0 ), 0 ); ?> type="checkbox" name="ship_to_different_address" value="0" /> <span><?php esc_html_e( 'Ship to a different address?', 'woocommerce' ); ?></span>
			</label>
		</h3>
其中在 <h3> tag 中,加入 style=”display:none” ,在 ‘shipping’ === get_option 中,把傳回的數值調整成0,代表預設不會勾選,這樣就可以隱藏運送到不同的地址的選項了
參考資料
by Rain Chu 11 月 12, 2021 | woocommerce , wordpress
WooCommerce PDF Invoices & Packing Slips
解決 WooCommerce PDF Invoices & Packing Slips 無法顯示中文字
其實這套免費的 PDF 發票、撿貨單,超多人使用,但可惜的一點是沒法顯示亞洲的字型,但其實她們也都知道有這些問題,早就都留有解決方案,解決的步驟如下
1.原廠的解決方案
先看原廠的寫的中文支援解決方案文章 ,
2.建立template
將 Plugin 中的 wp-content/plugins/woocommerce-pdf-invoices-packing-slips/templates/Simple/ 下面的資料全部複製一份到 wp-content/themes/my-(child)theme-folder /woocommerce/pdf/my-template /
3.下載中文字型(ttf)
可以用原廠推薦中文字型 ,可以採用 adobe 或是 google 的開放字型,但要注意的是目前只支援 ttf 檔案格式的字型,下載完畢後要解壓縮並且放到 wp-content/themes/my-(child)theme-folder /woocommerce/pdf/my-template /fonts 中
4.修改 my-template 中的 style.css
找到 template 下的 style.css 並且多加入下面的程式碼
/* Load font */
@font-face {
    font-family: 'MyFont';
    font-style: normal;
    font-weight: normal;
    src: local('MyFont'), local('MyFont'), url(<?php echo $this->get_template_path(); ?>/fonts/myfont.ttf) format('truetype');
}
@font-face {
    font-family: 'MyFont';
    font-style: normal;
    font-weight: bold;
    src: local('MyFont Bold'), local('MyFont-Bold'), url(<?php echo $this->get_template_path(); ?>/fonts/myfont-bold.ttf) format('truetype');
}
@font-face {
    font-family: 'MyFont';
    font-style: italic;
    font-weight: normal;
    src: local('MyFont Italic'), local('MyFont-Italic'), url(<?php echo $this->get_template_path(); ?>/fonts/myfont-italic.ttf) format('truetype');
}
@font-face {
    font-family: 'MyFont';
    font-style: italic;
    font-weight: bold;
    src: local('MyFont Bold Italic'), local('MyFont-BoldItalic'), url(<?php echo $this->get_template_path(); ?>/fonts/myfont-bolditalic.ttf) format('truetype');
}
並且找到 style.css 中的 body 區段,並且將字型指向 MyFont
body {
	background: #fff;
	color: #000;
	margin: 0cm;
	font-family: 'MyFont';
	/*font-family: 'Open Sans', sans-serif;*/
	/* want to use custom fonts? http://docs.wpovernight.com/woocommerce-pdf-invoices-packing-slips/using-custom-fonts/ */
	font-size: 9pt;
	line-height: 100%; /* fixes inherit dompdf bug */
}
5.啟用新的 template
要回到進入外掛後台,並且在 template 中選剛剛建好的模板,並且啟用 Enable font subsetting,可以降低 PDF 文件大小
參考資料
相關文章
by Rain Chu 11 月 12, 2021 | PHP , woocommerce , wordpress
雖然說網路上開店最棒的優勢就是可以 24 x 7 的不間斷賺錢,但是如果是線下升級成線上的店家們,會需要配合公司政策,一天開店八小時,假日不開店或是配合結帳時間,月底不收單等
WooCommerce 實現關店的想法
建立關店時間表 依照時間表判斷是否要開店 關店的狀態是要把 WooCommerce 的訂單按鈕都關閉以及隱藏起來 顯示訊息告知使用者現在關店中 WordPress Plug or Themes PHP 撰寫
以下示範每個月25號到月底作帳時間內,不讓客戶下單的寫法
// 啟動商店的假日檔
add_action ('init', 'qqqtips_woocommerce_holiday_mode');

// Disable Cart, Checkout, Add Cart
// 將下單相關的按鈕都關閉
function qqqtips_woocommerce_holiday_mode() {
   //remove_action( 'woocommerce_after_shop_loop_item', 'woocommerce_template_loop_add_to_cart', 10 );
   //remove_action( 'woocommerce_single_product_summary', 'woocommerce_template_single_add_to_cart', 30 );
   //remove_action( 'woocommerce_proceed_to_checkout', 'woocommerce_button_proceed_to_checkout', 20 );
   //remove_action( 'woocommerce_checkout_order_review', 'woocommerce_checkout_payment', 20 );
	add_filter( 'woocommerce_is_purchasable', '__return_false'); //
   add_action( 'woocommerce_before_main_content', 'qqqtips_wc_shop_disabled', 5 );
   add_action( 'woocommerce_before_cart', 'qqqtips_wc_shop_disabled', 5 );
   add_action( 'woocommerce_before_checkout_form', 'qqqtips_wc_shop_disabled', 5 );
}


// Show Holiday Notice
// 每月25號關帳,次月1號打開
function qqqtips_wc_shop_disabled() {
	$qqq_today = number_format(date('d'));
	if( $qqq_today >= 25 && $qqq_today <= 31) {
		wc_print_notice( '店家已經關帳,請下個月再來!', 'error');
	}
}
參考資料
Open Close Store Hours for WooCommerce
相關文章
by Rain Chu 11 月 10, 2021 | woocommerce , wordpress
在 woocommerce 中,收到客戶的訂單,常常需要列印一張出貨訂單附給客戶,或者是寄一個EMAIL,裡面含有出貨明細,又或者是要用到物流,需要列印物流資訊,貼在紙箱外殼中,找了 一下好用的 woocommerce plugs 覺得這套簡單且功能強大,就拿出來推薦給大家下。
自動將發票 PDF 附加到 WooCommerce 電子郵件
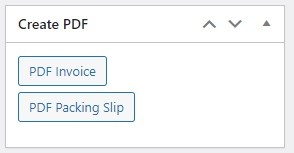
訂單可以建立PDF發票,以及檢貨單


近期留言