by Rain Chu | 6 月 26, 2024 | Linux, MariaDB, Ubuntu, 資料庫
今天來實做一個備份任務,要在 Ubuntu 上設定每日凌晨 4:00 自動備份 MariaDB 中的所有資料庫,我們可以使用 cron 和一個自定義的 Shell 腳本來完成這個任務,以下是詳細步驟和代碼:
步驟 1:創建備份腳本
先創建一個備份 Shell Script,這個腳本將備份所有資料庫並分開儲存。
1.在 /usr/local/bin 目錄下創建一個新的 Shell 腳本:
sudo nano /usr/local/bin/backup_mariadb.sh
2. Script 的內容指令如下
#!/bin/bash

# 設定資料庫的用戶名和密碼
DB_USER="your_db_user"
DB_PASSWORD="your_db_password"
DB_HOST="10.0.0.1"

# 設定備份儲存目錄
BACKUP_DIR="/path/to/backup/dir"
mkdir -p $BACKUP_DIR

# 獲取當前日期和時間
CURRENT_DATE=$(date +%Y-%m-%d-%H-%M-%S)

# 獲取所有資料庫名稱
DATABASES=$(mysql -h$DB_HOST -u$DB_USER -p$DB_PASSWORD -e "SHOW DATABASES;" | tr -d "| " | grep -v Database)

# 備份每個資料庫
for DB in $DATABASES; do
  if [[ "$DB" != "information_schema" && "$DB" != "performance_schema" && "$DB" != "mysql" && "$DB" != "sys" ]]; then
    BACKUP_FILE="$BACKUP_DIR/$CURRENT_DATE-$DB.sql"
    mysqldump  -h$DB_HOST -u$DB_USER -p$DB_PASSWORD --databases $DB > $BACKUP_FILE
  fi
done
其中要修改的有
- DB_HOST : 要改成自己的
- your_db_user : 資料庫中有備份權限的使用者 ID
- your_db_password : 密碼
- BACKUP_DIR=”/path/to/backup/dir” : 要改成你要存放的路徑,像是 /var/backup_db/
3.將 .sh 變成可執行擋
sudo chmod +x /usr/local/bin/backup_mariadb.sh
步驟 2:設置 Cron 任務
1.打開 cron
2.加入設定內容,要注意的是實間是主機時間,通常主機是 UTC+0 的時區,要注意轉換,才會是正確的當地時間,可以參考這篇
0 4 * * * /usr/local/bin/backup_mariadb.sh
這樣就會在每天的早上四點去備份資料庫了
加入每一個SQL檔案都可以被壓縮的功能
程式碼區塊要改成下面這一個
# 備份每個資料庫並壓縮
for DB in $DATABASES; do
  if [[ "$DB" != "information_schema" && "$DB" != "performance_schema" && "$DB" != "mysql" && "$DB" != "sys" ]]; then
    BACKUP_FILE="$BACKUP_DIR/$CURRENT_DATE-$DB.sql"
    ZIP_FILE="$BACKUP_DIR/$CURRENT_DATE-$DB.zip"
    mysqldump -h$DB_HOST -u$DB_USER -p$DB_PASSWORD --databases $DB > $BACKUP_FILE
    zip $ZIP_FILE $BACKUP_FILE
    rm $BACKUP_FILE
  fi
done
刪除舊資料
可以利用下面的指令,放在程式碼的最後面
# 刪除兩天前的備份文件
find $BACKUP_DIR -type f -name "*.zip" -mtime +2 -exec rm {} \;
需要改時間的話,只要修正 -mtime +2 ,把+2改成自己需要的時間
參考資料
https://help.ubuntu.com/community/CronHowto
by Rain Chu | 3 月 28, 2024 | Nginx, SERVER, wordpress
定義 proxy cache path
先找到設定檔,通常在
sudo nano /etc/nginx/nginx.conf
找到 http ,在他的配置中設定
http {
    proxy_cache_path /path/to/cache levels=1:2 keys_zone=my_cache:10m max_size=10g inactive=60m use_temp_path=off;

    ...
}
緩存配置
- 緩存文件儲存的路徑: /path/to/cache
- 緩存目錄的層級: 1:2
- 緩存區域的名稱和大小: my_cache:10m
- 緩存區域名稱: my_cache
- 緩存區域大小: 10MB
- 緩存的最大大小: 10GB
- 在指定的時間內沒有被訪問的緩存文件將被刪除: 60m
- 直接在緩存路徑上操作,而不是使用臨時路徑: off
詳細說明
緩存文件將儲存在指定的目錄中。您可以根據您的需求設置此路徑。
此設置控制緩存目錄的層級結構。例如,設置為 1:2 表示將使用兩個層級的目錄來儲存緩存文件。第一層級將包含 10 個子目錄,第二層級將包含 100 個子目錄。
此設置控制緩存區域的名稱和大小。緩存區域是緩存文件的分組。您可以根據您的需求設置多個緩存區域。
此設置控制緩存的最大大小。超過此大小時,最舊的緩存文件將被刪除。
此設置控制在指定的時間內沒有被訪問的緩存文件將被刪除。
修改設定檔,配置 proxy cache
找到 config 中的 server ,在裡面添加相關設定
server {
    listen 80;
    server_name yourdomain.com;

    location / {
        proxy_pass http://your_backend_server;
        proxy_cache my_cache;
        proxy_cache_revalidate on;
        proxy_cache_min_uses 1;
        proxy_cache_use_stale error timeout updating http_500 http_502 http_503 http_504;
        proxy_cache_lock on;
        proxy_cache_valid 200 302 10m;
        proxy_cache_valid 404 1m;
    }
}
反向代理配置
- 後端伺服器的地址: proxy_pass
- 此設置指定後端伺服器的地址。後端伺服器是 Nginx 將請求轉發到的伺服器。
- 使用之前定義的緩存區域: proxy_cache
- 此設置指定要使用的緩存區域。緩存區域是 Nginx 用於儲存靜態內容的區域。
- 啟用後,會在緩存過期時向後端伺服器驗證緩存內容是否仍然有效: proxy_cache_revalidate
- 此設置控制是否在緩存過期時向後端伺服器驗證緩存內容是否仍然有效。默認情況下,Nginx 將在緩存過期時直接使用緩存內容。
- 在緩存內容之前,請求必須達到指定的次數: proxy_cache_min_uses
- 此設置控制在緩存內容之前,請求必須達到指定的次數。這可以防止頻繁更新的內容被緩存。
- 在後端伺服器錯誤或超時時,使用舊的緩存數據: proxy_cache_use_stale
- 此設置控制在後端伺服器錯誤或超時時是否使用舊的緩存數據。默認情況下,Nginx 將在後端伺服器錯誤或超時時向客戶端返回錯誤。
- 在更新緩存內容時,防止多個請求同時向後端伺服器發送: proxy_cache_lock
- 此設置控制在更新緩存內容時是否防止多個請求同時向後端伺服器發送。這可以防止後端伺服器過載。
- 設定不同響應狀態碼的緩存時間: proxy_cache_valid
- 此設置控制不同響應狀態碼的緩存時間。您可以根據您的需求設置不同的緩存時間。
重新開啟 Nginx 讓設定生效
sudo nginx -t
sudo systemctl reload nginx
快取的時間設定
Nginx 支持多種時間單位来指定 cache 的有效期,这包括:
s 秒m 分鐘h 小時d 天w 周M 月(30 天)y 年(365 天)
舉例子
快取檔案 30 秒
proxy_cache_valid 200 302 30s;
刪除快取的方法
1.直接刪除快取檔案
找到你設定的路徑,直接刪除檔案即可
sudo rm -rf /path/to/cache/*
2.使用 Nginx Cache Purge
如果你在編譯 Nginx 有加入 cache purge ,就可以用下面的設定,如果你是用預設安裝,通常不包含 cache purge,可以看下我之前的安裝教學
location /purge_cache/ {
    proxy_cache_purge my_cache $scheme$host$request_uri;
}
by Rain Chu | 3 月 20, 2024 | wordpress
WordPress 是全球最受歡迎的內容管理系統之一,提供了直觀的圖形使用者介面來管理網站。然而,對於開發者和系統管理員來說,通過命令列介面管理 WordPress 也是非常必要的。這就是 WP-CLI 發揮作用的地方。WP-CLI 是一個為 WordPress 站點提供的命令列工具,允許用戶快速執行許多任務,如安裝和更新插件、配置多站點安裝、生成內容等,而無需使用 Web 瀏覽器。
WP-CLI 的優勢
- 效率:通過命令列執行任務通常比使用圖形使用者介面更快。
- 自動化:可以輕鬆地將命令腳本化和自動化,以便批量處理任務。
- 無需 GUI:對於僅命令列介面訪問的伺服器,這是管理 WordPress 站點的理想選擇。
安裝 WP-CLI
WP-CLI 的安裝過程簡單直接,可以通過幾個簡單的步驟在任何類 UNIX 系統上安裝(包括 MacOS、Linux 發行版和 Windows 的 WSL)。
下載 WP-CLI: 首先,使用 curl 或 wget 命令下載 WP-CLI 的 Phar 檔案。
使用 curl:
curl -O https://raw.githubusercontent.com/wp-cli/builds/gh-pages/phar/wp-cli.phar
或者使用 wget:
wget https://raw.githubusercontent.com/wp-cli/builds/gh-pages/phar/wp-cli.phar
驗證 Phar 檔案是否可執行: 執行以下命令測試 wp-cli.phar 是否正常工作:
將它變成執行檔: 將下載的檔案轉換為可執行檔案,並移動到全域路徑中,以便從任何位置訪問 WP-CLI。
chmod +x wp-cli.phar
sudo mv wp-cli.phar /usr/local/bin/wp
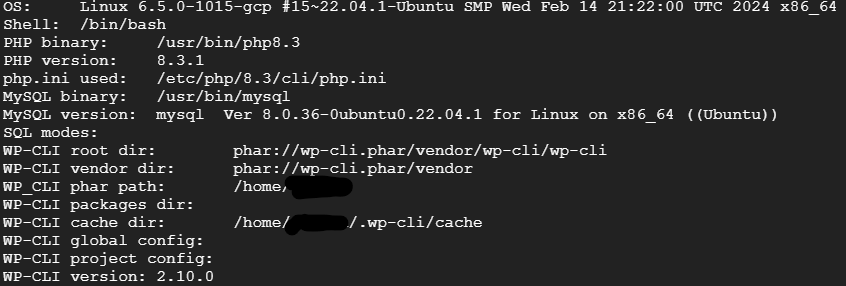
驗證及測試WP-CLI: 輸入以下命令以確認 WP-CLI 正確安裝:
會看到結果如下
以下示範一些簡單的功能
檢查 WordPress 核心檔案更新:
安裝插件:
wp plugin install [plugin-name] --activate
更新單一外掛
wp plugin update [plugin-name]
更新所有插件:
創建新的用戶:
by Rain Chu | 3 月 12, 2024 | Nginx, SERVER, wordpress
在許多 WordPress 網站運營者的心中,提升網站載入速度始終是一項持續的任務。快速的載入速度不僅能改善用戶體驗,降低跳出率,還能在搜索引擎優化(SEO)上取得更好的成績。本文將引導您如何通過配置 NGINX 的 FastCGI Cache 來提升您的 WordPress 網站載入速度。
為什麼選擇 NGINX 的 FastCGI Cache?
NGINX 作為一款高效能的 Web 伺服器,其 FastCGI Cache 功能可以對動態內容(如 WordPress 生成的頁面)進行快取,從而減少對後端伺服器的請求,提高頁面載入速度。與其他快取方法相比,FastCGI Cache 直接在 Web 伺服器層面進行操作,能更精確地控制快取內容及其有效期。
步驟一:設定快取儲存路徑
建立快取存放的路徑,注意目錄擁有者是 www-data
sudo mkdir -p /etc/nginx/cache
sudo chown -R www-data:www-data /etc/nginx/cache
下面的設定是放在記憶體中的設定,如果你想要把快取放在記憶體內,要用下面這一個
sudo mkdir -p /var/run/cache/nginx
sudo chown -R www-data:www-data /var/run/cache/nginx
首先,您需要在 NGINX 配置文件中指定快取的儲存路徑及其他相關參數。打開您的 NGINX 配置文件(通常位於 /etc/nginx/nginx.conf),並添加以下配置:
http {
    ...
    fastcgi_cache_path /etc/nginx/cache levels=1:2 keys_zone=WORDPRESS_CACHE:100m inactive=60m max_size=256m;
    fastcgi_cache_key "$scheme$request_method$host$request_uri";
    fastcgi_cache_use_stale error timeout invalid_header http_500;
    fastcgi_ignore_headers Cache-Control Expires Set-Cookie;
    ...
}
這段配置創建了一個名為 WORDPRESS_CACHE 的快取區域,並將其儲存路徑設定為 /etc/nginx/cache。levels=1:2 定義了目錄結構,keys_zone 指定了快取鍵的儲存空間大小,1 MB 的記憶體大約可以存放八千個左右的鍵值,也就是說若設定為 16 MB 的話(16m),大約可以快取 128,000 個左右的網址,max_size 是設定快取檔案的總容量上限(也就是放在 /etc/nginx/cache 中的檔案大小上限),inactive=60m 表示如果快取內容在60分鐘內未被訪問,則會被自動清除。
步驟二:啟用 FastCGI Cache
接下來,在處理 PHP 請求的 location 塊中啟用 FastCGI Cache。這通常在您站點的伺服器配置中(例如 /etc/nginx/sites-available/yourdomain.com):
server {
    ...
    set $skip_cache 0;

	# POST 請求不用快取
	if ($request_method = POST) {
    	set $skip_cache 1;
  	}

  	# 若有 query 參數的網址不用快取
  	if ($query_string != "") {
      	set $skip_cache 1;
  	}

  	# 特殊的網址不用快取
  	if ($request_uri ~* "(/wp-admin/|/xmlrpc.php|/wp-(app|cron|login|register|mail).php|wp-.*.php|/feed/|index.php|wp-comments-popup.php|wp-links-opml.php|wp-locations.php|sitemap(_index)?.xml|[a-z0-9_-]+-sitemap([0-9]+)?.xml)") {
      	set $skip_cache 1;
  	}

  	# 已登入使用者、留言者不用快取
  	if ($http_cookie ~* "comment_author|wordpress_[a-f0-9]+|wp-postpass|wordpress_no_cache|wordpress_logged_in") {
      	set $skip_cache 1;
  	}

    #正在維護模式中也略過
	if (-f "$document_root/.maintenance") {
    	set $skip_cache 1;
	}

  	# 加入快取資訊表頭(除錯用)
  	add_header X-Cache $upstream_cache_status;

    location ~ \.php$ {
        include fastcgi_params;
        fastcgi_pass unix:/var/run/php/php8.2-fpm.sock;
        fastcgi_index index.php;
    	include fastcgi.conf;

        # FastCGI 快取設定
        fastcgi_cache WORDPRESS_CACHE;
        fastcgi_cache_valid 200 301 302 1d;
        fastcgi_cache_bypass $skip_cache;
    	fastcgi_no_cache $skip_cache;

        # 可以加入除錯用的標頭
        add_header X-Cache "$upstream_cache_status From $host";
    	add_header Cache-Control  max-age=0;
    	add_header Nginx-Cache "$upstream_cache_status";
    	add_header Last-Modified $date_gmt;
    }
    ...
}這裡,fastcgi_cache 指令啟用了快取,並指定使用前面創建的快取區域。fastcgi_cache_valid 200 60m 表示成功的響應(HTTP 200 狀態碼)將被快取60分鐘。
步驟三:細化快取規則
為了避免快取敏感內容或確保特定條件下的頁面不被快取,您可以進一步細化快取規則。例如,避免快取已登入用戶的內容:
fastcgi_cache_bypass $cookie_user_logged_in;
fastcgi_no_cache $cookie_user_logged_in;
這些指令確保當 user_logged_in cookie 存在時,快取將被繞過。
清除快取
利用指令清除所有的快取
rm -rf /path/to/your/nginx/cache/*
利用 API 清除快取
首先去取 nginx 的 config 檔案中加入以下設定
location /purge_cache/ {
    allow 127.0.0.1; # 允許本地
    allow '多個主機ip';
    deny all; # 拒绝其他所有请求
    fastcgi_cache_purge WORDPRESS_CACHE $scheme$request_method$host$request_uri;
}
接下來就可以安裝 Nginx Helper 或是透過呼叫API網址清除快取
curl -X GET http://your-domain.com/purge_cache/the_uri_to_purge
區分手機版本和電腦版本
map $http_user_agent $is_desktop {
    default 0;
    ~*linux.*android|windows\s+(?:ce|phone) 0; # exceptions to the rule
    ~*spider|crawl|slurp|bot 1; # bots
    ~*windows|linux|os\s+x\s*[\d\._]+|solaris|bsd 1; # OSes
}

## Revert the logic.
map $is_desktop $is_mobile {
    1 0;
    0 1;
}
add_header x-ua-device $is_mobile;

# cache key 要加入 is_moubile
fastcgi_cache_key "$scheme$request_method$host$request_uri$is_mobile";
將快取放在記憶體,開機要自動執行
若是你把快取得存放路徑設定在記憶體中 /var/run ,那要記得設定重開機自動要建立該目錄,並且讓nginx重生效才行
先建立一個執行檔,執行重開機的設定
nano start-fastcgi.sh
chmod +x start-fastcgi.sh
start-fastcgi.sh的內容如下
mkdir -p /var/run/cache/nginx
chown -R www-data:www-data /var/run/cache/nginx
systemctl restart nginx
建立開機自動執行檔
rc.local 內容如下
#!/bin/bash
bash /home/yourname/start-fastcgi.sh

exit 0
設定開機自動執行
如果之前完全沒有設定過開機自動執行,那你會需要先設定開機自動執行的環境
為 rc-local 創建一個 Systemd 單元文件
sudo nano /etc/systemd/system/rc-local.service
將以下內容添加到文件中:
[Unit]
Description=/etc/rc.local Compatibility
ConditionPathExists=/etc/rc.local

[Service]
Type=forking
ExecStart=/etc/rc.local start
TimeoutSec=0
StandardOutput=tty
RemainAfterExit=yes
SysVStartPriority=99

[Install]
WantedBy=multi-user.target
啟用並啟動服務
現在您有了一個為 rc-local 正確配置的 systemd 服務文件,您可以啟用並啟動它:
sudo chmod +x /etc/rc.local
sudo systemctl enable rc-local.service
sudo systemctl start rc-local.service
常見問題
無法使用 purage_all 功能,可以重新編譯 Nginx ,加入參數 –add-module=/path/to/src/ngx_cache_purge-2.3.1
Nginx Helper 的替代 Nginx FastCGI Cache
by Rain Chu | 2 月 21, 2024 | PHP, wordpress
在處理大量數據和高流量的情況下,WordPress網站可能會面臨效能問題。這時,使用高效的緩存解決方案變得尤為重要。Object Cache Pro是一款專業級的物件緩存插件,它能夠顯著提升WordPress網站的性能和響應速度。本文將介紹如何在WordPress中安裝和配置Object Cache Pro。
安裝Object Cache Pro
步驟1:獲取插件
先從Object Cache Pro官方網站購買插件。完成後會取得授權金鑰。
步驟2:上傳並安裝插件
- 登入您的WordPress後台。
- 點擊「插件」>「新增」。
- 選擇「上傳插件」,然後選擇您下載的Object Cache Pro插件文件。
- 上傳並安裝插件。
跟一般外掛不一樣的地方,這邊要自己手動在 /wp-content/wp-config.php 中,去配置參數,配置方法如下
define('WP_REDIS_CONFIG', [
    'token' => '<your-license-token>',
    'host' => '127.0.0.1',
    'port' => 6379,
    'database' => 0, // change for each site
    'maxttl' => 86400 * 7,
    'timeout' => 1.0,
    'read_timeout' => 1.0,
    'split_alloptions' => true,
    'debug' => false,
]);

define('WP_REDIS_DISABLED', false);
步驟4:清除舊資料
步驟4:啟用插件
安裝完成後,點擊「啟用插件」。
進階配置Object Cache Pro
超快速度的配置
Object Cache Pro 進階配置,將序列話變成二進制,並且啟用快速壓縮等功能,再加入多主機支援
define('WP_REDIS_CONFIG', [
    'token' => '...',
    'host' => '127.0.0.1',
    'port' => 6379,
    'database' => 0, // change for each site
    'timeout' => 0.5,
    'read_timeout' => 0.5,
    'retry_interval' => 10,
    'retries' => 3,
    'backoff' => 'smart',
    'compression' => 'zstd', // `zstd` compresses smaller, `lz4` compresses faster
    'serializer' => 'igbinary',
    'async_flush' => true,
    'split_alloptions' => true,
    'prefetch' => true,
    'strict' => true,
    'debug' => false,
    'save_commands' => false,
    'prefix' => 'mysitename',
]);

define('WP_REDIS_DISABLED', getenv('WP_REDIS_DISABLED') ?: false);
安裝 PHP 外掛支援超快速配置
想要享用超快速的 object cache pro 配置的話,有兩個前提要先做好
1.安裝igbinary serializer
簡易安裝
pecl install igbinary
pecl install --configureoptions='enable-redis-igbinary="yes"' redis
原始檔安裝
https://github.com/igbinary/igbinary#installing
2.安裝 lzf/lz4/zstd compression
簡易安裝
# Use prompts
pecl install redis

# Skip prompts
pecl install --configureoptions='enable-redis-lzf="yes" enable-redis-zstd="yes" enable-redis-lz4="yes"' redis
原始檔安裝
https://github.com/phpredis/phpredis/blob/develop/INSTALL.md
測試和優化
安裝並配置好Object Cache Pro後,您應該進行測試,以確保一切運作正常。您可以使用速度測試工具如GTmetrix來檢查網站效能的提升。
結論
使用Object Cache Pro可以顯著提升WordPress網站的效能。通過合理配置和優化,您可以為您的用戶提供更快、更流暢的瀏覽體驗。
近期留言