by Rain Chu | 9 月 3, 2022 | wordpress
全世界隨時隨地都在發生攻擊事件,我這種小站每天也都有上千次的登入嘗試,實在是防不勝防,只能盡量減少被攻擊的機會,在wordpress中,可以先關閉 XML-RPC 就可以少掉9成的攻擊,值得看一下這篇
檢測自己的網站是否有 XML-RPC 服務
首先先測試自己的網站是否有開啟 XML-RPC 服務,可以透過以下 https://你的網址/xmlpc.php ,來檢測是否可以用,例如
https://rain.tips/xmlrpc.php
會看到下面的訊息,代表這個網址是可以工作的
XML-RPC server accepts POST requests only.
關閉 XMLRPC 的方法如下
1.RD,修改佈景主題的 function.php ,加入xmlrpc_enabled
// option :禁用 XML-RPC 認證
add_filter('xmlrpc_enabled', '__return_false');

// 移除 XML-RPC 相關的訊息
remove_action('wp_head', 'wlwmanifest_link');
2.MIS,IIS和Apache
IIS 修改 web.config
<location path="xmlrpc.php">
<system.webServer>
  <security>
	<ipSecurity allowUnlisted="false">
	  <add ipAddress="127.0.0.1" subnetMask="255.255.255.255" allowed="true" />
	</ipSecurity>
  </security>
</system.webServer>
</location>
Apache 修改 .htaccess
<Files xmlrpc.php>
order deny,allow
deny from all
allow from 127.0.0.1
</Files>
3.Wordpress管理者
安裝外掛 Disable XML-RPC
參考資料
https://ithelp.ithome.com.tw/articles/10272566
by Rain Chu | 8 月 18, 2022 | woocommerce, wordpress
電子商務、課程、遊戲型的網站,都有其特別要記錄的事件以及標籤,這時候一個一個自己慢慢的建立或是編寫的話,會需要耗費不少心力,還好用 WordPress 在處理我的部落格和商城,可以直接使用外掛 GTM4WP ,並且採用她預先已經定義好的 json 來快速建立電子商務流程或是表單的追蹤程式碼。
設定 WordPress 的 GTM4WP
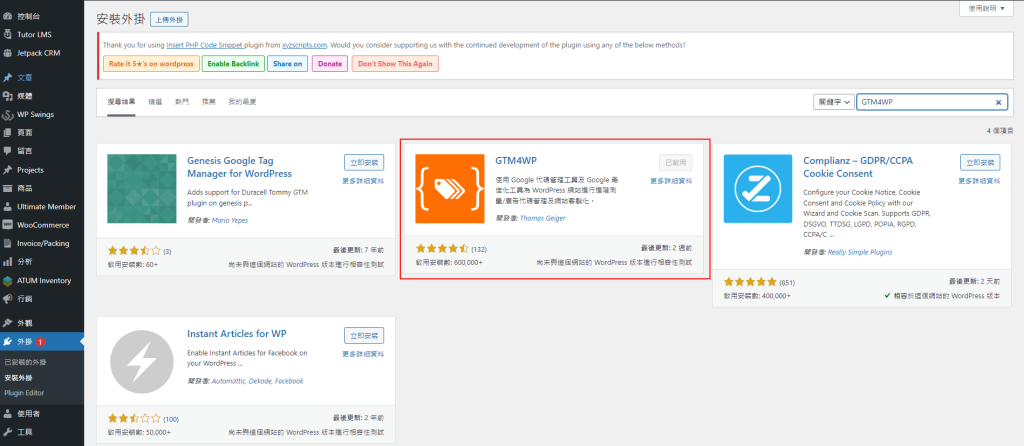
首先安裝外掛 – GTM4WP
GTM4WP
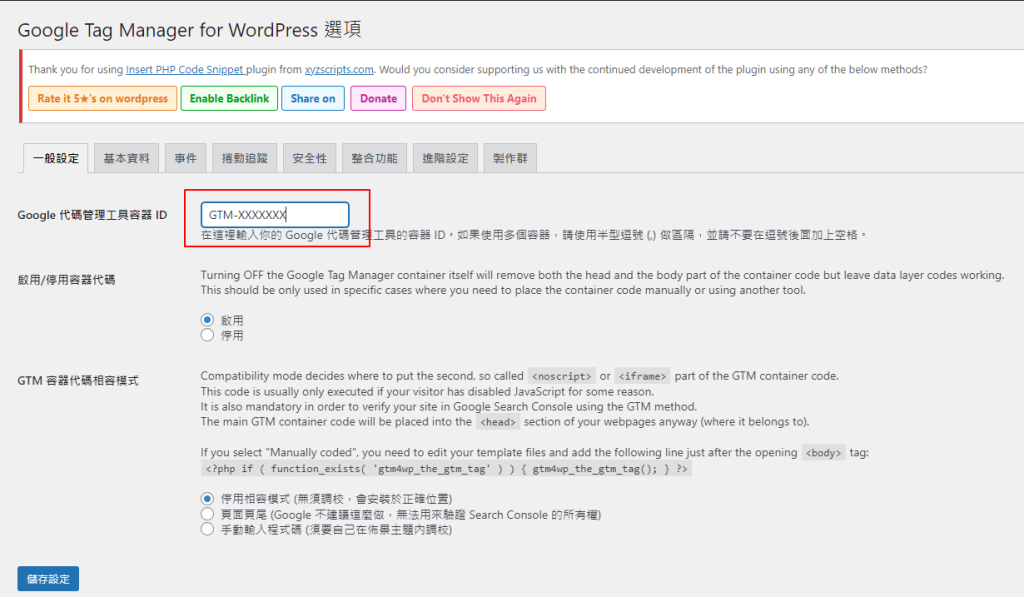
設定 GTM 代碼 ID
將 woocommerce 追蹤功能啟用
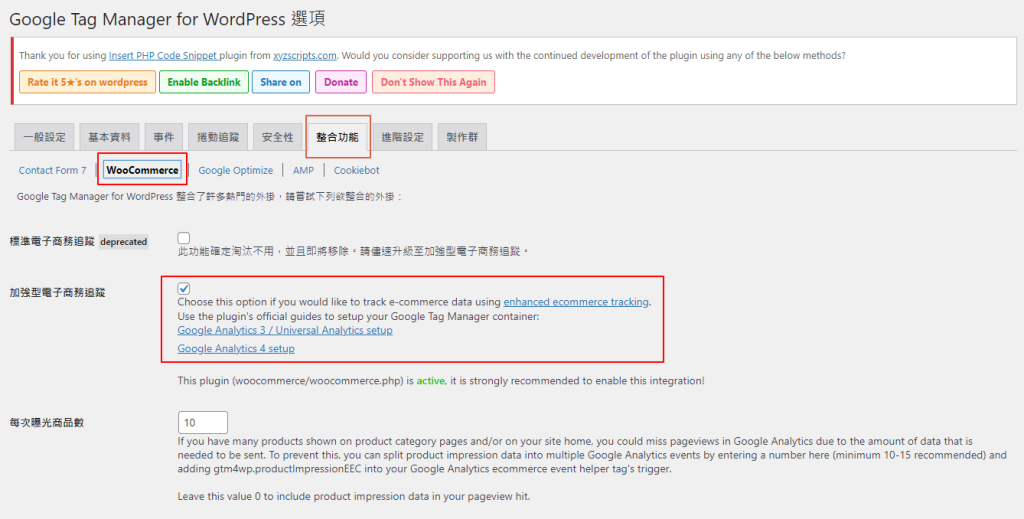 啟用 woocommerce 加強型電子商務追蹤功能
設置 Google GTM
去到 https://tagmanager.google.com/ 設定一個新的 GA4 的代碼
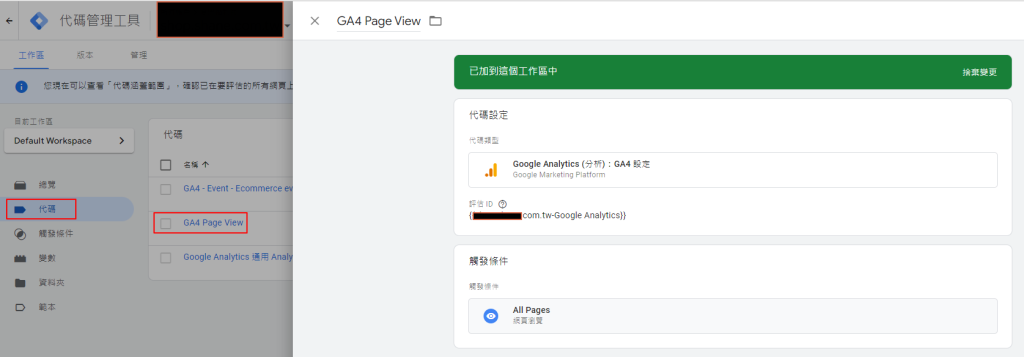 GTM GA4 代碼設定說明
導入GTM4WP Google Analytics 4容器範本
下載範本 https://gtm4wp.com/gtm-containers/gtm4wp-ga4-container-elements-20200419.json
並且去到 「管理」 中的 「匯入容器」上傳範本
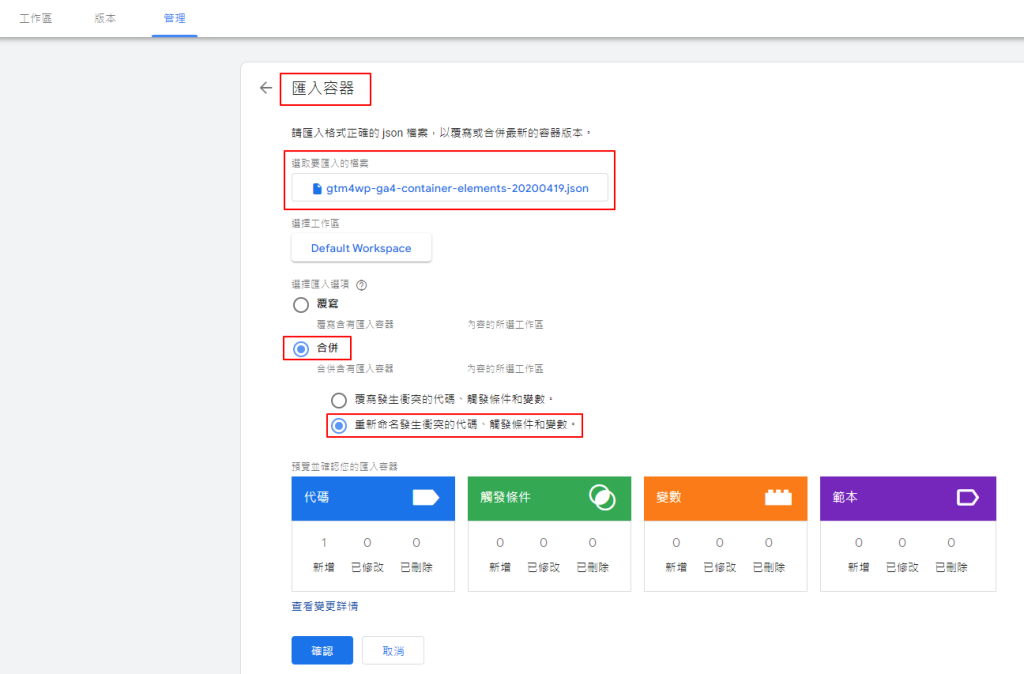 gtm4wp ga4 container 範本
過程中會創建預設好的事件以及代碼
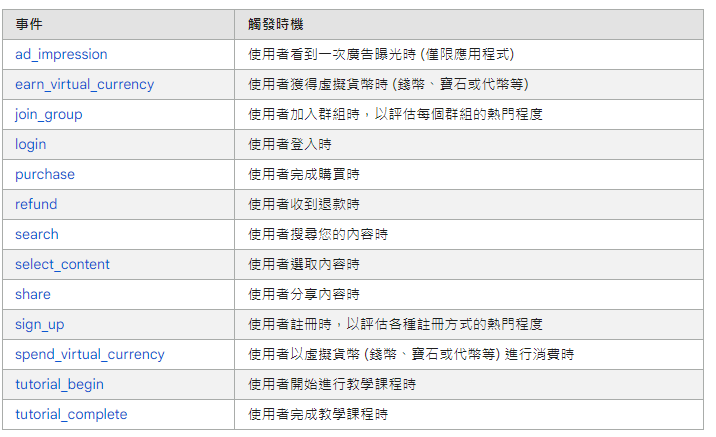 預設事件以及代碼
完成新創建的電子商務事件代碼
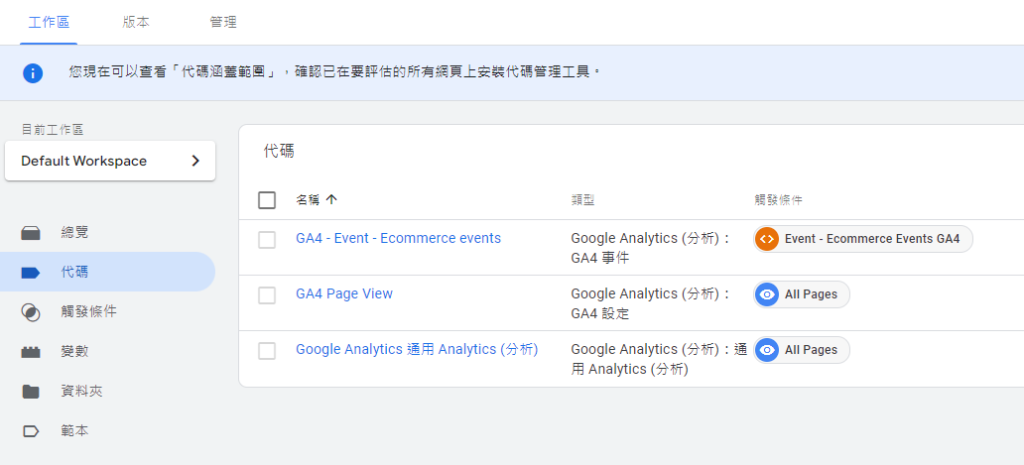
- 在前面你應該已經有了 “Google Analyitcs 4: GA4 configuration tag”
- 打開 “GA4 – Event – Ecommerce events”
- 打開 Configuration Tag drop down
- 選擇 GA4 configuration tag
- 存檔即可
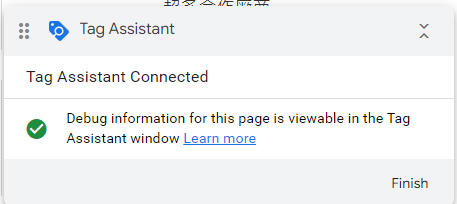
別忘了要驗證是否成功
按下預覽按鈕

看到連線成功就可以了
參考資料
啟用 GA 加強型電子商務報表,追蹤 Woocommerce 銷售數據 | WebLai
為 WooCommerce 啟用 GA 加強型電子商務功能 | applemint Ltd.
谷歌分析4 / GA4 – 增強的電子商務跟蹤 – 如何設置?- 谷歌跟蹤管理器外掛程式為WordPress (gtm4wp.com)
[GA4] 建議事件 – Analytics (分析)說明 (google.com)
https://analytics.google.com/
https://tagmanager.google.com/
by Rain Chu | 8 月 11, 2022 | wordpress
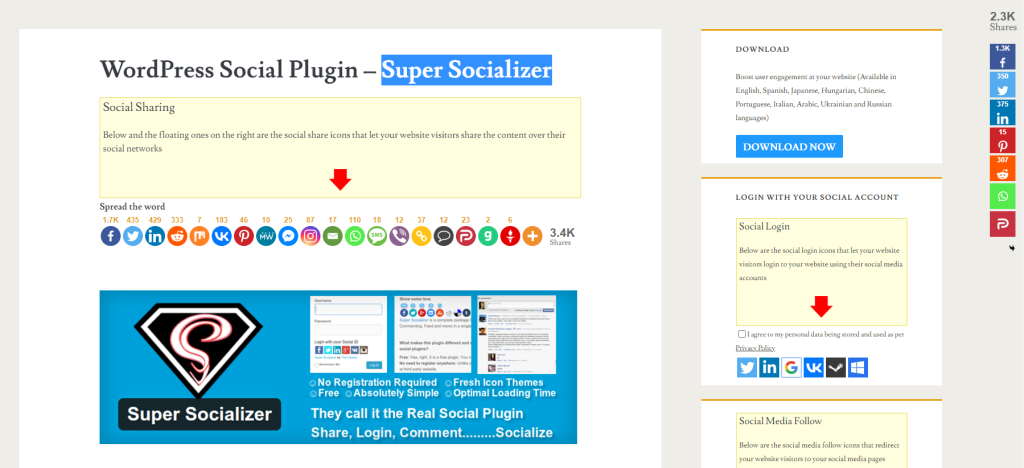
現在的網站內容皆需要跟社群發生互動,才會提高使用率或是說轉化率,最多人使用的 WordPress 裡面有很多好用的 Plugins ,其中我推薦 Super Socializer ,裡面我最常使用到 Social Login 的功能,免費版本中用這個功能,只能在預設的登入頁面中增加 FB、LINE登入功能,沒法在其他頁面中直接用shortcode功能去增加社群登入,在你還沒有付費的情況下,想要用他的 shortcode 功能的話,其實可以查詢SOCIAL LOGIN SHORTCODE AND WIDGET,裡面有詳細的用法
Social login demo
Social Login Shortcode
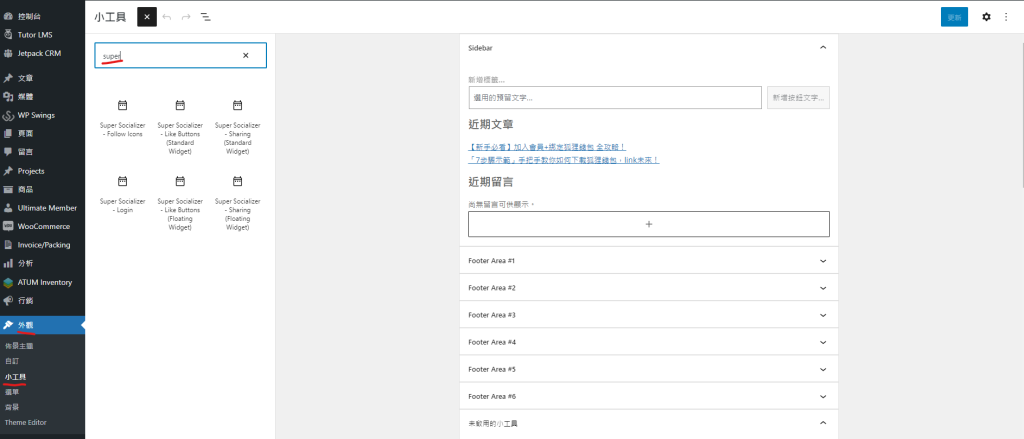
如果要在頁面中使用 Social login 的話,可以使用以下幾種方法
1.使用小工具,在外觀->小工具->新增-> super系列的工具
2.Social Login Shortcode
在文章內直接使用短代碼插入登入代碼
3.修改社群登入的標題
[TheChamp-Login title="利用社群登入"]
4.增加這個選項可以在圖示旁邊顯示使用者的名稱
[TheChamp-Login show_username="ON"]
5.使用 redirect_url 選項可以指定登入後會移到你指定的網頁上
[TheChamp-Login redirect_url="https://rain.tips/thankyou"]
6.使用do_shortcode可以再任意的php檔案插入登入選項
<?php echo do_shortcode('[TheChamp-Login style="background-color:#000;"]') ?>延伸閱讀
如果有用付費版本以及ultimatemember,可以參考這邊處理
https://docs.ultimatemember.com/article/1531-social-login-2-3-setup
by Rain Chu | 8 月 5, 2022 | woocommerce, wordpress
在寫 woocommerce 的程式時候,最常使用到的就是 $order 這個參數了,每次都要用 Google 查找很不方便,這次把它整理並且記錄起來,當作簡易字典查找,就快速且簡單的多了,也謝謝 Rodolfo Melogli 大神分享了好用的文章。
// Get Order ID and Key
$order->get_id();
$order->get_order_key();

// Get Order Totals $0.00
$order->get_formatted_order_total();
$order->get_cart_tax();
$order->get_currency();
$order->get_discount_tax();
$order->get_discount_to_display();
$order->get_discount_total();
$order->get_fees();
$order->get_formatted_line_subtotal();
$order->get_shipping_tax();
$order->get_shipping_total();
$order->get_subtotal();
$order->get_subtotal_to_display();
$order->get_tax_location();
$order->get_tax_totals();
$order->get_taxes();
$order->get_total();
$order->get_total_discount();
$order->get_total_tax();
$order->get_total_refunded();
$order->get_total_tax_refunded();
$order->get_total_shipping_refunded();
$order->get_item_count_refunded();
$order->get_total_qty_refunded();
$order->get_qty_refunded_for_item();
$order->get_total_refunded_for_item();
$order->get_tax_refunded_for_item();
$order->get_total_tax_refunded_by_rate_id();
$order->get_remaining_refund_amount();

// Get and Loop Over Order Items
foreach ( $order->get_items() as $item_id => $item ) {
   $product_id = $item->get_product_id();
   $variation_id = $item->get_variation_id();
   $product = $item->get_product(); // see link above to get $product info
   $product_name = $item->get_name();
   $quantity = $item->get_quantity();
   $subtotal = $item->get_subtotal();
   $total = $item->get_total();
   $tax = $item->get_subtotal_tax();
   $tax_class = $item->get_tax_class();
   $tax_status = $item->get_tax_status();
   $allmeta = $item->get_meta_data();
   $somemeta = $item->get_meta( '_whatever', true );
   $item_type = $item->get_type(); // e.g. "line_item"
}

// Other Secondary Items Stuff
$order->get_items_key();
$order->get_items_tax_classes();
$order->get_item_count();
$order->get_item_total();
$order->get_downloadable_items();
$order->get_coupon_codes();

// Get Order Lines
$order->get_line_subtotal();
$order->get_line_tax();
$order->get_line_total();

// Get Order Shipping
$order->get_shipping_method();
$order->get_shipping_methods();
$order->get_shipping_to_display();

// Get Order Dates
$order->get_date_created();
$order->get_date_modified();
$order->get_date_completed();
$order->get_date_paid();

// Get Order User, Billing & Shipping Addresses
$order->get_customer_id();
$order->get_user_id();
$order->get_user();
$order->get_customer_ip_address();
$order->get_customer_user_agent();
$order->get_created_via();
$order->get_customer_note();
$order->get_address_prop();
$order->get_billing_first_name();
$order->get_billing_last_name();
$order->get_billing_company();
$order->get_billing_address_1();
$order->get_billing_address_2();
$order->get_billing_city();
$order->get_billing_state();
$order->get_billing_postcode();
$order->get_billing_country();
$order->get_billing_email();
$order->get_billing_phone();
$order->get_shipping_first_name();
$order->get_shipping_last_name();
$order->get_shipping_company();
$order->get_shipping_address_1();
$order->get_shipping_address_2();
$order->get_shipping_city();
$order->get_shipping_state();
$order->get_shipping_postcode();
$order->get_shipping_country();
$order->get_address();
$order->get_shipping_address_map_url();
$order->get_formatted_billing_full_name();
$order->get_formatted_shipping_full_name();
$order->get_formatted_billing_address();
$order->get_formatted_shipping_address();

// Get Order Payment Details
$order->get_payment_method();
$order->get_payment_method_title();
$order->get_transaction_id();

// Get Order URLs
$order->get_checkout_payment_url();
$order->get_checkout_order_received_url();
$order->get_cancel_order_url();
$order->get_cancel_order_url_raw();
$order->get_cancel_endpoint();
$order->get_view_order_url();
$order->get_edit_order_url();

// Get Order Status
$order->get_status();

// Get Thank You Page URL
$order->get_checkout_order_received_url();
參考資料
https://woocommerce.github.io/code-reference/

by Rain Chu | 8 月 4, 2022 | wordpress, 未分類
Divi 真的是一個很好用的佈景主題,其實他的英文介面我已經看了很習慣了,但還是有太多的名詞,對於剛接觸的編輯來說,摸不著頭緒,所以就有了要找中文化的需求,網路上用Divi的人很多,可以很快的鎖定幾個解決方案,目前用起來最佳解釋採用Make9大大的版本。
安裝說明
下載zip檔案後,分別把 corelang, lang, languages, 複製到 Divi 佈景主體下,並且合併 functions.php 即可,操作如下:
1.解開壓縮檔後,會看到這些資料
2.複製目錄到 Divi 佈景主體的目錄下
 sudo cp -R ~/Make9_Divi_zhtw_20220412v22/corelang/* /var/www/wordpress/wp-content/themes/Divi/corelang/
 sudo cp -R ~/Make9_Divi_zhtw_20220412v22/lang/* /var/www/wordpress/wp-content/themes/Divi/lang/
 sudo cp -R ~/Make9_Divi_zhtw_20220412v22/languages/* /var/www/wordpress/wp-content/themes/Divi/languages/
 sudo chown -R www-data:www-data /var/www/wordpress/.
3.整合你的 functions.php,將下面的程式碼複製到你原本的 functions.php
add_action( 'wp_enqueue_scripts', 'enqueue_parent_styles' );
function enqueue_parent_styles() {
    wp_enqueue_style( 'parent-style', get_template_directory_uri().'/style.css' );
}

load_theme_textdomain( 'Divi', get_stylesheet_directory() . '/lang' );
load_theme_textdomain( 'et-core', get_stylesheet_directory() . '/corelang' );
load_theme_textdomain( 'et_builder', get_stylesheet_directory() . '/languages' );
下載點
https://drive.google.com/file/d/1fozK6-0dRTgOzbMOse6DoyesJUzsdMPa/view?usp=sharing
參考文章
近期留言