by Rain Chu 2 月 8, 2022 | PHP , woocommerce , wordpress
WordPress Woocommerce 中,如果是 B2B 的網站或是會員限定的網站,通常會有一個需求,不能對來賓客戶顯示金額,登入後,也應該要對每一個不同的客戶顯示不同的金額,這邊文章先提供如何對沒有登入的客戶隱藏價格,之後再提供不同來賓顯示不同金額
作法很簡單,將以下的程式碼片段,貼到你的佈景主題的 functions.php 即可
// 對訪客隱藏價格
add_filter('woocommerce_get_price_html',function($price){
    if(!is_user_logged_in()){
        return '' ;
    }
    else {
        return $price; // 返回原價
    }});

add_filter('woocommerce_cart_item_price','__return_false');
add_filter('woocommerce_cart_item_subtotal','__return_false');
Woocommerce 如何對不同的使用者權限做價格控制
add_filter( 'woocommerce_get_price_html', function( $price ) {
if ( is_admin() ) return $price;
$user = wp_get_current_user();
$hide_for_roles = array( 'wholesale', 'wholesale-silver', 'wholesale-gold' );
// If one of the user roles is in the list of roles to hide for.
if ( array_intersect( $user->roles, $hide_for_roles ) ) {
return ''; // Return empty string to hide.
}
return $price; // Return original price
} );
add_filter( 'woocommerce_cart_item_price', '__return_false' );
add_filter( 'woocommerce_cart_item_subtotal', '__return_false' );
Woocommerce 如何對不同的類別中的商品做價格控制
add_filter( 'woocommerce_get_price_html', function( $price, $product ) {
if ( is_admin() ) return $price;
// Hide for these category slugs / IDs
$hide_for_categories = array( 'clothes', 'electronics' );
// Don't show price when its in one of the categories
if ( has_term( $hide_for_categories, 'product_cat', $product->get_id() ) ) {
return '';
}
return $price; // Return original price
}, 10, 2 );
add_filter( 'woocommerce_cart_item_price', '__return_false' );
add_filter( 'woocommerce_cart_item_subtotal', '__return_false' );
Woocommerce 如何對特別的商品做價格控制
add_filter( 'woocommerce_get_price_html', function( $price, $product ) {
$hide_for_products = array( 89, 125 );
if ( in_array( $product->get_id(), $hide_for_products ) ) {
return '';
}
return $price; // Return original price
}, 10, 2 );
add_filter( 'woocommerce_cart_item_price', '__return_false' );
add_filter( 'woocommerce_cart_item_subtotal', '__return_false' );
好用外掛推薦
by Rain Chu 12 月 24, 2021 | Chrome 外掛
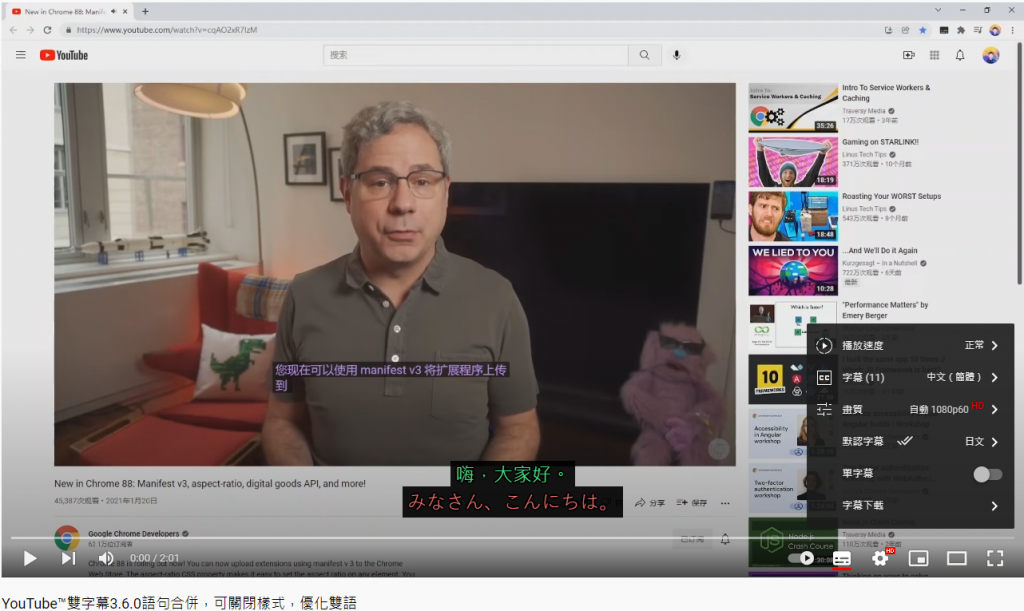
用 YouTube 學英文,許多人應該都會先想到 VoiceTube ,不得不稱讚他,是個學習語言的好工具,但對我來說只能看上面他們提供的影片,我自己喜歡看的影片沒能有比較好的處理,所以會想到下載雙字幕的外掛軟體,在學習知識時候也學習語言,可以看看我自己的學習步驟。
先盲聽一遍,不看字幕,試著去理解內容,如果太難懂,我就會直接進入第二步 開啟雙字幕,外語和母語一起顯示,此時可以了解兩種語言的對照 關閉雙字幕,留下外語字幕,但細節有一些聽不懂時候,可以再複習一次 關閉所有的字幕,只用耳朵聽,訓練聽力 試用後,我要推薦 YouTube 雙字幕 和 CapTube (Dual Captions for YouTube)
YouTube™ 雙字幕
VIDEO
基本的功能-雙字幕顯示 介面高度整合到 YouTube 中,要選擇功能不用去找另外的選單 可以下載字幕 自訂字幕位置 自訂字幕的字型、外框、顏色等 有了自訂字型,我還可以用注音字型進去,可以讓小朋友看注音學習
CapTube (Dual Captions for YouTube)
支援雙字幕 可以自訂第三方的翻譯、例如:騰訊翻譯 DeepL翻譯 開源專案、OpenSource 在中國或是想用自己的翻譯的人以及 IT 高手很適合這套,不過缺點是需要自己申請翻譯的 API,或是自己寫寫程式碼
下載以及安裝
CapTube (Dual Captions for YouTube)
YouTube™ 雙字幕
追加看影片學英文的好幫手 – Language Reactor – Netflix也適用
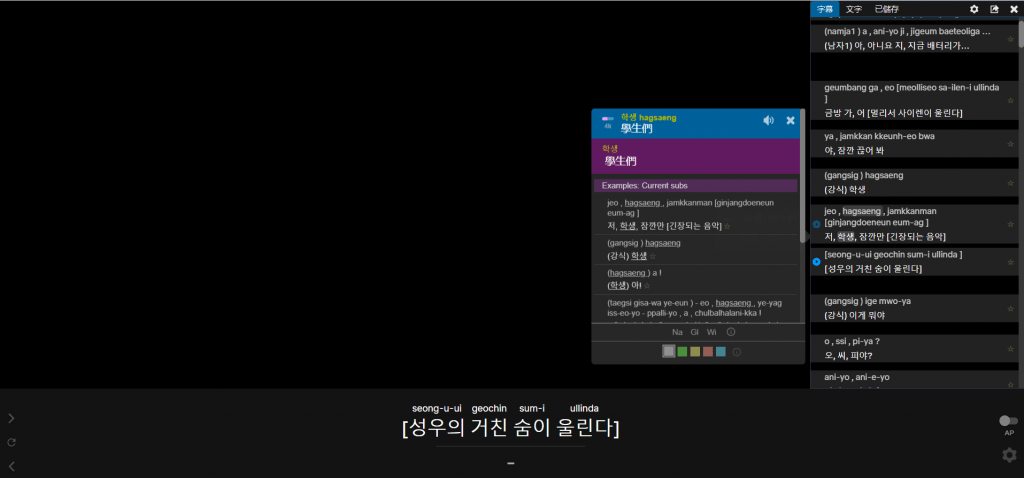
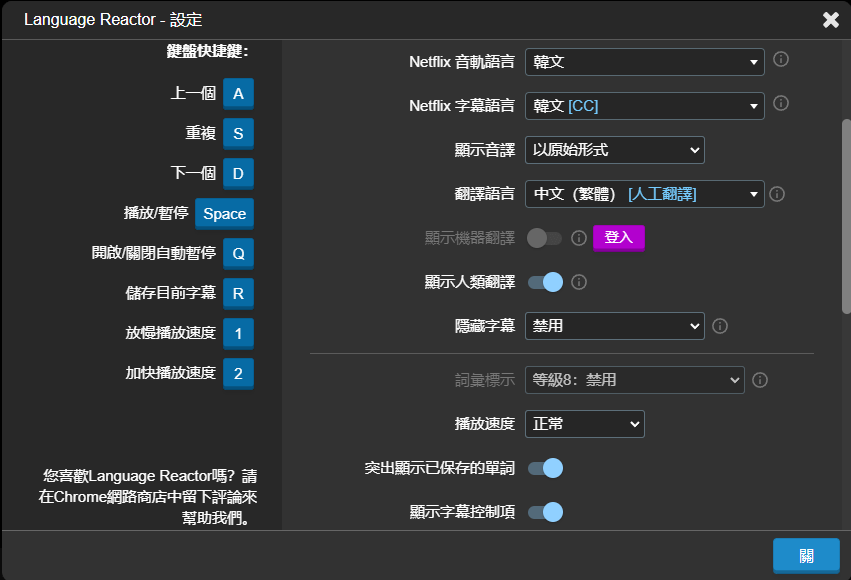
這一套 Language Reactor 跟前面不一樣的部分是加強了學習的功能,安裝上去之後,介面會感覺像是 VoiceTube ,預設會把所有段落的字幕放在右側,可以點選想要看的字幕而去連動影片的播放,另外也可以針對單字選取以及查詢,也同時支援各個國家,像是華人常學的英文、韓文、日文、越南文、泰文等。
Netflix 影片的單字翻譯以及學習功能 設定功能選項 下載 Language Recator https://chrome.google.com/webstore/detail/language-reactor/hoombieeljmmljlkjmnheibnpciblicm/related
by Rain Chu 11 月 18, 2021 | PHP , woocommerce , wordpress
WooCommerce 預設安裝好會在結帳畫面中,出現「配送道不同的地址」的選項,並且預設是勾選起來的,常常有客戶需要把這個選項關閉,或是隱藏他,做法很多種,我這邊是以複製該 template 到自己的子佈景主題中,然後修改 PHP 的程式碼為主
先複製 wp-content/plugins/woocommerce/templates/checkout/form-shipping.php 到 wp-content/themes/[themes-child]/woocommerce/checkout/form-shipping.php
sudo cp /var/www/html/wp-content/plugins/woocommerce/templates/checkout/form-shipping.php /var/www/html/wp-content/themes/themes-child/woocommerce/checkout/form-shipping.php
2. 修改 form-shipping.php 的內容,將預設選項移除,以及將整個欄位隱藏
原先的程式碼如下
	<h3 id="ship-to-different-address">
			<label class="woocommerce-form__label woocommerce-form__label-for-checkbox checkbox">
				<input id="ship-to-different-address-checkbox" class="woocommerce-form__input woocommerce-form__input-checkbox input-checkbox" <?php checked( apply_filters( 'woocommerce_ship_to_different_address_checked', 'shipping' === get_option( 'woocommerce_ship_to_destination' ) ? 1 : 0 ), 1 ); ?> type="checkbox" name="ship_to_different_address" value="1" /> <span><?php esc_html_e( 'Ship to a different address?', 'woocommerce' ); ?></span>
			</label>
		</h3>
修改後的程式碼如下
	<h3 id="ship-to-different-address" style="display:none" >
			<label class="woocommerce-form__label woocommerce-form__label-for-checkbox checkbox">
				<input id="ship-to-different-address-checkbox" class="woocommerce-form__input woocommerce-form__input-checkbox input-checkbox" <?php checked( apply_filters( 'woocommerce_ship_to_different_address_checked', 'shipping' === get_option( 'woocommerce_ship_to_destination' ) ? 1 : 0 ), 0 ); ?> type="checkbox" name="ship_to_different_address" value="0" /> <span><?php esc_html_e( 'Ship to a different address?', 'woocommerce' ); ?></span>
			</label>
		</h3>
其中在 <h3> tag 中,加入 style=”display:none” ,在 ‘shipping’ === get_option 中,把傳回的數值調整成0,代表預設不會勾選,這樣就可以隱藏運送到不同的地址的選項了
參考資料
by Rain Chu 11 月 18, 2021 | Nginx , PHP , Ubuntu , VSCODE
假設你已經在 Ubuntu 上安裝好了 Nginx 、 Php8.0、 VSCODE,那麼我們就可以專注在如何讓你的 VSCODE 可以對 PHP 除錯
先安裝 php-xdebug 套件 sudo apt install php-xdebug 對應 Php8.0 的環境下,會安裝對應不同 php 版本的 mods ,我的環境下安裝的是 PHP 8.1 版本,路徑是 /etc/php/8.1/mods-available/
2. 更改 xdebug.ini 的設定
sudo /etc/php/8.1/mods-available/xdebug.ini 3. 將 xdebug.ini 內容改成
zend_extension = xdebug.so
xdebug.remote_enable = 1
xdebug.remote_autostart = 1
xdebug.remote_handler = dbgp
xdebug.remote_host = 172.17.0.1     ;指定vscode所在的IP
xdebug.remote_connect_back = 1      ;如果為1,則會忽略remote_host
xdebug.remote_port = 9000

xdebug.remote_log = "/var/log/xdebug.log"
4. 重新啟動服務
sudo systemctl start php8.0-fpm
sudo systemctl start nginx
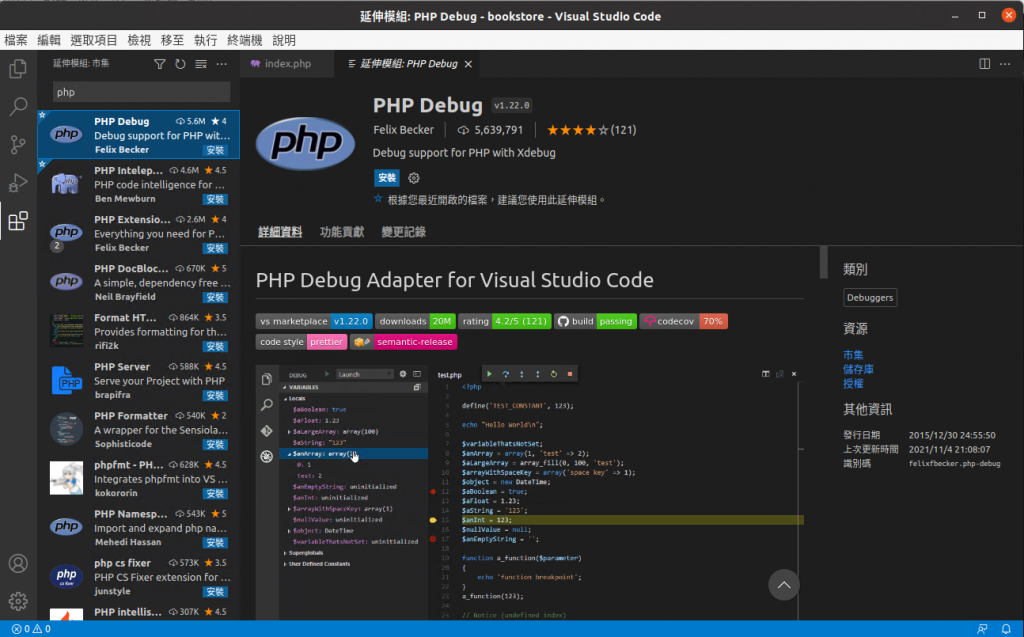
5. 要讓 VSCODE 支援 PHP Debug ,要先安裝 php debug
6. 安裝完畢後,在 PHP 的專案目錄下要建立 launch.json 讓除錯器知道要連線到那裏
{
  "version": "0.2.0",
  "configurations": [
    {
      "name": "Listen for XDebug",
      "type": "php",
      "request": "launch",
      "port": 9000
    }
  ]
}
到這裡,就可以用你的 VSCODE 去除錯你的 PHP CODE 了
by Rain Chu 11 月 12, 2021 | PHP , woocommerce , wordpress
雖然說網路上開店最棒的優勢就是可以 24 x 7 的不間斷賺錢,但是如果是線下升級成線上的店家們,會需要配合公司政策,一天開店八小時,假日不開店或是配合結帳時間,月底不收單等
WooCommerce 實現關店的想法
建立關店時間表 依照時間表判斷是否要開店 關店的狀態是要把 WooCommerce 的訂單按鈕都關閉以及隱藏起來 顯示訊息告知使用者現在關店中 WordPress Plug or Themes PHP 撰寫
以下示範每個月25號到月底作帳時間內,不讓客戶下單的寫法
// 啟動商店的假日檔
add_action ('init', 'qqqtips_woocommerce_holiday_mode');

// Disable Cart, Checkout, Add Cart
// 將下單相關的按鈕都關閉
function qqqtips_woocommerce_holiday_mode() {
   //remove_action( 'woocommerce_after_shop_loop_item', 'woocommerce_template_loop_add_to_cart', 10 );
   //remove_action( 'woocommerce_single_product_summary', 'woocommerce_template_single_add_to_cart', 30 );
   //remove_action( 'woocommerce_proceed_to_checkout', 'woocommerce_button_proceed_to_checkout', 20 );
   //remove_action( 'woocommerce_checkout_order_review', 'woocommerce_checkout_payment', 20 );
	add_filter( 'woocommerce_is_purchasable', '__return_false'); //
   add_action( 'woocommerce_before_main_content', 'qqqtips_wc_shop_disabled', 5 );
   add_action( 'woocommerce_before_cart', 'qqqtips_wc_shop_disabled', 5 );
   add_action( 'woocommerce_before_checkout_form', 'qqqtips_wc_shop_disabled', 5 );
}


// Show Holiday Notice
// 每月25號關帳,次月1號打開
function qqqtips_wc_shop_disabled() {
	$qqq_today = number_format(date('d'));
	if( $qqq_today >= 25 && $qqq_today <= 31) {
		wc_print_notice( '店家已經關帳,請下個月再來!', 'error');
	}
}
參考資料
Open Close Store Hours for WooCommerce
相關文章
by Rain Chu 11 月 11, 2021 | VisualStudio , 程式
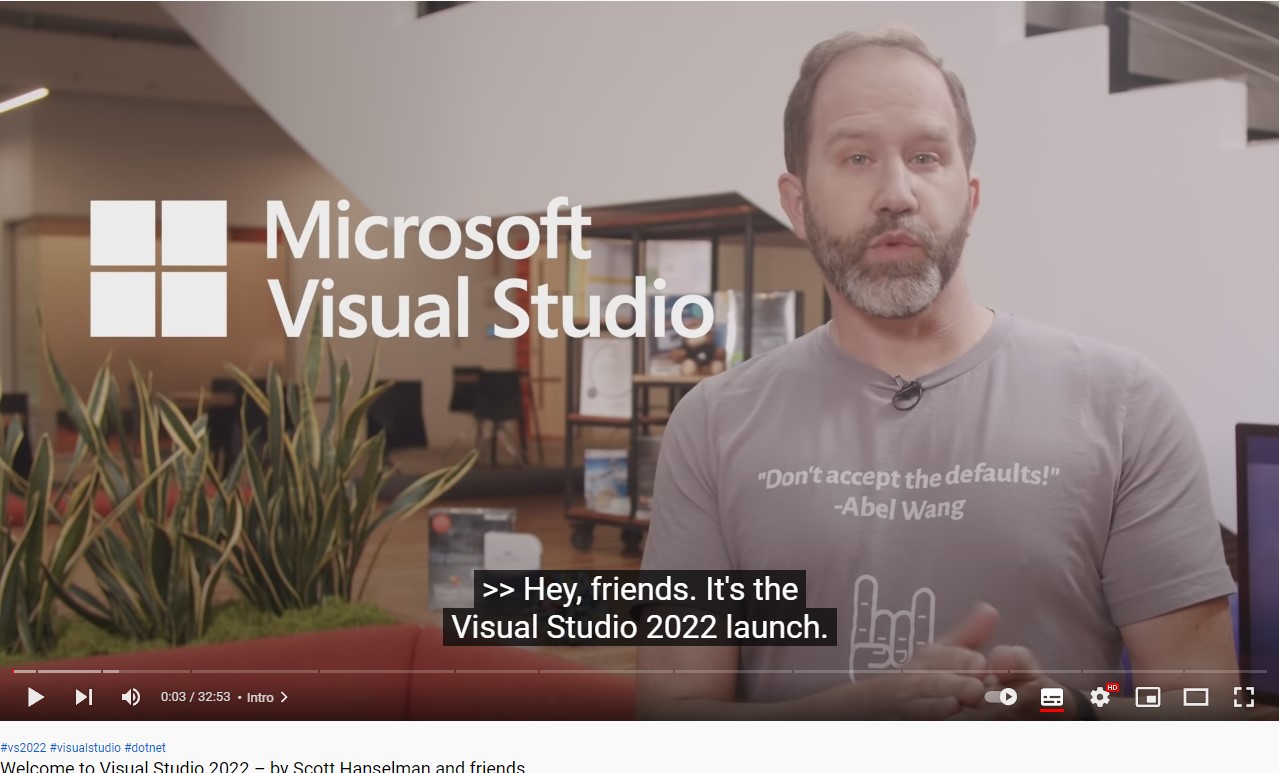
Visual Studio 2022 正式上市,新增功能介紹
在試用了將近半年的 Visual Studio 2022 Preview,終於等到了 Visual Studio 2022 正式版上市的這天,看了 Visual Studio 2022 的新功能 介紹,重點落於
Visual Studio IDE 執行程序改成 64 位元,意思是可以執行大型的程式,在也不用受限於 4GB 的限制了
IntelliCode 的更新,在 Visual Studio 2019 更新中有導入的 AI IntelliCode 在 Visual Studio 2022 變成預設,打些關鍵字按下 TAB 就可以讓 AI 接手完成後續的程式碼,大幅度的增加寫程式的速度
文字搜尋的速度,比起舊版本,快了 3 倍速度
原生支援 .NET 6 ,.NET 6 重寫了所有的 FileStream ,採用了動態PGO技術,C# 特別有感覺,以及.NET多平臺應用程式UI(Multi-platform App UI,MAUI),可以寫一次程式碼給桌面和行動裝置使用,.NET 6 效能大躍進
AI 時代來了,用語音寫程式,只要寫幾行程式,AI 機器人自動就幫你完成後面的 Code,這些都已經實現了,未來已經到來.
每三年一次改版,每次都有非常好的體驗,配合 .NET 6 的推出,效能又網上了不只一階,檔案存取的效率增加了15-30%,JSON Class 轉換的效率也有明顯的改善,Hot Reload in ASP.NET 和 C++,更好的支援 Linux 和 GitHub。



近期留言