by Rain Chu | 11 月 18, 2021 | Nginx, PHP, Ubuntu, VSCODE
假設你已經在 Ubuntu 上安裝好了 Nginx 、 Php8.0、 VSCODE,那麼我們就可以專注在如何讓你的 VSCODE 可以對 PHP 除錯
- 先安裝 php-xdebug 套件
sudo apt install php-xdebug
對應 Php8.0 的環境下,會安裝對應不同 php 版本的 mods ,我的環境下安裝的是 PHP 8.1 版本,路徑是 /etc/php/8.1/mods-available/
2. 更改 xdebug.ini 的設定
sudo /etc/php/8.1/mods-available/xdebug.ini
3. 將 xdebug.ini 內容改成
zend_extension = xdebug.so
xdebug.remote_enable = 1
xdebug.remote_autostart = 1
xdebug.remote_handler = dbgp
xdebug.remote_host = 172.17.0.1     ;指定vscode所在的IP
xdebug.remote_connect_back = 1      ;如果為1,則會忽略remote_host
xdebug.remote_port = 9000

xdebug.remote_log = "/var/log/xdebug.log"
4. 重新啟動服務
sudo systemctl start php8.0-fpm
sudo systemctl start nginx
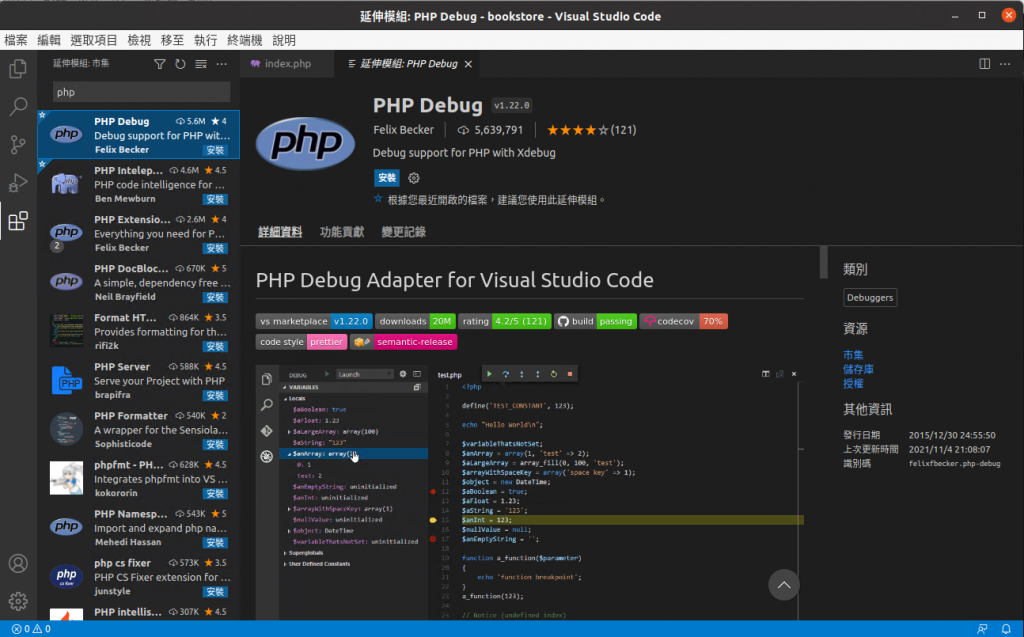
5. 要讓 VSCODE 支援 PHP Debug ,要先安裝 php debug
6. 安裝完畢後,在 PHP 的專案目錄下要建立 launch.json 讓除錯器知道要連線到那裏
{
  "version": "0.2.0",
  "configurations": [
    {
      "name": "Listen for XDebug",
      "type": "php",
      "request": "launch",
      "port": 9000
    }
  ]
}
到這裡,就可以用你的 VSCODE 去除錯你的 PHP CODE 了
by Rain Chu | 11 月 9, 2021 | Linux, Nginx, SERVER, Ubuntu
現在網站沒有支援 https ,肯定是扣分項目,並且想要支援 https 已經不像是以往,一定需要去購買 SSL 憑證,大多數應用下會採用 Let’s Encrypt 的服務,本文是要介紹 Ubuntu 下替 Nginx 安裝 SSL 憑證的方法。
安裝憑證的準備工作
首先確認是否有網域名稱,也就是在DNS伺服器中擁有對應的 A Record,舉例如下:
- A Record rain.tips XXX.XXX.XXX.XXX
- A Record www.rain.tips XXX.XXX.XXX.XXX
並且在 Nginx 中已經設定好該網站,可以在瀏覽器中打入 rain.tips 後可以正常瀏覽
安裝 Let’s Encrypt
首先安裝憑證機器人 certbot 來支援安裝 SSL 憑證
sudo apt install certbot python3-certbot-nginx
利用 Certbot 取得憑證
找出的你主機名稱,也就是在 Nginx 中的 conf 檔案內定義的 Server Name,像我的是rain.tips,然後利用下面的指令建立憑證,-d 後面要帶入網域的名稱
sudo certbot --nginx -d rain.tips -d www.rain.tips
接下來就可以跟著交談視窗一步一步建立起憑證
- 輸入 Email
- 同意合約
- 是否要公開 EMAIL
- 設定 http 是否要轉址到 https,建議一般情況下是設定 Redirect
到此就大功告成了,有防火牆的記得要去開啟下
檢查 Certbot 的自動更新是否正常
因為 Let’s Encrypt 每三個月要 renew 一次,現在的 Certbot 都會自動的啟用自動更新,但避免出意外,可以利用下面指令確認下是否有設定正常。
sudo systemctl status certbot.timer
手動更新憑證
sudo certbot renew --dry-run
確認憑證狀態
sudo certbot certificates
到此就大功告成,參考資料如下
How To Secure Nginx with Let’s Encrypt on Ubuntu 20.04
How to Secure Nginx with Let’s Encrypt On Ubuntu 20.04 / 18.04
by Rain Chu | 11 月 5, 2021 | Linux, Ubuntu, wordpress
Linux Net-tools
Ubuntu Linux 安裝起來後,常常需要查詢自己的 IP Address ,方便 SSH 或是 FTP 連線,但不知為何,常用的 ifconfig 的指令沒有內建進來,常常需要額外去安裝,安裝不是簡單的使用 apt install ifconfig,而是需要安裝網路工具箱 apt install net-tools。
sudo apt install net-tools
安裝完成後,就可以使用 ifconfig 查詢 IP 資訊了

近期留言