by rainchu 9 月 10, 2024 | Docker , MIS
剛開始學習 docker的人,要記很多docker的指令,非常的麻煩以及複雜,身為RD,喜歡一切自己來,自己用CLI來控制,可以參考以下的指令
現有的 Docker 中去執行 shell command
1.找出容器的名稱或是ID
2.進入容器
docker exec -it [container_name_or_id] /bin/bash 3.直接執行shell命令,例如更新系統
apt update -y
apt upgrade -y
4.退出容器
延伸閱讀
docker 官網
by rainchu 8 月 27, 2024 | Agent , AI
Dify AI 是一個開放靈活的生成式 AI 應用開發框架,提供了一個全方面的解決方案,讓開發者能夠輕鬆構建和運營生成式 AI的 原生應用。平台的核心技術包括 AI 工作流程編排、RAG 檢索、模型管理等功能。Dify AI 支持從 Agent 建立到工作流程編排的完整開發過程,讓使用者可以專注於創造應用的核心價值,此外,它提供的工具包括 Prompt IDE、Enterprise LLMOps 和 BaaS 等解決方案,可以大幅度的提升開發效率並優化應用性能,可以先去Dify的GitHUB 看看。
特色介紹
公司內部私有化的知識庫和AI助理 :Dify AI 允許企業將內部知識庫整合到平台中,並創建專屬的AI助理,來高效地管理和利用企業知識。
公司內部可以控管的紀錄 :企業可以通過Dify AI平台對所有操作和數據進行詳細記錄和管控,確保數據安全和合規性。
AI工作流自動化 :Dify AI 提供連結公司內部資訊系統的能力,幫助企業自動化處理各種業務流程,提升運營效率。
零代碼創建 AI Agent :平台支持用戶在無需編寫代碼的情況下,創建和部署個性化的 AI Agent,滿足各類業務需求。
支持多種大語言模型 :Dify AI 支持全球各種主流的大語言模型(LLM),為企業提供靈活的選擇,以滿足不同場景的應用需求。
開發以及運營的支持
利用 Docker 安裝
先把專案抓下來
git clone https://github.com/langgenius/dify.git 然後可以用下面的指令安裝
cd docker
cp .env.example .env
docker compose up -d
安裝完成後,利用瀏覽器看 http://localhost/install ,按照步驟設定即可
使用線上服務
https://cloud.dify.ai/apps
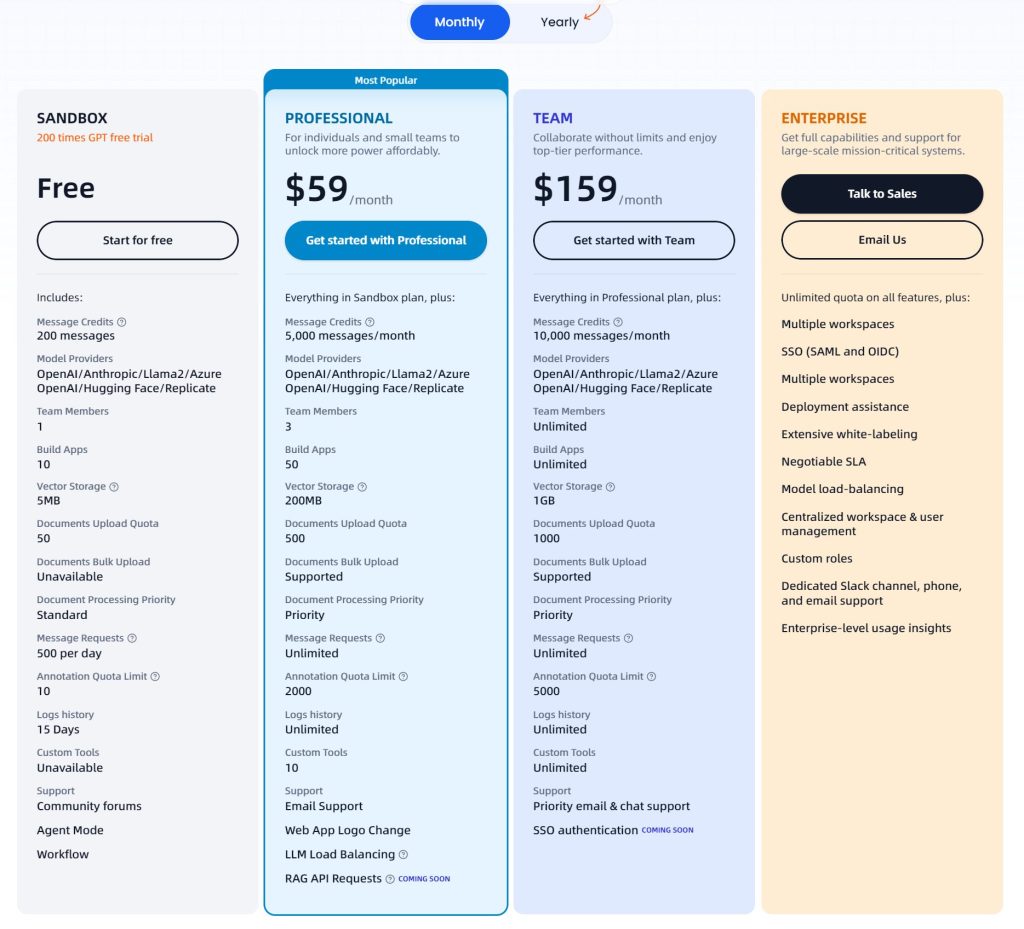
價格表
您可以在 Dify AI 官網 上了解更多詳情。
參考資料:
by rainchu 8 月 26, 2024 | AI , Chat
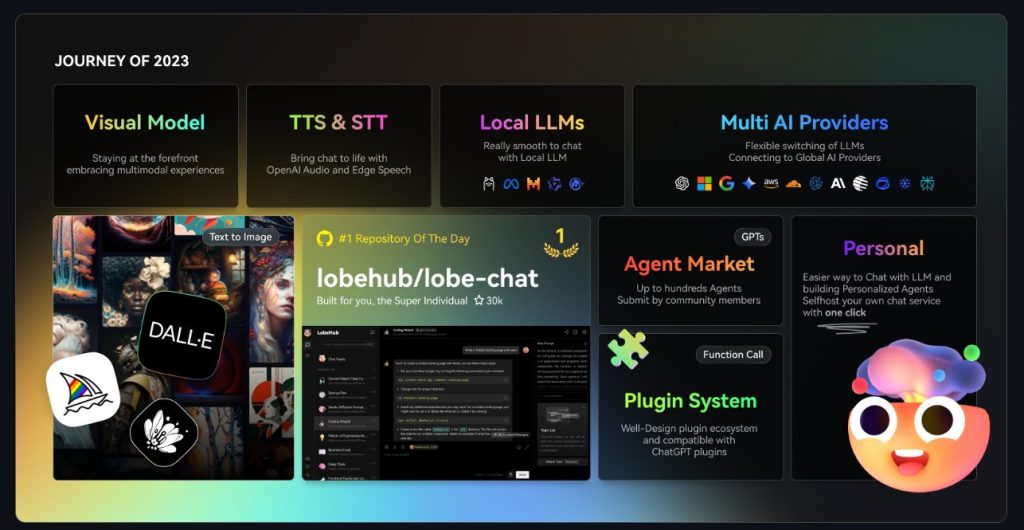
一個可以支援本地模型(ollama) ,支援使用者拖拉圖片到對話框、文生圖、STT、TTS、插件設計(Plugin)、自建GPTs、資料庫的強大的 Web Chat UI
支持各種方法安裝
https://lobehub.com/zh-TW/docs/self-hosting/start
本地開發
git clone https://github.com/lobehub/lobe-chat.git
cd lobe-chat
pnpm install
pnpm run dev
Docker 安裝
docker run -d -p 3210:3210 \
  -e OPENAI_API_KEY=sk-xxxx \
  -e ACCESS_CODE=lobe66 \
  --name lobe-chat \
  lobehub/lobe-chat
參考資料
GitHUB
by rainchu 7 月 22, 2024 | AI , Chat
AnythingLLm 官方最推薦的安裝方法是採用 docker,可以最快速的體驗 anything llm web ui 以及驗證想法,雖然說用docker安裝已經超簡單了,但還是有些小細節值得記錄一下,並且告訴大家避免採坑。
最低要求
最低需要 Docker v18.03+ 版本在 Win/Mac 上和 20.10+ 版本在 Linux/Ubuntu 上才能解析 host.docker.internal
Linux:在 docker run 命令中添加 –add-host=host.docker.internal參數以使其能夠解析。例如:在主機上 localhost:8000 上運行的 Chroma 主機 URL 在 AnythingLLM 中使用時需改為 http://host.docker.internal:8000。
安裝指令
docker pull mintplexlabs/anythingllm Windows 的設定指令,定義好你要存放 llm 的位址
$env:STORAGE_LOCATION="$HOMEDocumentsanythingllm"; `
If(!(Test-Path $env:STORAGE_LOCATION)) {New-Item $env:STORAGE_LOCATION -ItemType Directory}; `
If(!(Test-Path "$env:STORAGE_LOCATION.env")) {New-Item "$env:STORAGE_LOCATION.env" -ItemType File}; `
docker run -d -p 3001:3001 `
--cap-add SYS_ADMIN `
-v "$env:STORAGE_LOCATION`:/app/server/storage" `
-v "$env:STORAGE_LOCATION.env:/app/server/.env" `
-e STORAGE_DIR="/app/server/storage" `
mintplexlabs/anythingllm;
多個 Anything llm containers
如果你需要安裝多個anything llm,那記得要改兩個位置
$env:STORAGE_LOCATION=”$HOMEDocumentsanythingllm-yourid”; `
docker run -d -p 8001(改成你自己的port):3001 `
修改玩會像是下面的樣子
$env:STORAGE_LOCATION="$HOMEDocumentsanythingllm-yourid"; `
If(!(Test-Path $env:STORAGE_LOCATION)) {New-Item $env:STORAGE_LOCATION -ItemType Directory}; `
If(!(Test-Path "$env:STORAGE_LOCATION.env")) {New-Item "$env:STORAGE_LOCATION.env" -ItemType File}; `
docker run -d -p 8001:3001 `
--cap-add SYS_ADMIN `
-v "$env:STORAGE_LOCATION`:/app/server/storage" `
-v "$env:STORAGE_LOCATION.env:/app/server/.env" `
-e STORAGE_DIR="/app/server/storage" `
--name yourid `
mintplexlabs/anythingllm;
之後可以執行 Docker run
docker run -d -p 8001:3001 --cap-add SYS_ADMIN --user root -v "$env:STORAGE_LOCATION:/app/server/storage" -v "$env:STORAGE_LOCATION.env:/app/server/.env" -e STORAGE_DIR="/app/server/storage" mintplexlabs/anythingllm 利用 Docker Compose 安裝
先寫一段 docker-compose.yml ,再用 docker-compose up -d 執行即可
version: '3.8'
services:
  anythingllm:
    image: mintplexlabs/anythingllm
    container_name: anythingllm
    ports:
      - "3001:3001"
    volumes:
      - ./storage:/app/server/storage
      - ./env.txt:/app/server/.env
    environment:
      - STORAGE_DIR=/app/server/storage
    cap_add:
      - SYS_ADMIN
    extra_hosts:
      - "host.docker.internal:host-gateway"
    restart: unless-stopped
利用介面安裝
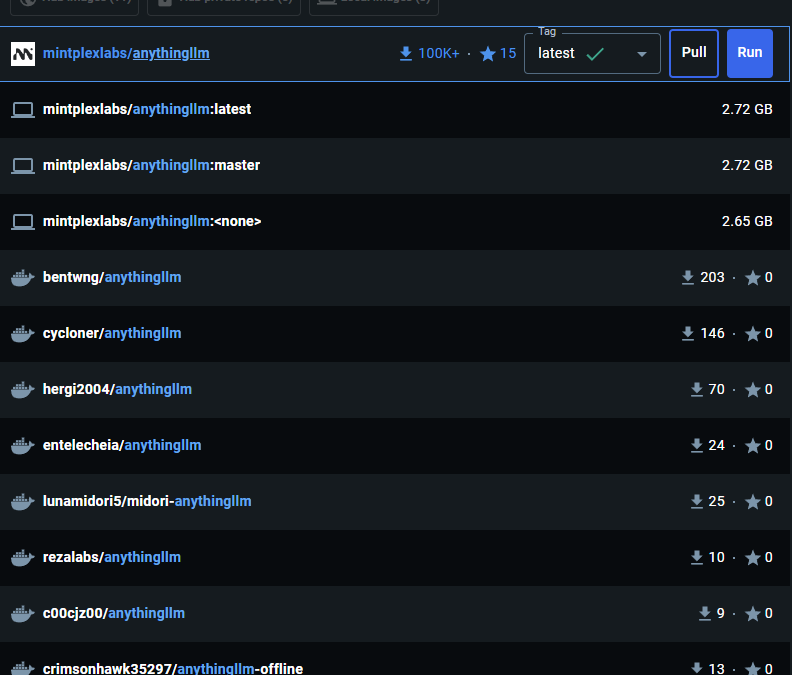
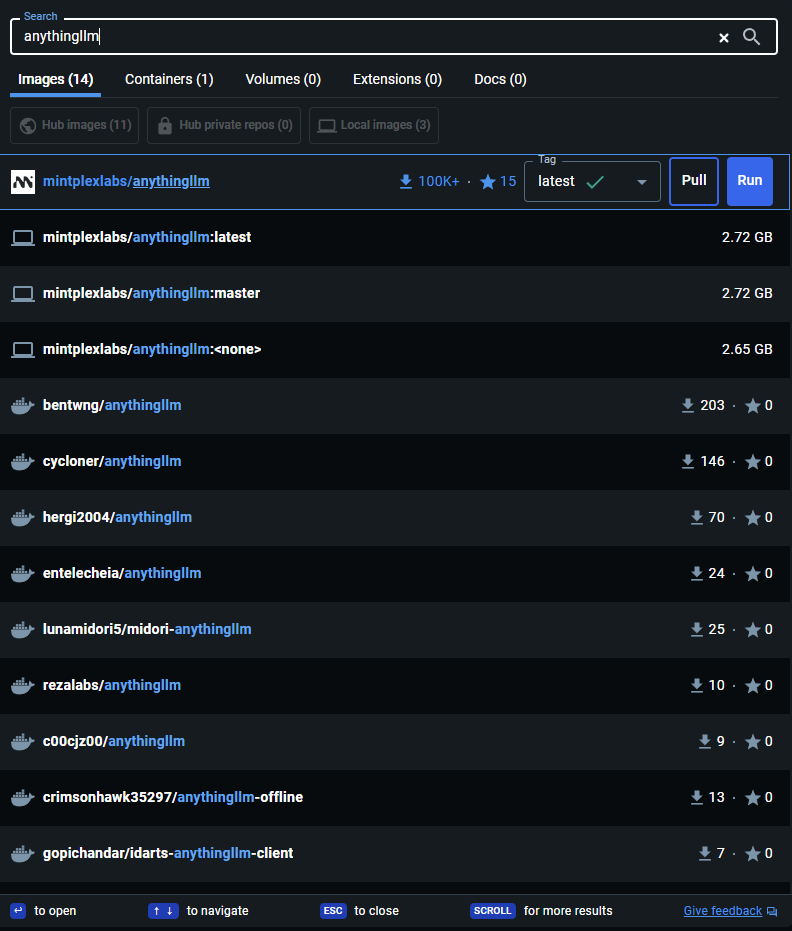
在 docker desktop 的搜尋框內輸入 anythingllm ,找到 mintpolexlabs/anythingllm,並且按下 Run
下載完畢後記得要做第一次的初始化設定喔
TIPS
記得你現在運行的服務是在 docker 中,如果您在 localhost 上運行其他服務,如 Chroma、LocalAi 或 LMStudio,您將需要使用 http://host.docker.internal:xxxx 從 Docker 容器內訪問該服務,因為 localhost對主機系統來說無法解析。
參考資料
https://docs.useanything.com/installation/self-hosted/local-docker
錯誤解決
如果遇到Error : ‘Invalid file upload. EACCES: permission denied, open ‘/app/collector/hotdir/xxxx.txt’,可以用以下的方法解決
docker run -d -p 8001:3001 --cap-add SYS_ADMIN --user root -v "$env:STORAGE_LOCATION:/app/server/storage" -v "$env:STORAGE_LOCATION.env:/app/server/.env" -e STORAGE_DIR="/app/server/storage" mintplexlabs/anythingllm
by Rain Chu 5 月 13, 2024 | AI , Chat , Linux , NodeJS , React , Ubuntu , ViteJS , 程式
AnythingLLM是一款全功能的應用程序,支持使用商業或開源的大語言模型(LLM)和向量數據庫建構私有ChatGPT。用戶可以在本地或遠端運行該系統,並利用已有文檔進行智能對話。此應用將文檔分類至稱為工作區的容器中,確保不同工作區間的資料隔離,保持清晰的上下文管理。
特點:多用戶支持、權限管理、內置智能代理(可執行網頁瀏覽、代碼運行等功能)、可嵌入到網站的聊天窗口、多種文檔格式支持、向量數據庫的簡易管理界面、聊天和查詢兩種對話模式、引用文檔內容的展示,以及完善的API支持客戶端定制整合。此外,該系統支持100%雲端部署,Docker部署,且在處理超大文檔時效率高,成本低。
VIDEO
注意,以下要用 linux 平台安裝,windows 用戶可以用 WSL,推薦用 Ubuntu OS
在自己的 home 目錄下,到 GitHub 中下載原始碼
git clone https://github.com/Mintplex-Labs/anything-llm.git 利用 yarn 作設定資源
cd anything-llm
yarn setup
把環境變數建立起來,後端主機是 NodeJS express
cp server/.env.example server/.env
nano server/.env
密文需要最少12位的字元,檔案的存放路徑也記得改成自己的
JWT_SECRET="my-random-string-for-seeding"
STORAGE_DIR="/your/absolute/path/to/server/storage"
前端的環境變數,先把/api打開即可
# VITE_API_BASE='http://localhost:3001/api' # Use this URL when developing locally
# VITE_API_BASE="https://$CODESPACE_NAME-3001.$GITHUB_CODESPACES_PORT_FORWARDING_DOMAIN/api" # for Github Codespaces
VITE_API_BASE='/api' # Use this URL deploying on non-localhost address OR in docker.
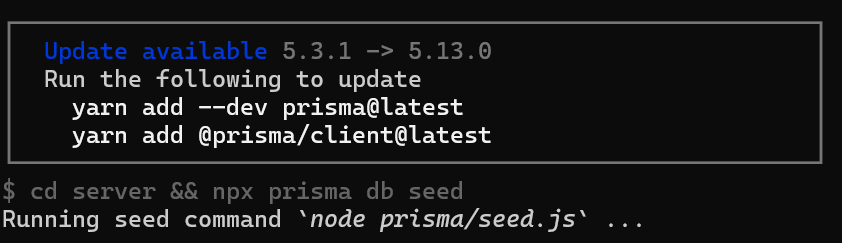
如果你在設定的時候,遇到更新請求,可以跟我著我下面的方法作
把 prisma 更新好
yarn add --dev prisma@latest
yarn add @prisma/client@latest
前端的程式碼
先編譯前端程式碼,前端是由 viteJS + React
cd frontend && yarn build 將編譯好的資料放到 server 的目錄下
cp -R frontend/dist/* server/public/ 選項,如果需要用到本地端的 LLM 模型,就把 llama-cpp 下載下來
cd server && npx --no node-llama-cpp download 把資料庫建立好
cd server && npx prisma generate --schema=./prisma/schema.prisma
cd server && npx prisma migrate deploy --schema=./prisma/schema.prisma
Server端是用來處理 api 以及進行向量資料庫的管理以及跟 LLM 交互
Collector 是一個 NodeJS express server,用來作UI處理和解析文檔
cd server && NODE_ENV=production node index.js &
cd collector && NODE_ENV=production node index.js &
更新的指令碼
現在 anything llm 更新速度超快,把這一段指令碼複製起來,方便未來作更新的動作
#!/bin/bash

cd $HOME/anything-llm &&\
git checkout . &&\
git pull origin master &&\
echo "HEAD pulled to commit $(git log -1 --pretty=format:"%h" | tail -n 1)"

echo "Freezing current ENVs"
curl -I "http://localhost:3001/api/env-dump" | head -n 1|cut -d$' ' -f2

echo "Rebuilding Frontend"
cd $HOME/anything-llm/frontend && yarn && yarn build && cd $HOME/anything-llm

echo "Copying to Sever Public"
rm -rf server/public
cp -r frontend/dist server/public

echo "Killing node processes"
pkill node

echo "Installing collector dependencies"
cd $HOME/anything-llm/collector && yarn

echo "Installing server dependencies & running migrations"
cd $HOME/anything-llm/server && yarn
cd $HOME/anything-llm/server && npx prisma migrate deploy --schema=./prisma/schema.prisma
cd $HOME/anything-llm/server && npx prisma generate

echo "Booting up services."
truncate -s 0 /logs/server.log # Or any other log file location.
truncate -s 0 /logs/collector.log

cd $HOME/anything-llm/server
(NODE_ENV=production node index.js) &> /logs/server.log &

cd $HOME/anything-llm/collector
(NODE_ENV=production node index.js) &> /logs/collector.log &



近期留言